
 Maybe it’s the refreshing feeling Spring brings, but I’ve been on a bit of a beauty/houseware kick lately. It seems I am getting more excited about buying makeup and skin/hair care products rather than clothes, and organizing/cleaning my home and welcoming cute wares into our abode. So I thought I’d share a few things I picked up recently.
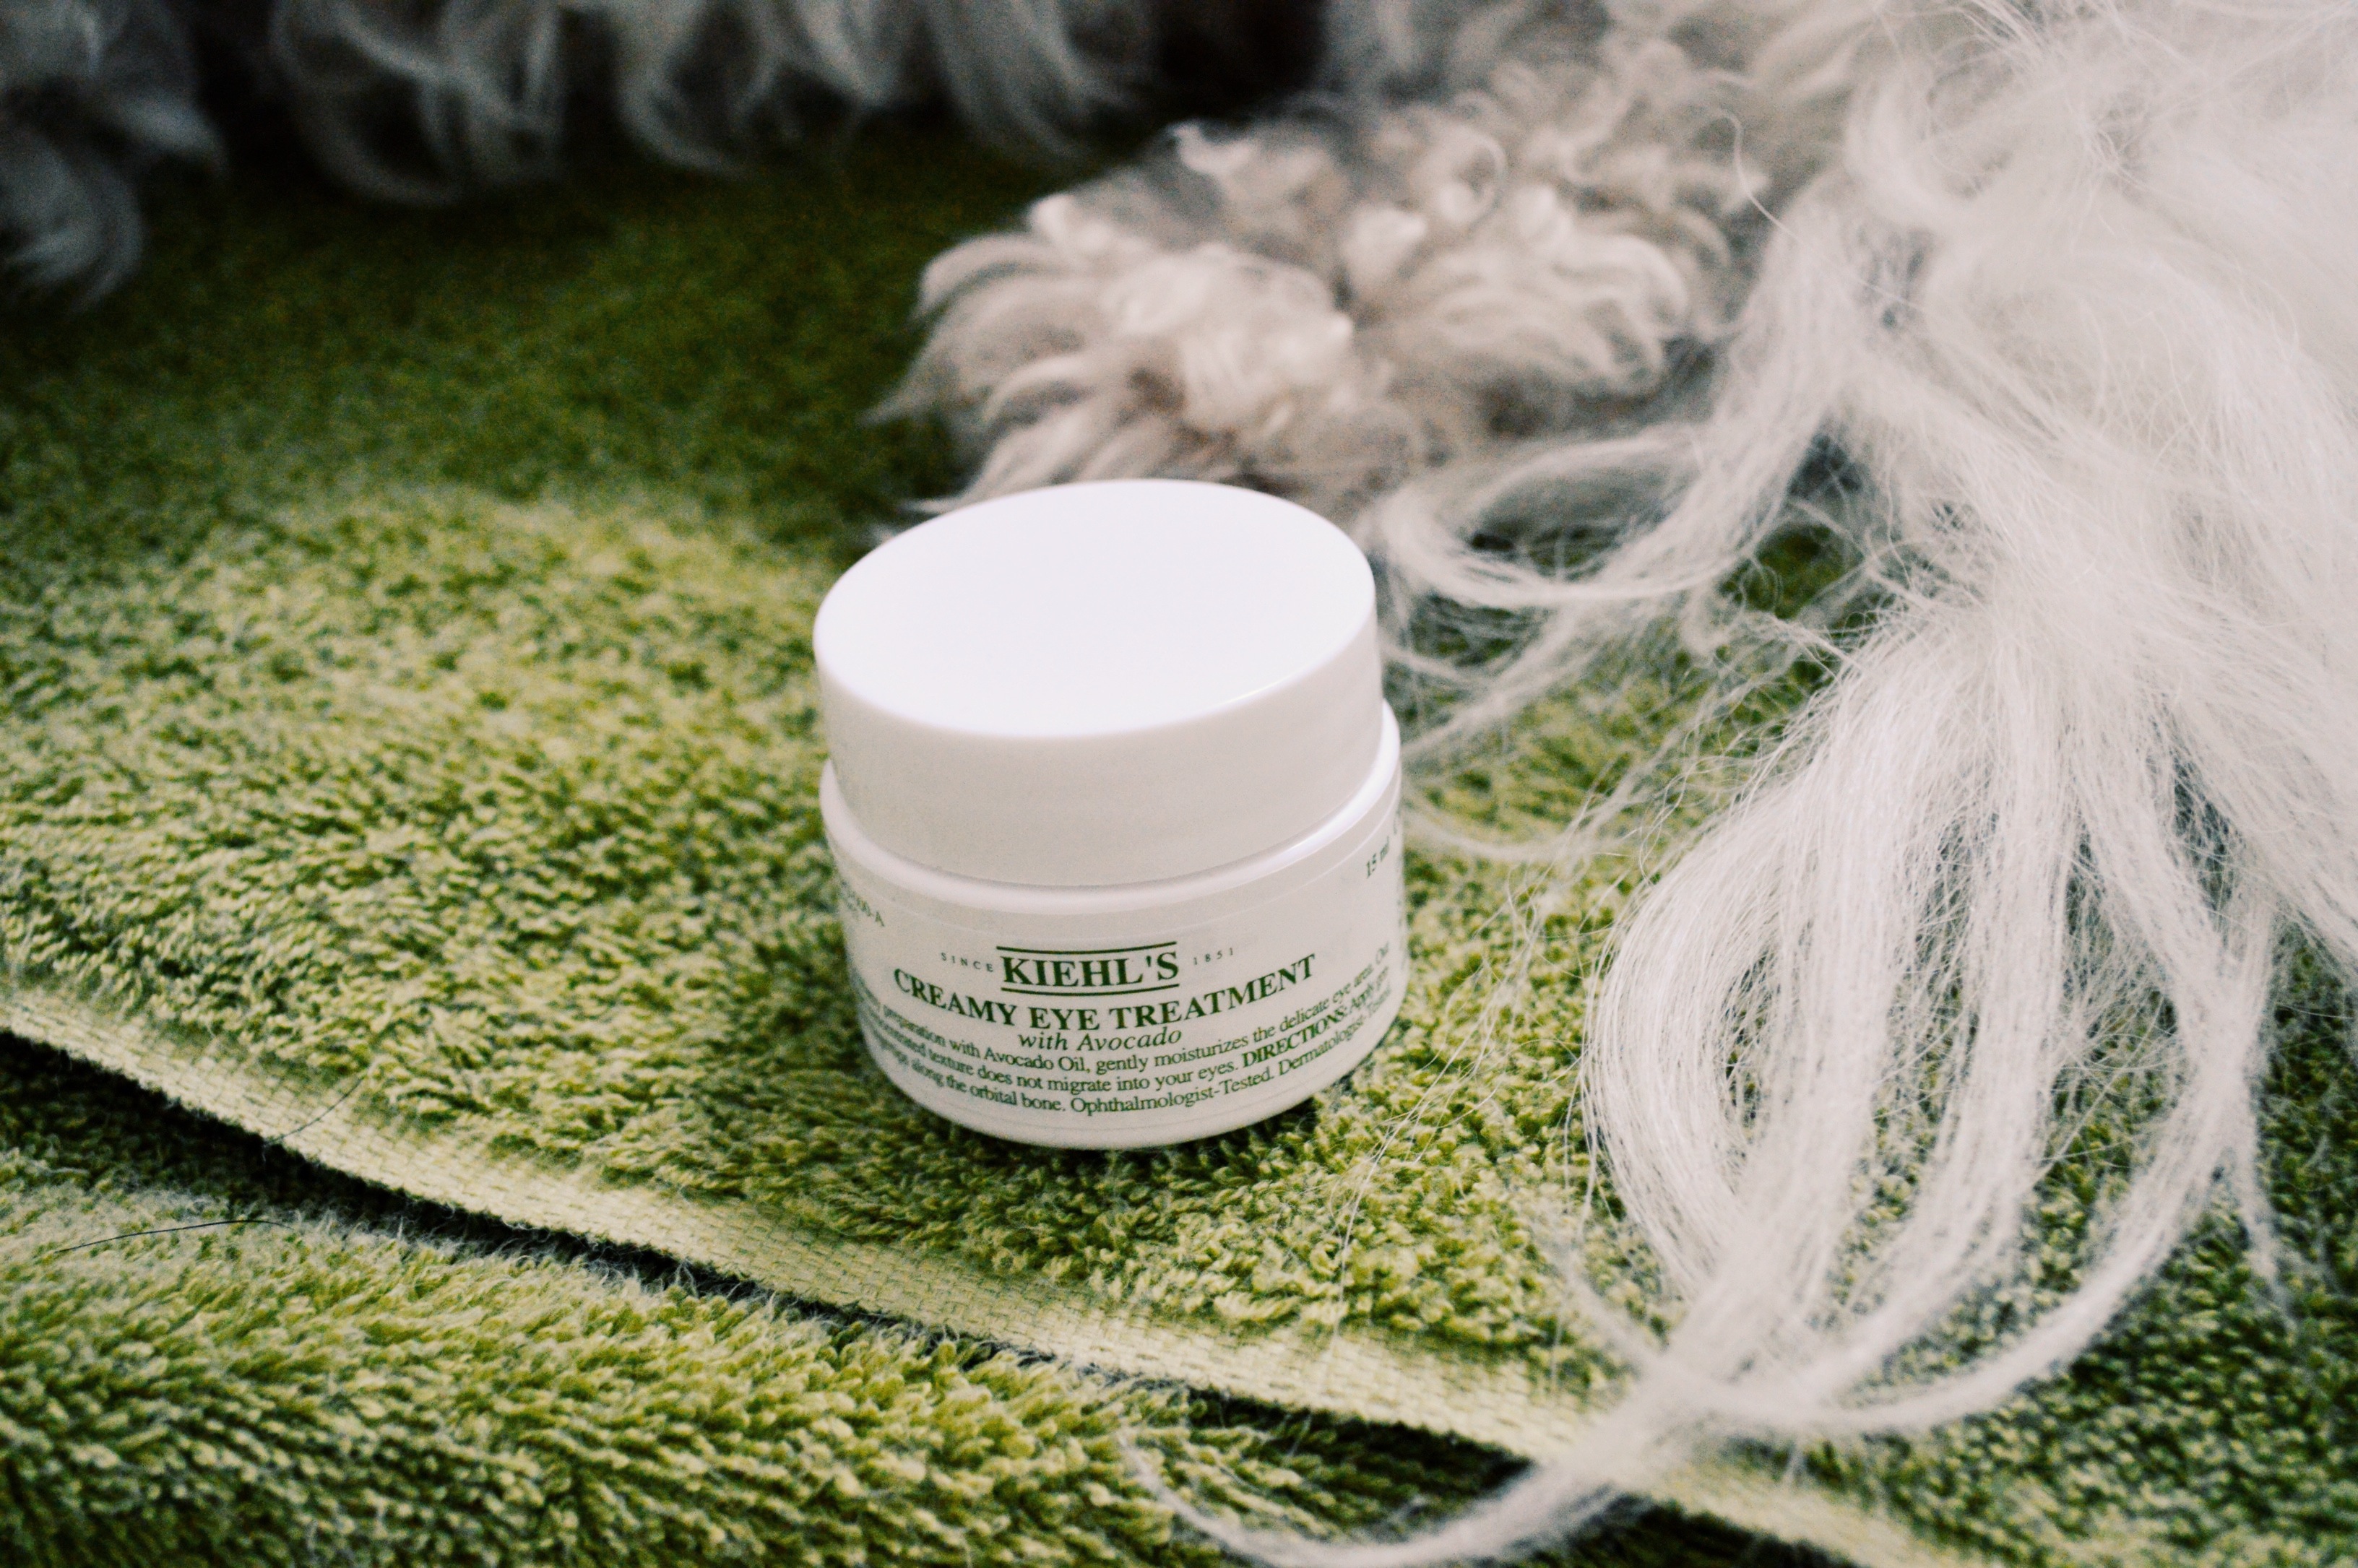
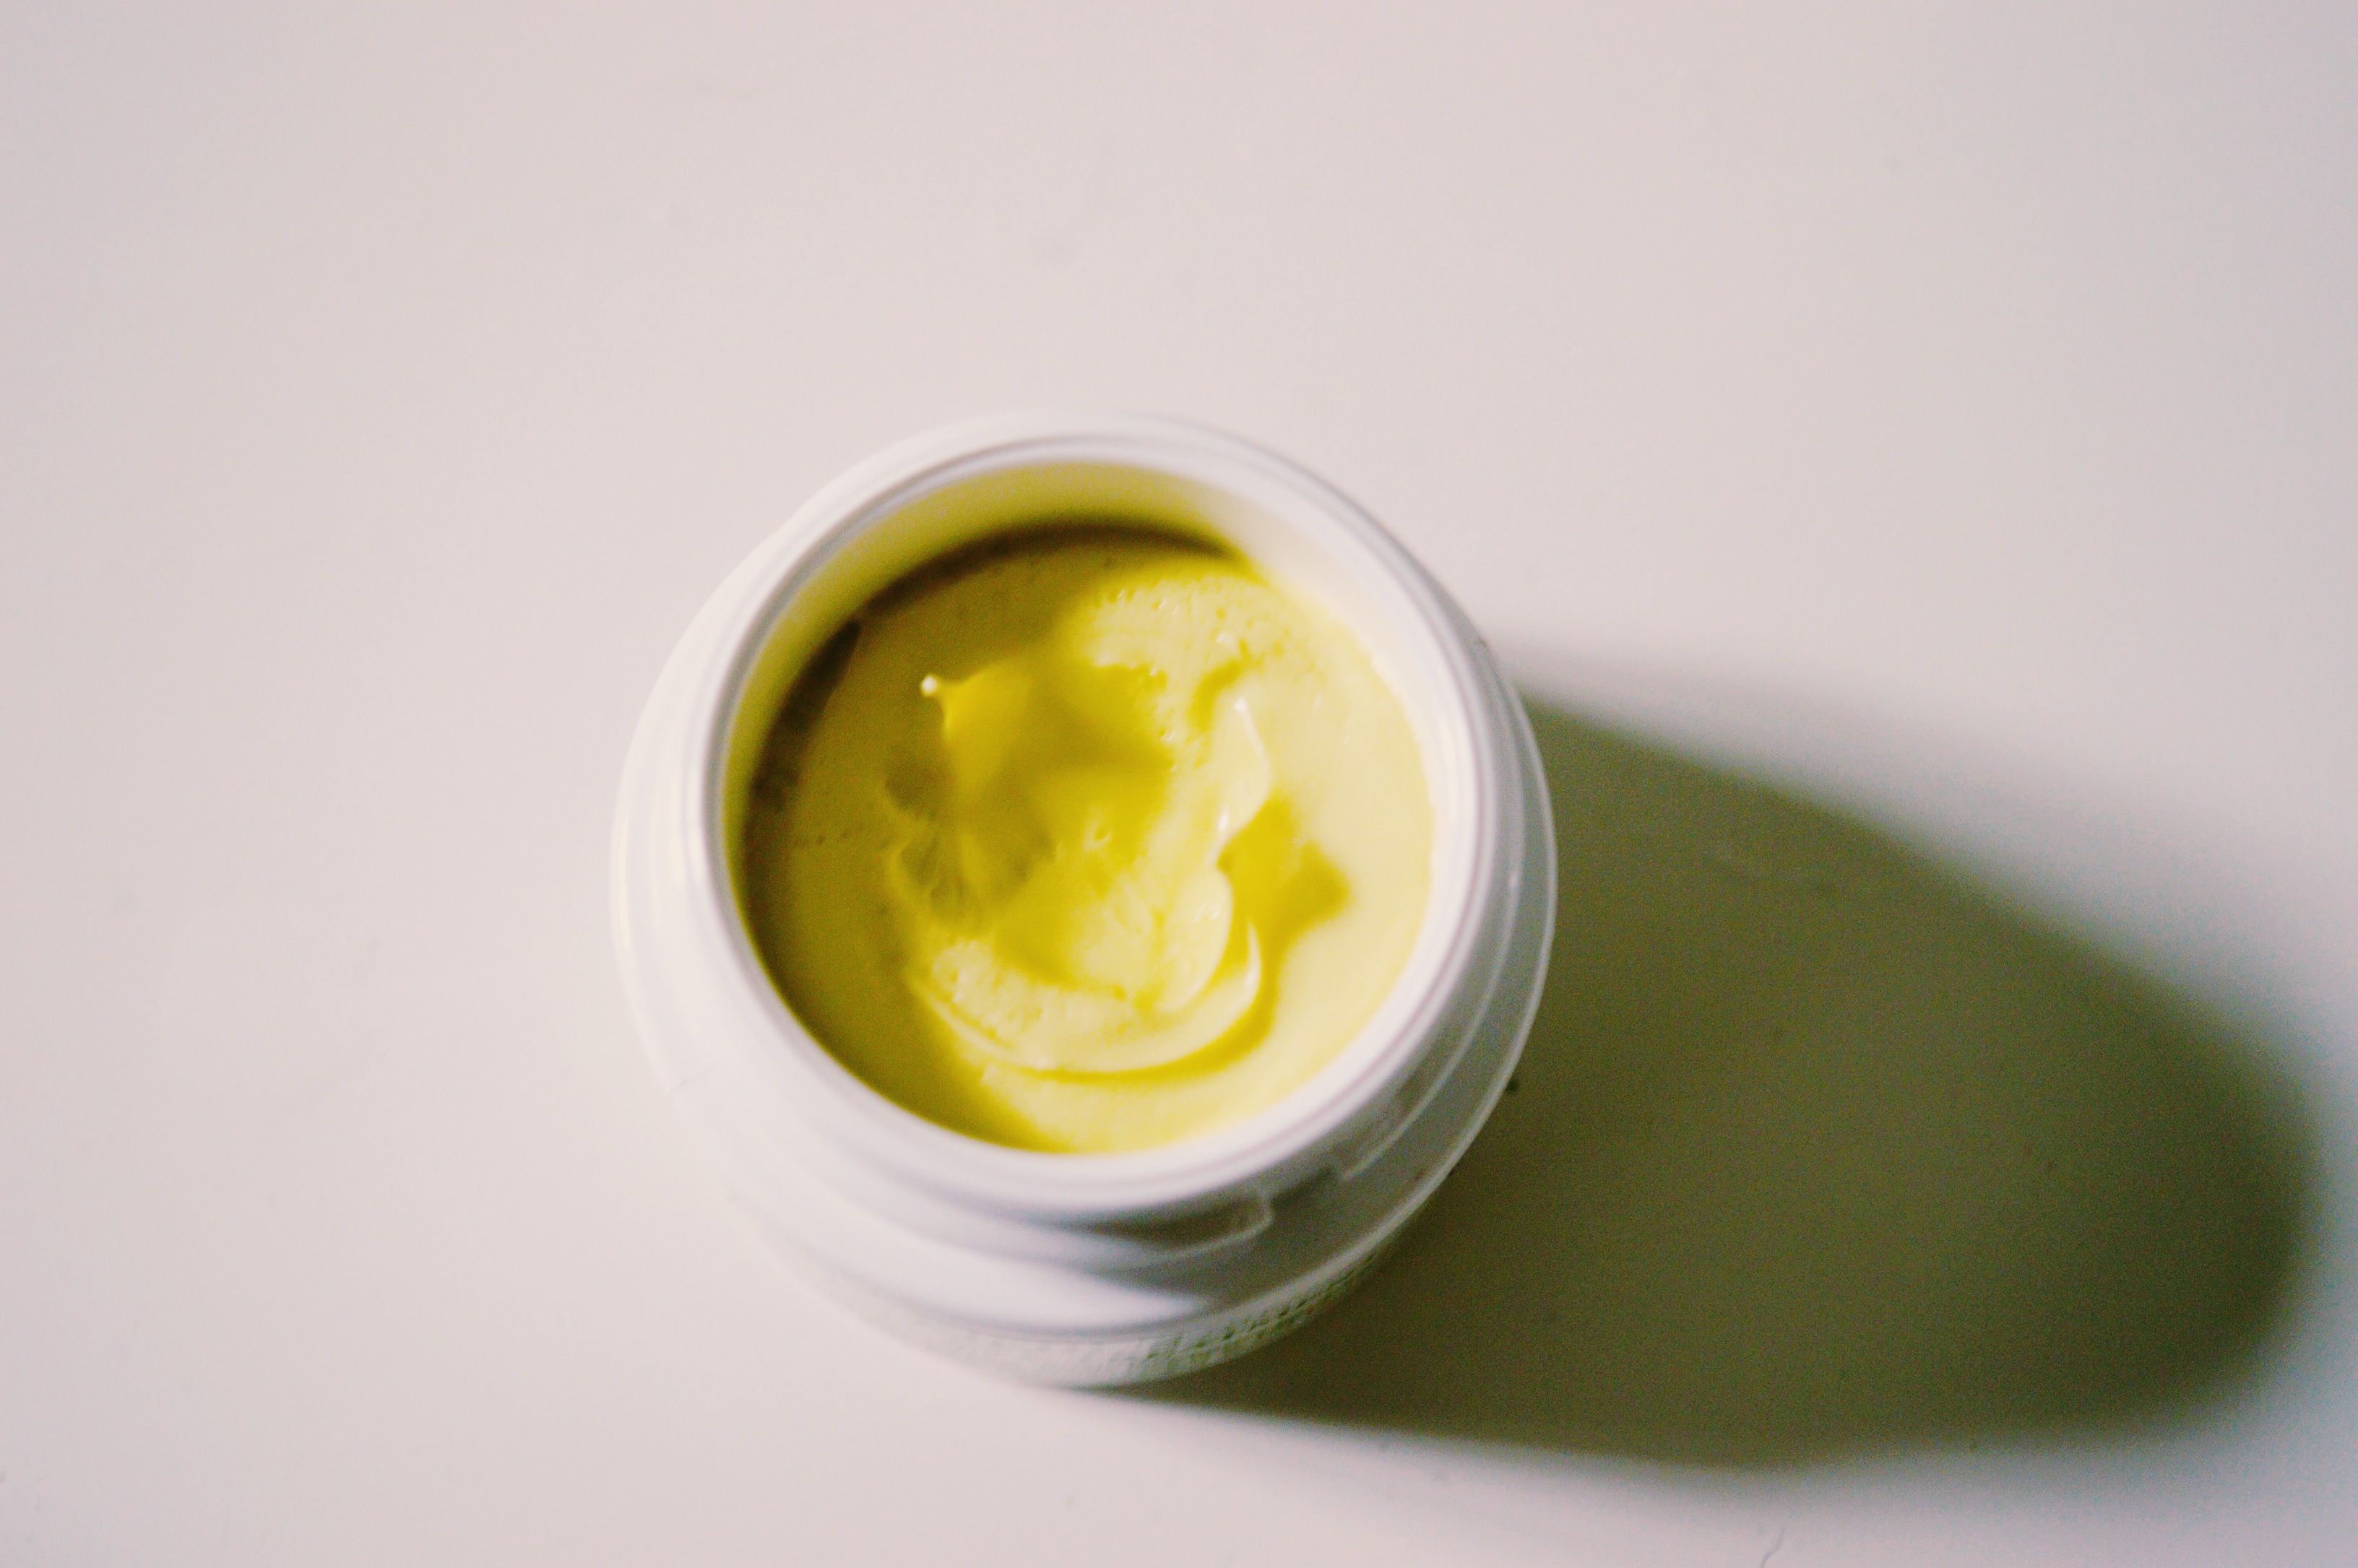 I recently picked up Kiehl’s creamy eye treatment with avocado from the Kiehl’s store in Yorkdale Mall (a big ol’ mall in Toronto). I have a tough time justifying a more expensive purchase for a skincare product if I haven’t heard a recommendation or haven’t tried it myself (ie, a sample), but I had heard some good things about this eye cream, and I was looking for an under eye treatment product, so I picked this up and I love it. It may be a little pricey, but it will last a long while, so, well worth the money in the end. I’ve only been using it a few days now, so I don’t have much to report, but I do love using it as a morning product. The avocado sort of helps wake me up, and it’s a nice base for my under eye concealer.
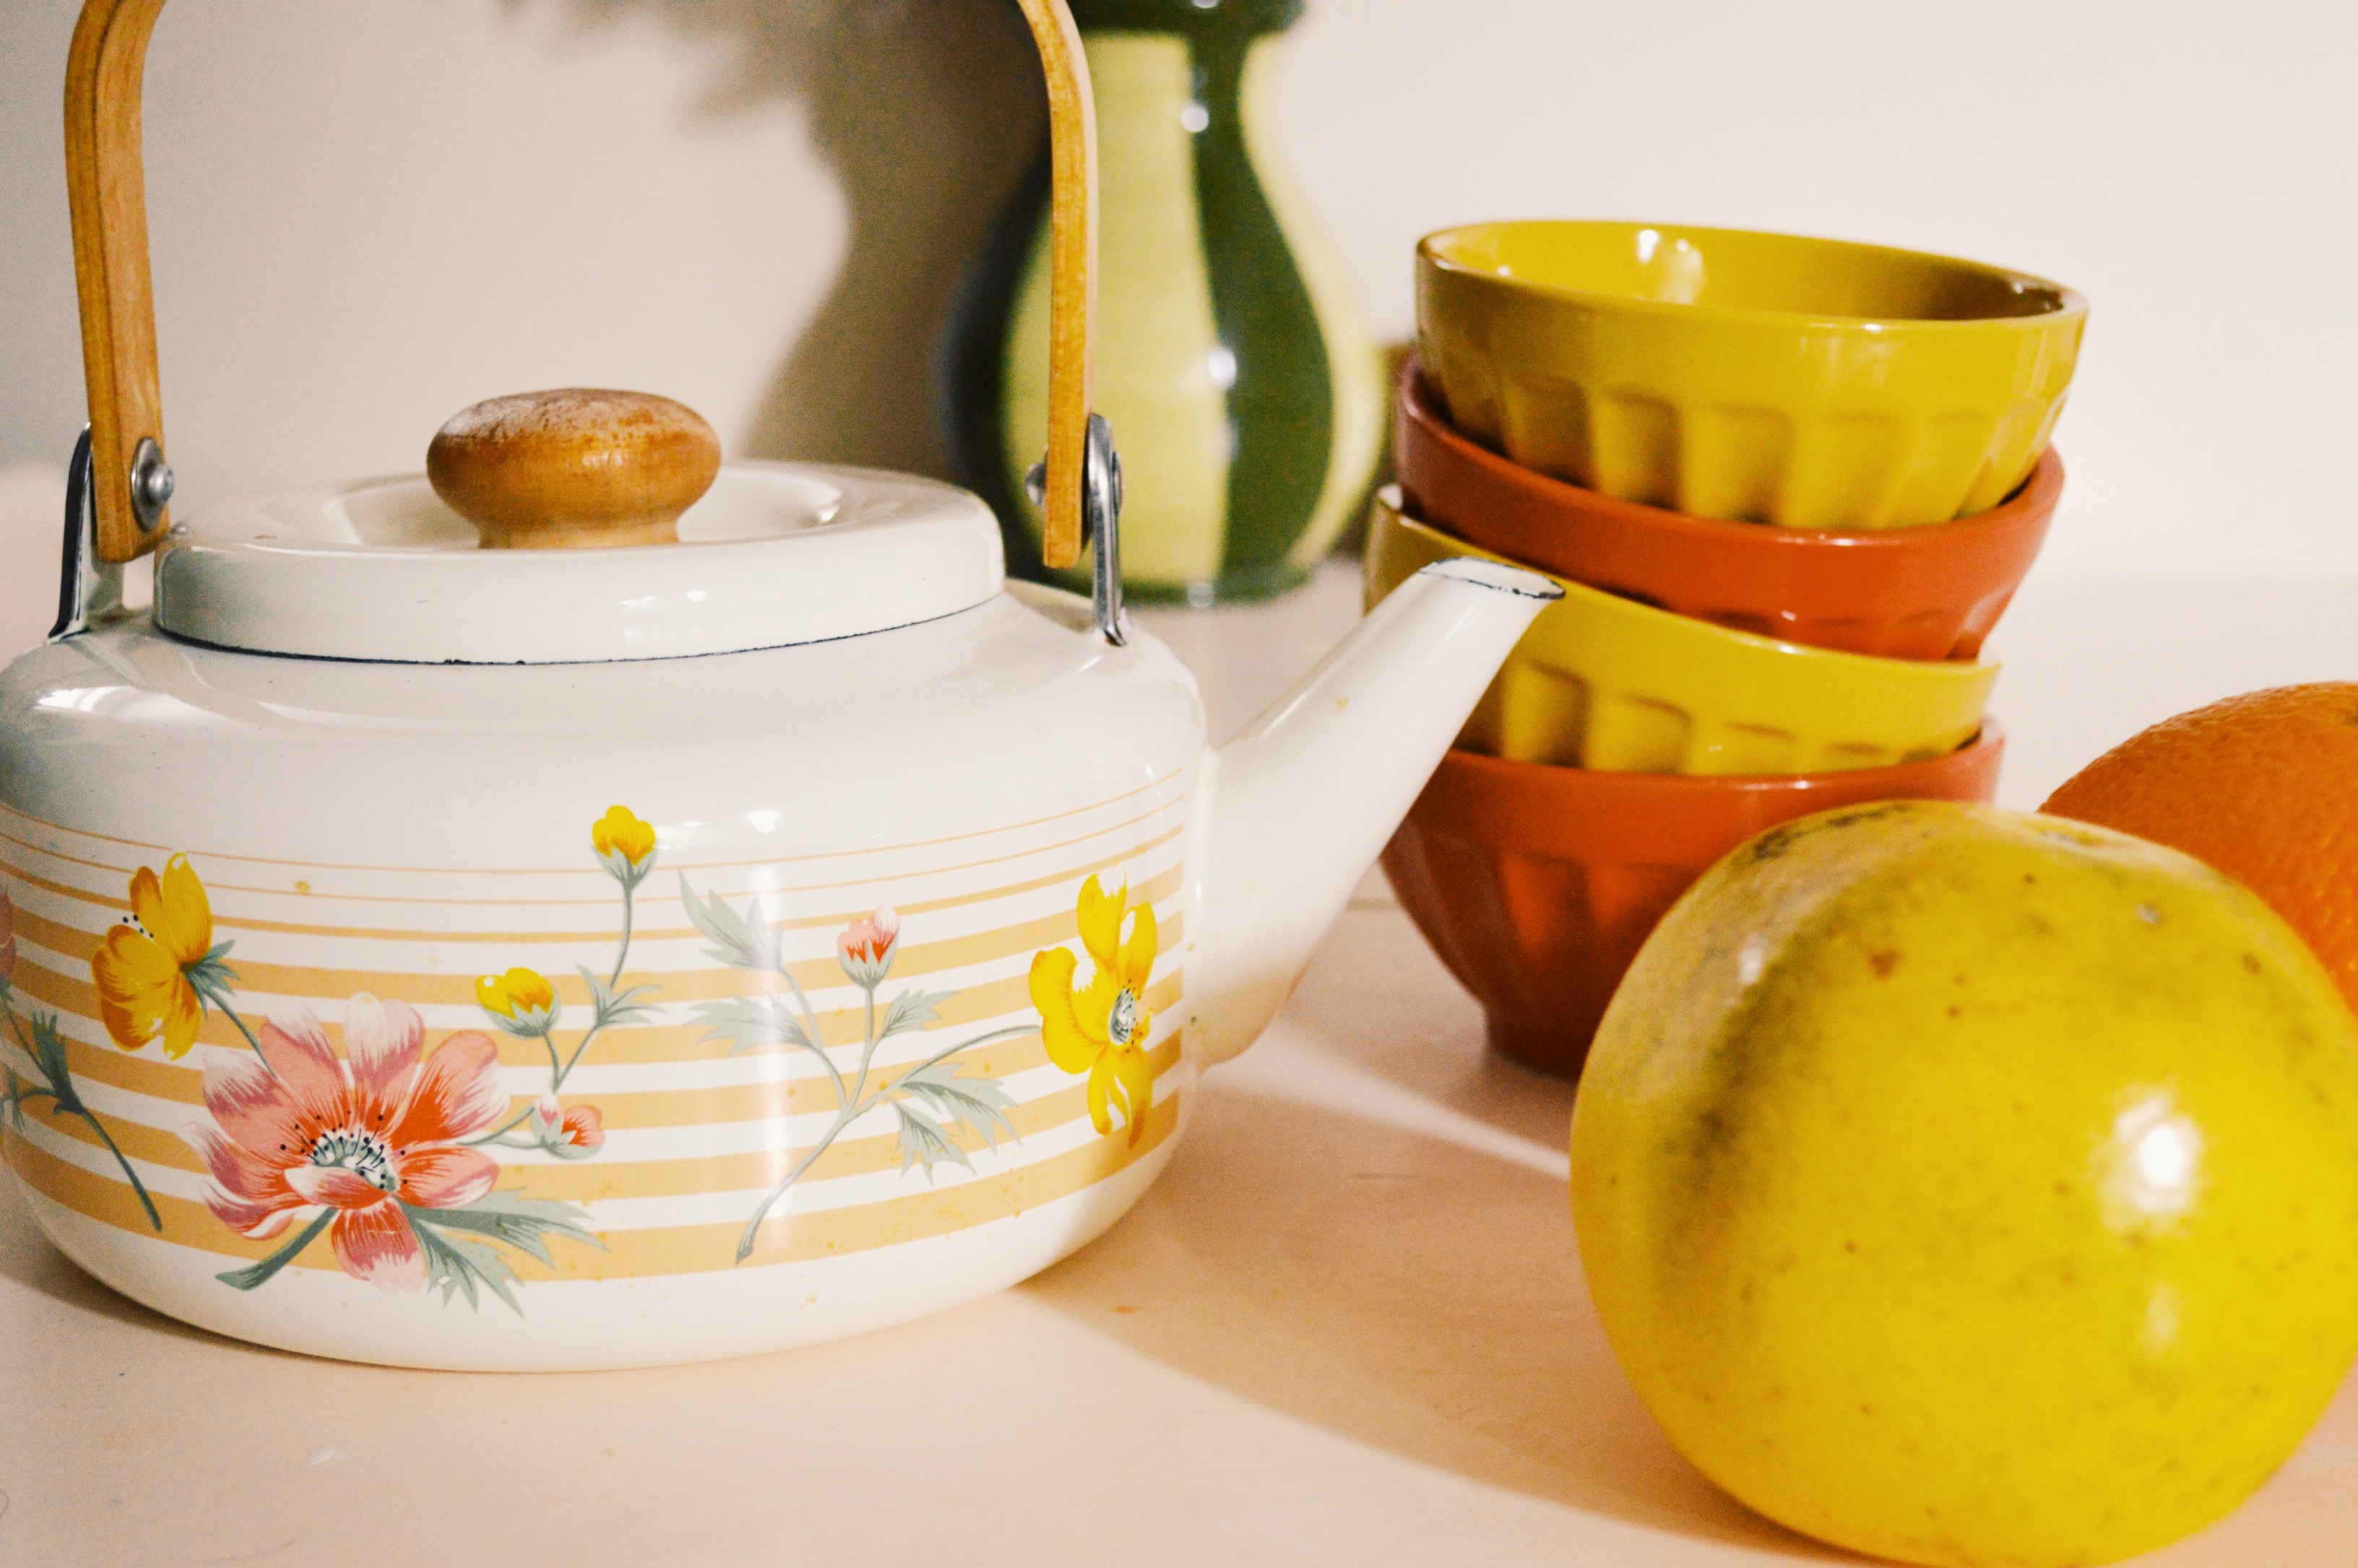
 Value Village is one of my favourite places to find houseware goodies. Sometimes there is absolute shit, and other times there are some real gems. This time I found some gems in the way of 4 little colourful bowls and this adorable teapot/kettle hybrid. I actually don’t know what it is (which is embarassing), the wooden handle confuses me. I originally thought it was a kettle, but then when I got home I thought maybe it’s a teapot. To be honest, it’s making me feel like an idiot that I don’t know what it is. Someone, if you know, please enlighten me! LOL
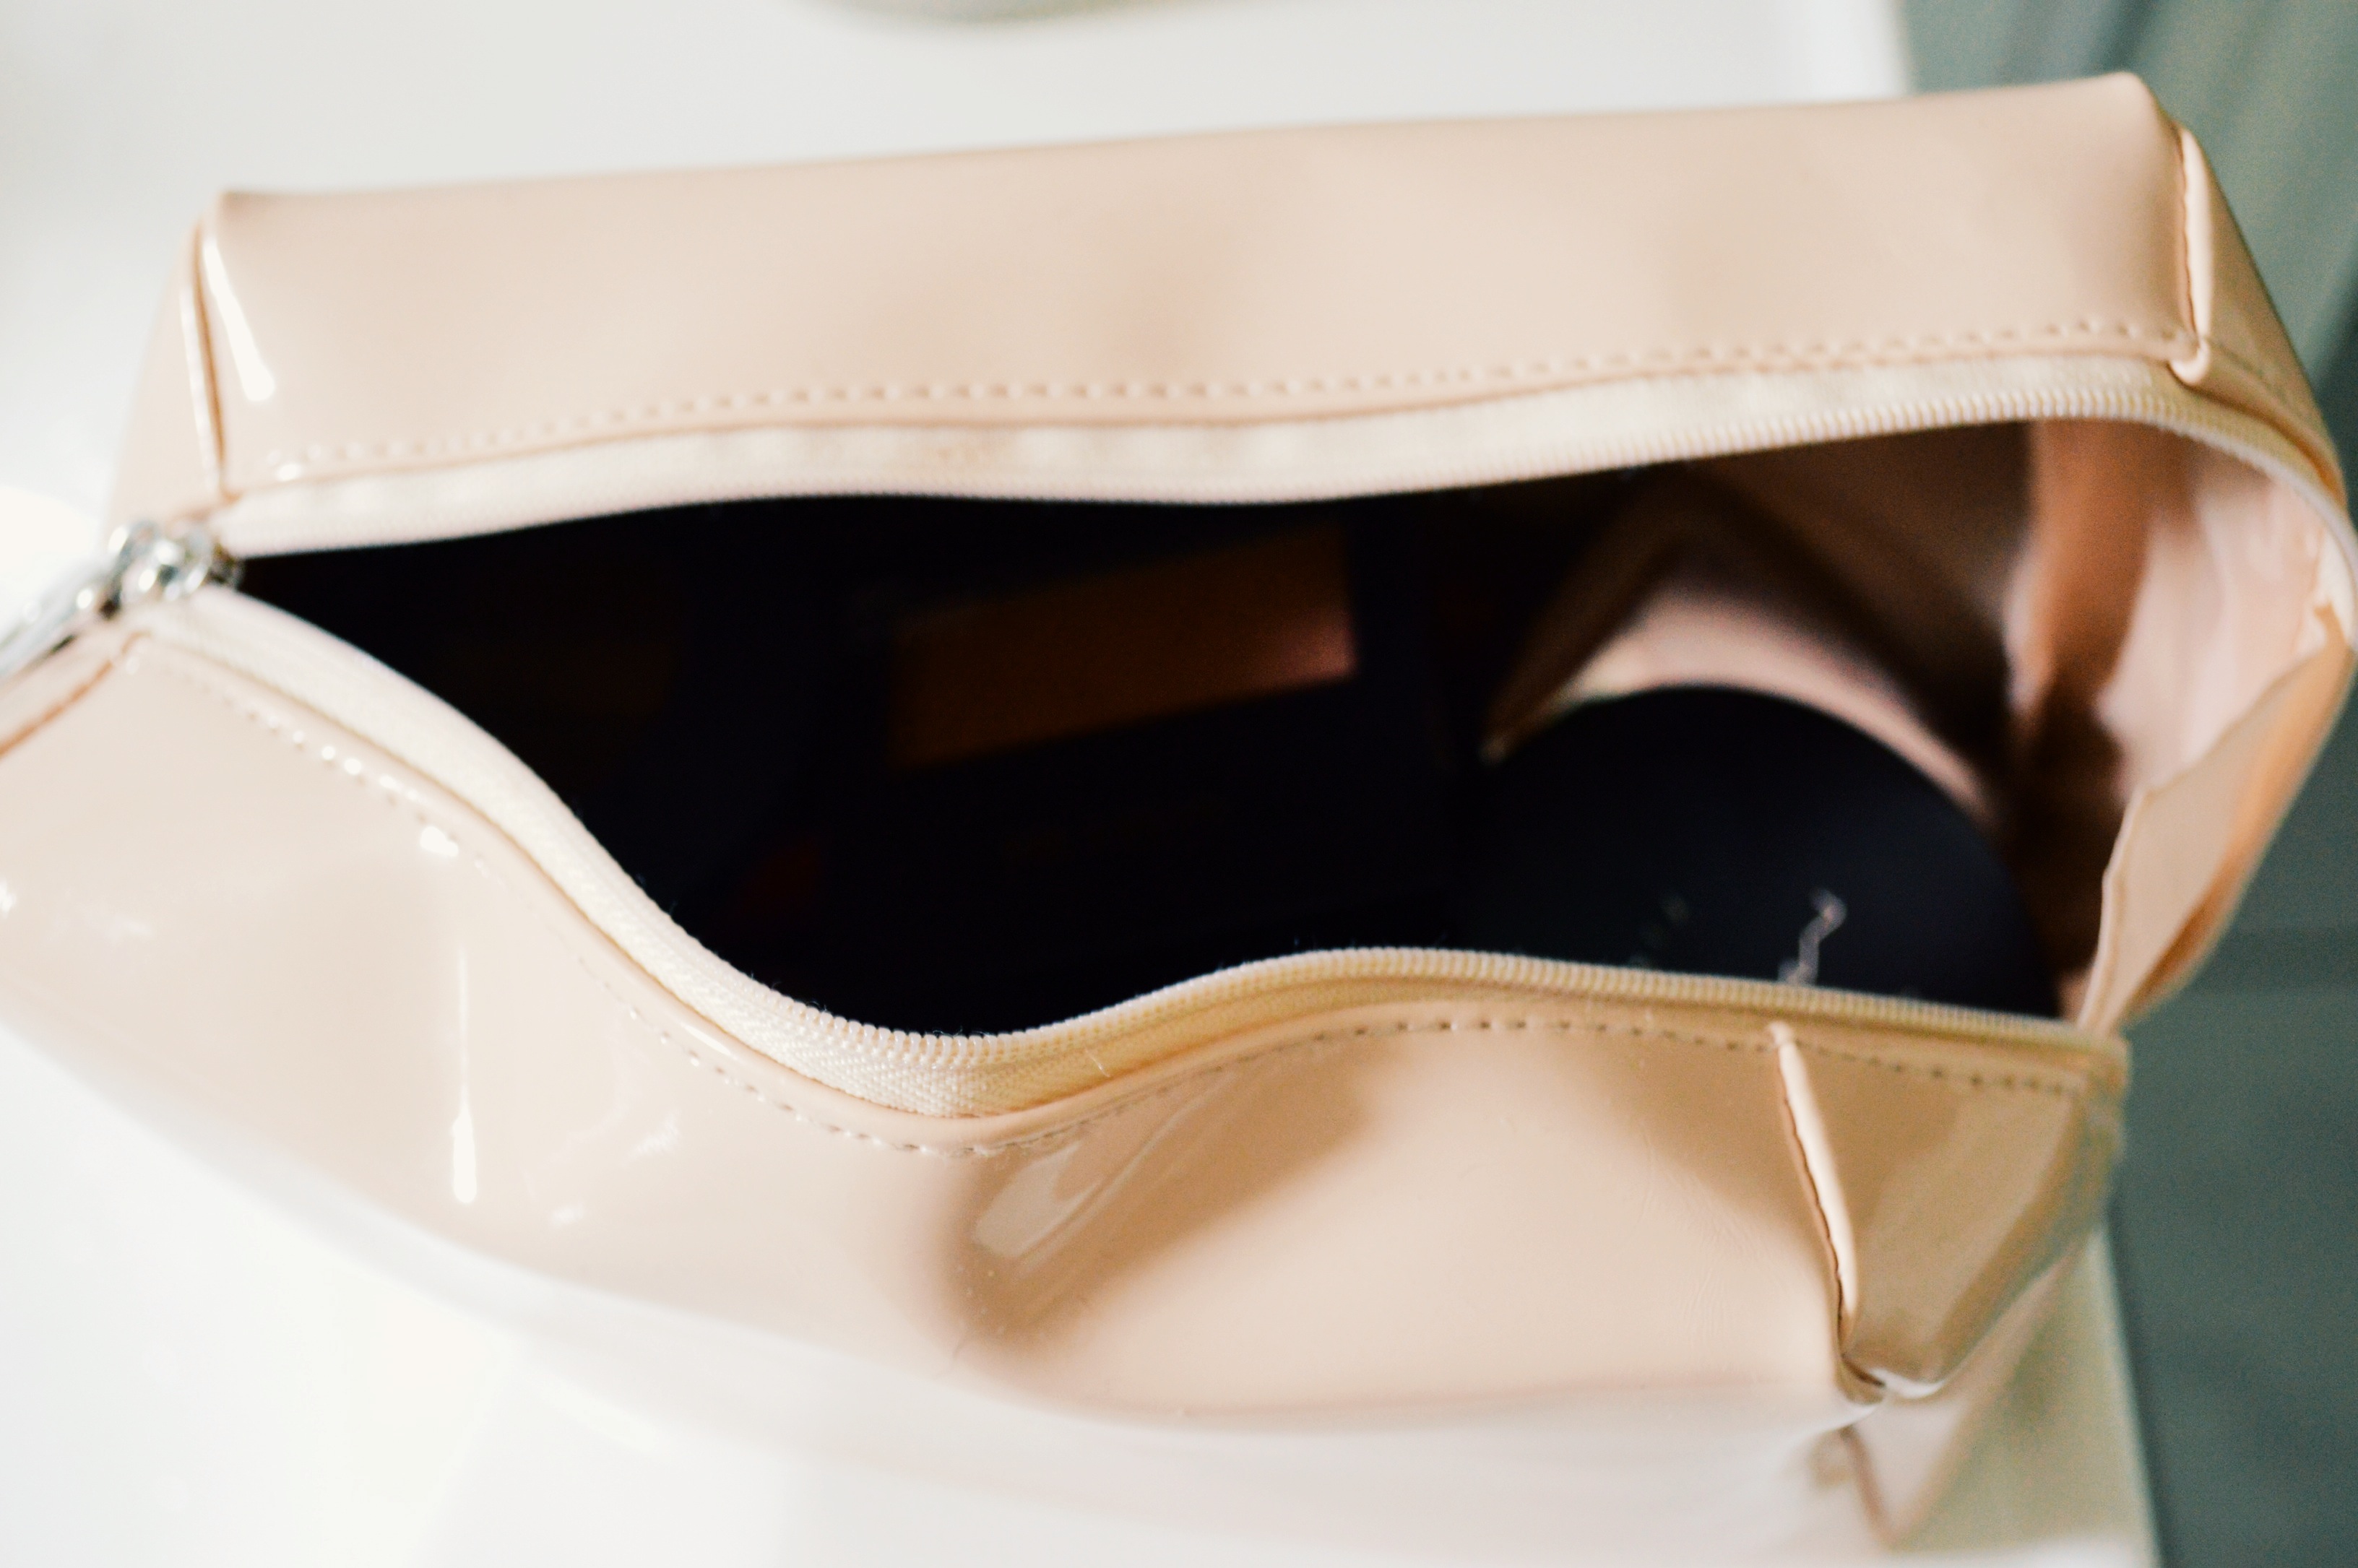 A new makeup bag!! I had been using the same disgusting (read: old) makeup bag for quite a long while. So while I was waiting for a prescription at the drug store to be ready, I walked over to H&M for a wee browse. Now I don’t really like many of the clothes in H&M, at least, not the way I used to, but I do get quite excited about their accessories and this makeup bag immediately caught my eye because of, you guessed it, pink! There isn’t much to it, just a zipper and the inside, but it’s pink, it’s clean and it’s new, so I’m a happy camper.
 While Ryan and I were in Yorkdale Mall, we also headed into Bath and Body Works to pick up some wallflower fragrances because our home was starting to smell of big stinky dog breath (ie, Beans). Bath and Body Works is a dangerous place for me – scents and candles everywhere! This body wash/bath foam immediately caught my eye. I swear, anything that says stress relief I’m like a moth to a flame. If you know me on a personal level, then you know how stressed out I can become (I sometimes talk about it on here), so anything that says it will help with stress, even if it is a stupid gimmick, I’m usually intrigued by. This body wash is with eucalyptus and spearmint, which sounds like soothing properties. I’ve used it a few times now and so has Ryan, and we both quite like it.
 You might be shocked to know that I really don’t use any products in my hair, like at all. I shampoo and condition, and that’s it. But when I was in MTL, Kristen had the Fructis Marvelous Oil in her cabinet, so after I washed my hair I gave it a go and the silky difference in my hair was so apparent I knew when I got back to Toronto I had to buy it. And buy it I did. I also picked up Fructis Triple Nutrition Double Care which I spray on my hair while it’s damp and it helps with tangles. The downside to having long hair is it tangles so easily, like dreadlocks style. I’m loving both these products. The oil helps my hair dry faster and leaves it feeling silky and the spray helps to make brushing my hair a less painful experience.
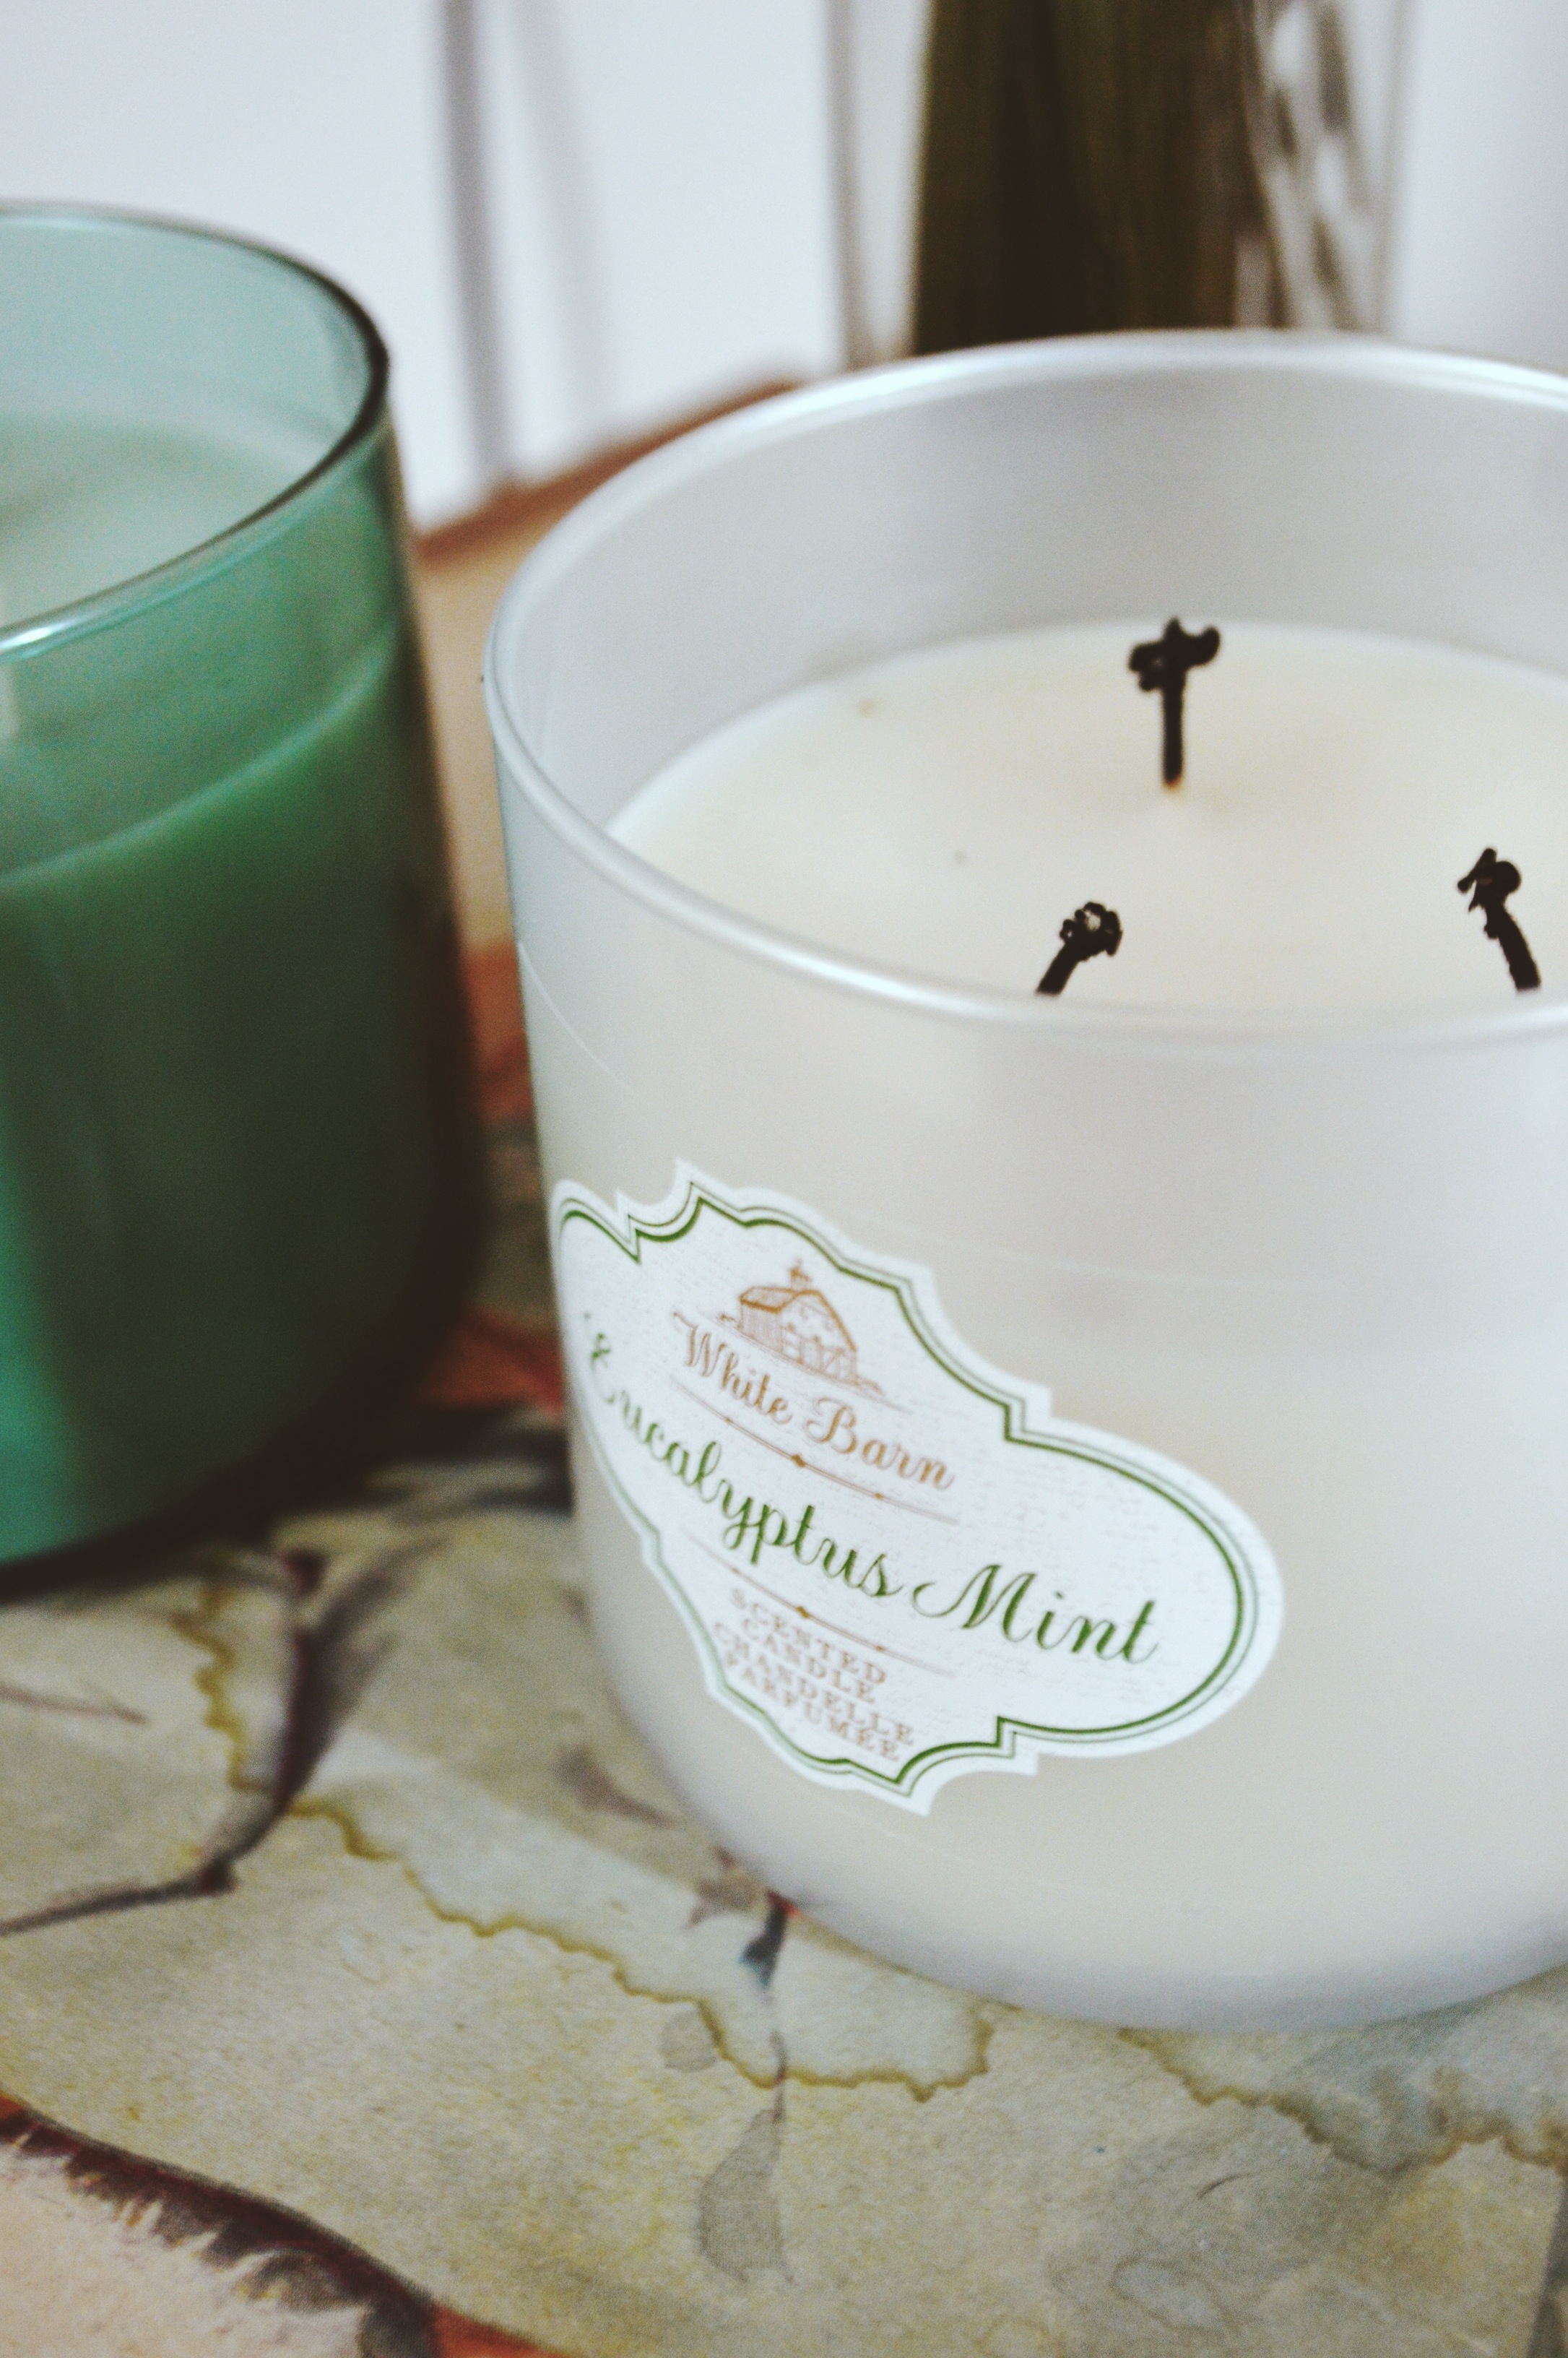
 Candles!! Bath and Body Works has amazing smelling candles. I really like the Lemon Mint Leaf one and Ryan liked the Eucalyptus Mint, so I got one of each.
 There is a vintage/antique shop called Ransack The Universe really close to our home, and the last few weekends we have walked passed it on our way to get donuts and coffee from TBC Vegan Bakery. They usually have some furniture strategically placed outside on the sidewalk so as to force you to look at all the neat stuff they have without even having to go inside. Well, each time I walked passed I noticed a little light blush pink end table that so perfectly matched the colour of my kitchen table. So after about the 4th time of seeing it, I finally gave in and headed to the shop on Monday to see if it was still for sale. And now here it is, looking lovely as ever in my livingroom. I’m especially excited about it because our livingroom is very “Ryan”, which is fine, but it’s nice having some girlyness added to it.
 I actually picked up this perfume oil while I was in MTL 3 weeks ago. My usual scent is Daisy by Marc Jacobs, but I ran out of it and I’m looking to get a Chloe perfume next, but when Kristen and I were browsing a shop (which I can’t remember the name of now) we found these perfume oils by Dot & Lil and I fell in love with the vanilla scent. I’ve never used a perfume oil before, but I quite like it. It seems longer lasting and I can also get whiffs of myself throughout the day, which I like. It’s also an added bonus that this perfume oil can be used in a diffuser in the home, so you could also have your home smelling of delicious vanilla – double whammy of goodness.
Category: Beauty
Beauty / Daily Makeup Routine
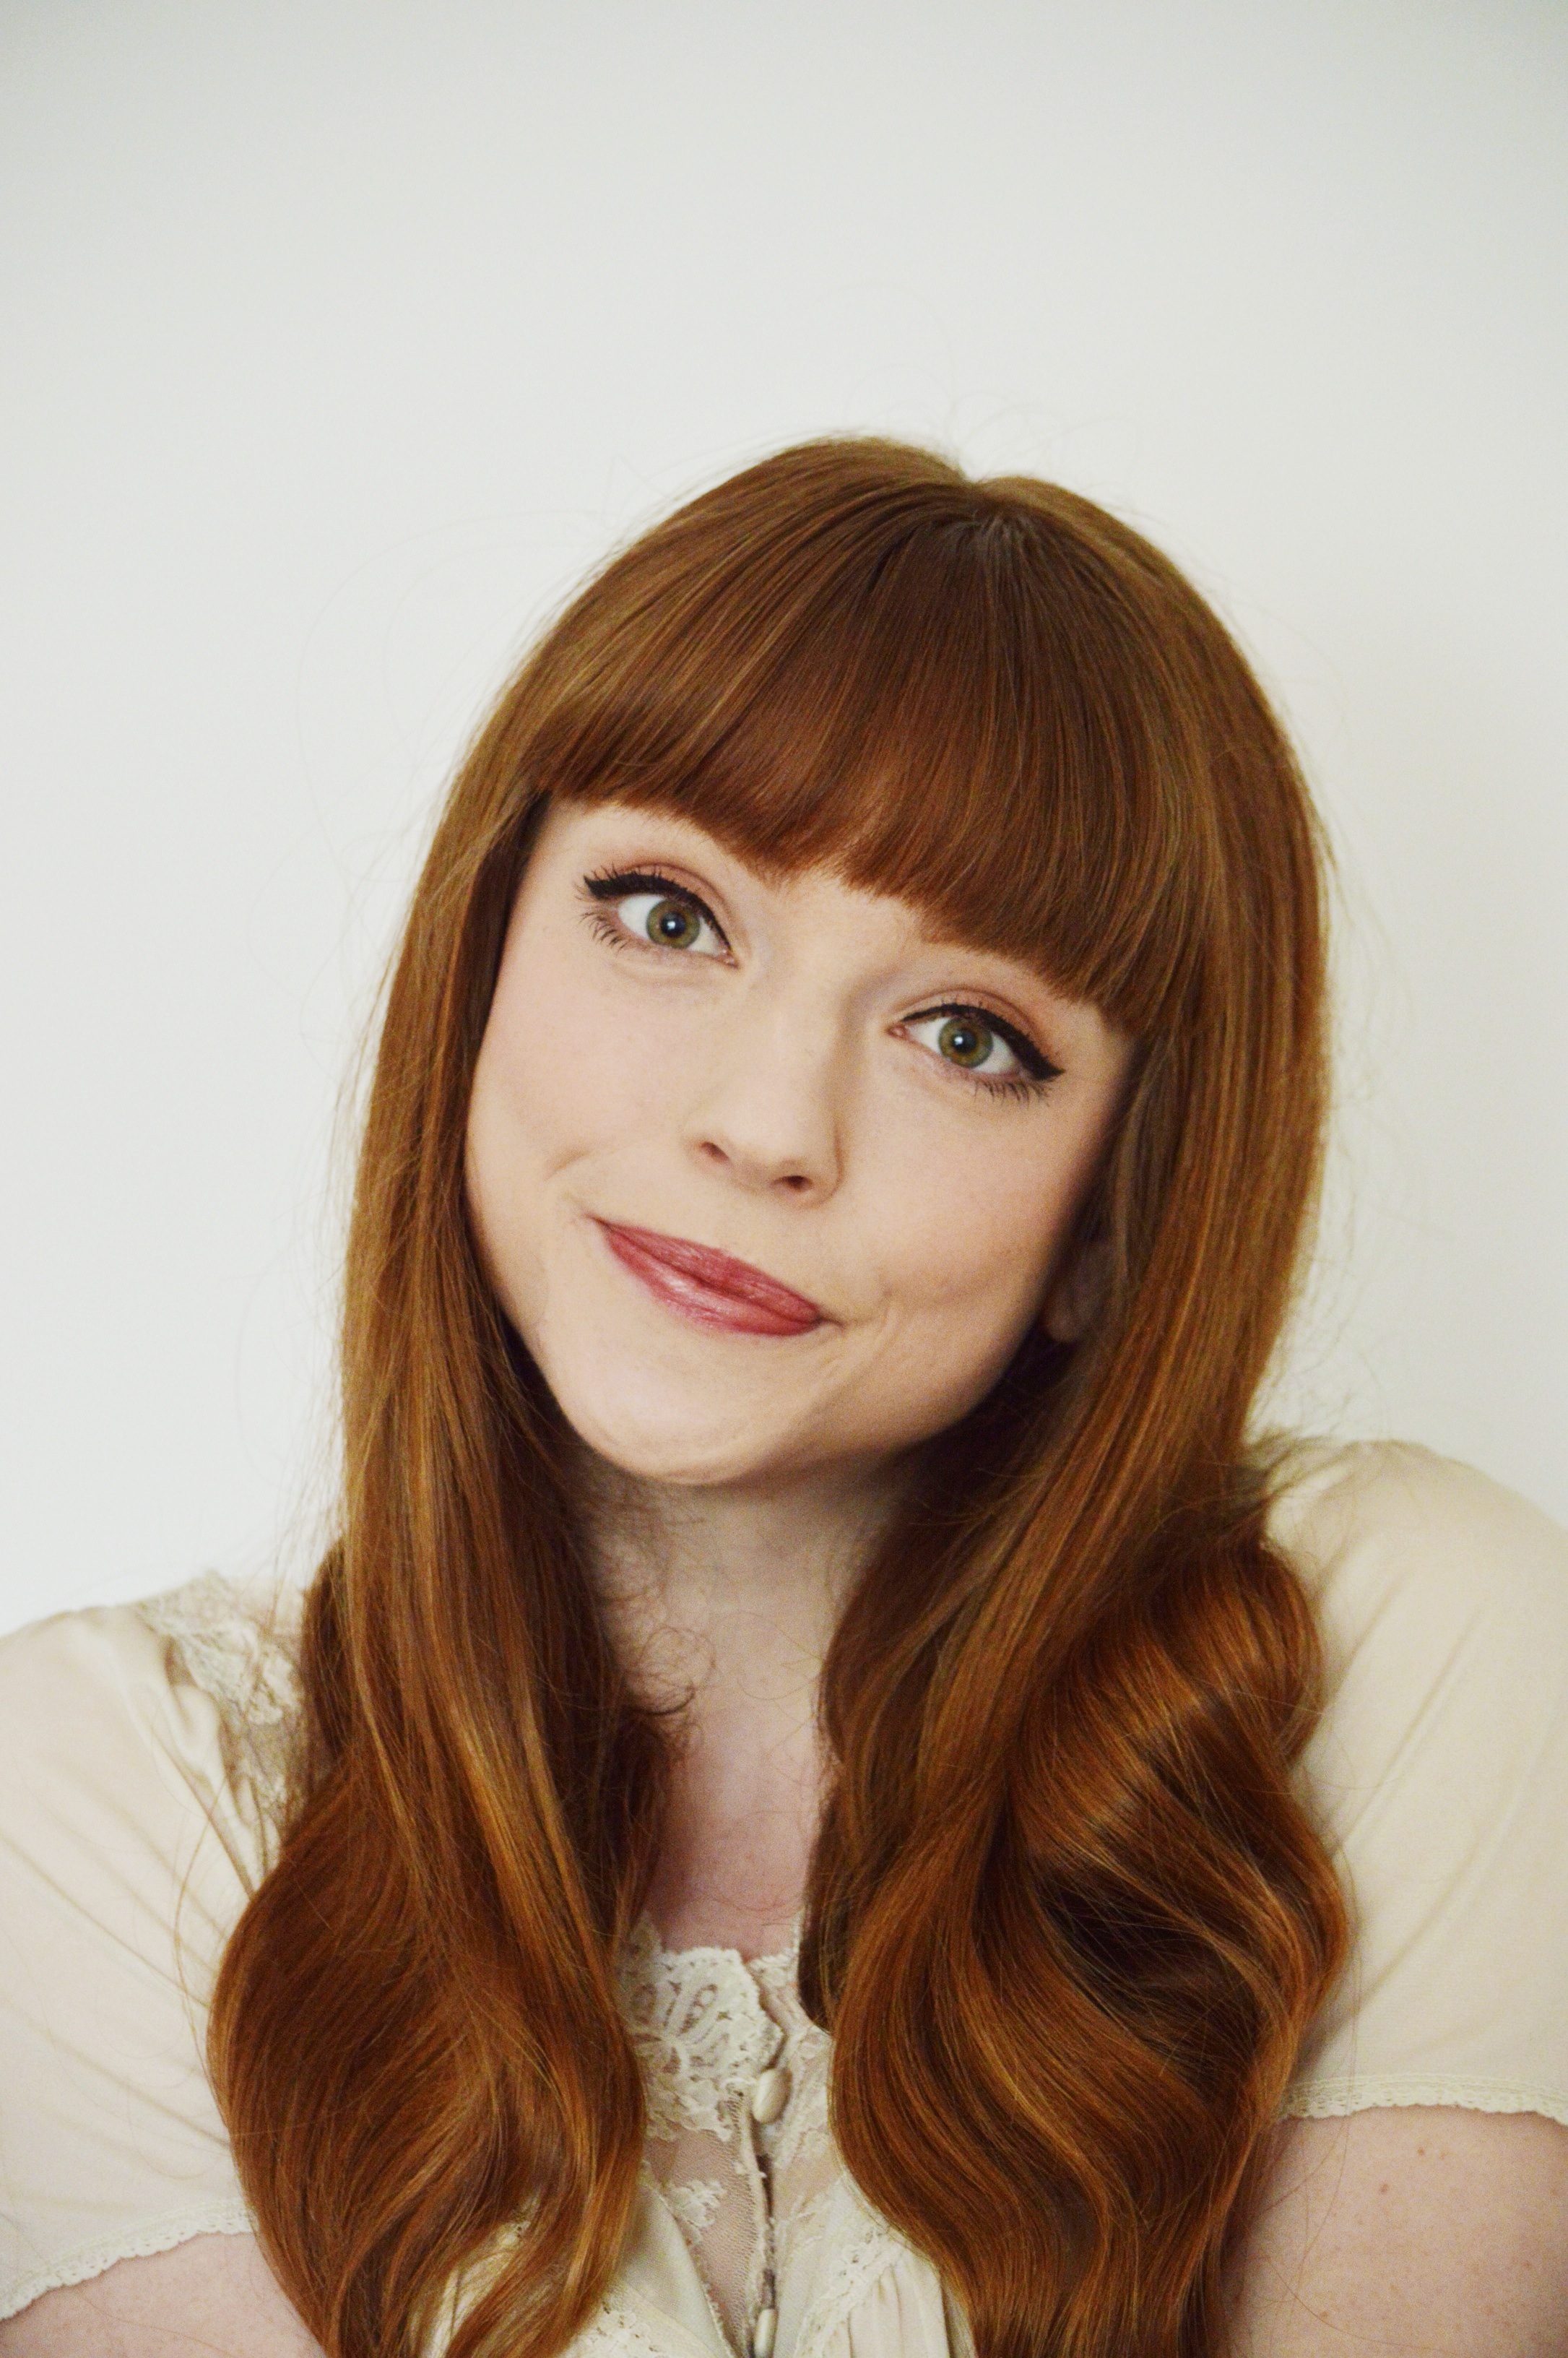 I get quite a few questions about what makeup I use, or how I do my insert word here ,so I thought it was about damn time I share. Originally, and the reason I had been holding off is, I wanted to make this in video format. But, I’m kind of a perfectionist and I watch a lot of amazing youtubers, so I sort of got in my head that I don’t want to make a video unless it is good quality. So one day, I hope, I will have the means to do that so you can hear my lil’ voice and we can connect in a different way. In the mean time, here is my daily makeup routine in picture format.
PRODUCTS


 Skin
Skin
+ Maybelline Dream Fresh BB cream light 100
+ MAC Studio Fix NW15
+ Rimmel Wake Me Up concealer in very fair
Cheeks and Lips
+ Revlon blusher in Melon-Drama
+ Revlon Photoready Skinlights face illuminator in 200 Pink Light
+ Burt’s Bees lipgloss in Evening Glow
Eyes and Eyebrows
+ Marcelle eyebrow pencil in Blondine
+ Lise Watier eyebrow shadow in blonde
+ Revlon Illuminance Cream Shadow in Skinlights
+ L’Oreal Telescopic Shocking Extensions Mascara
+ Revlon Colorstay liquid liner
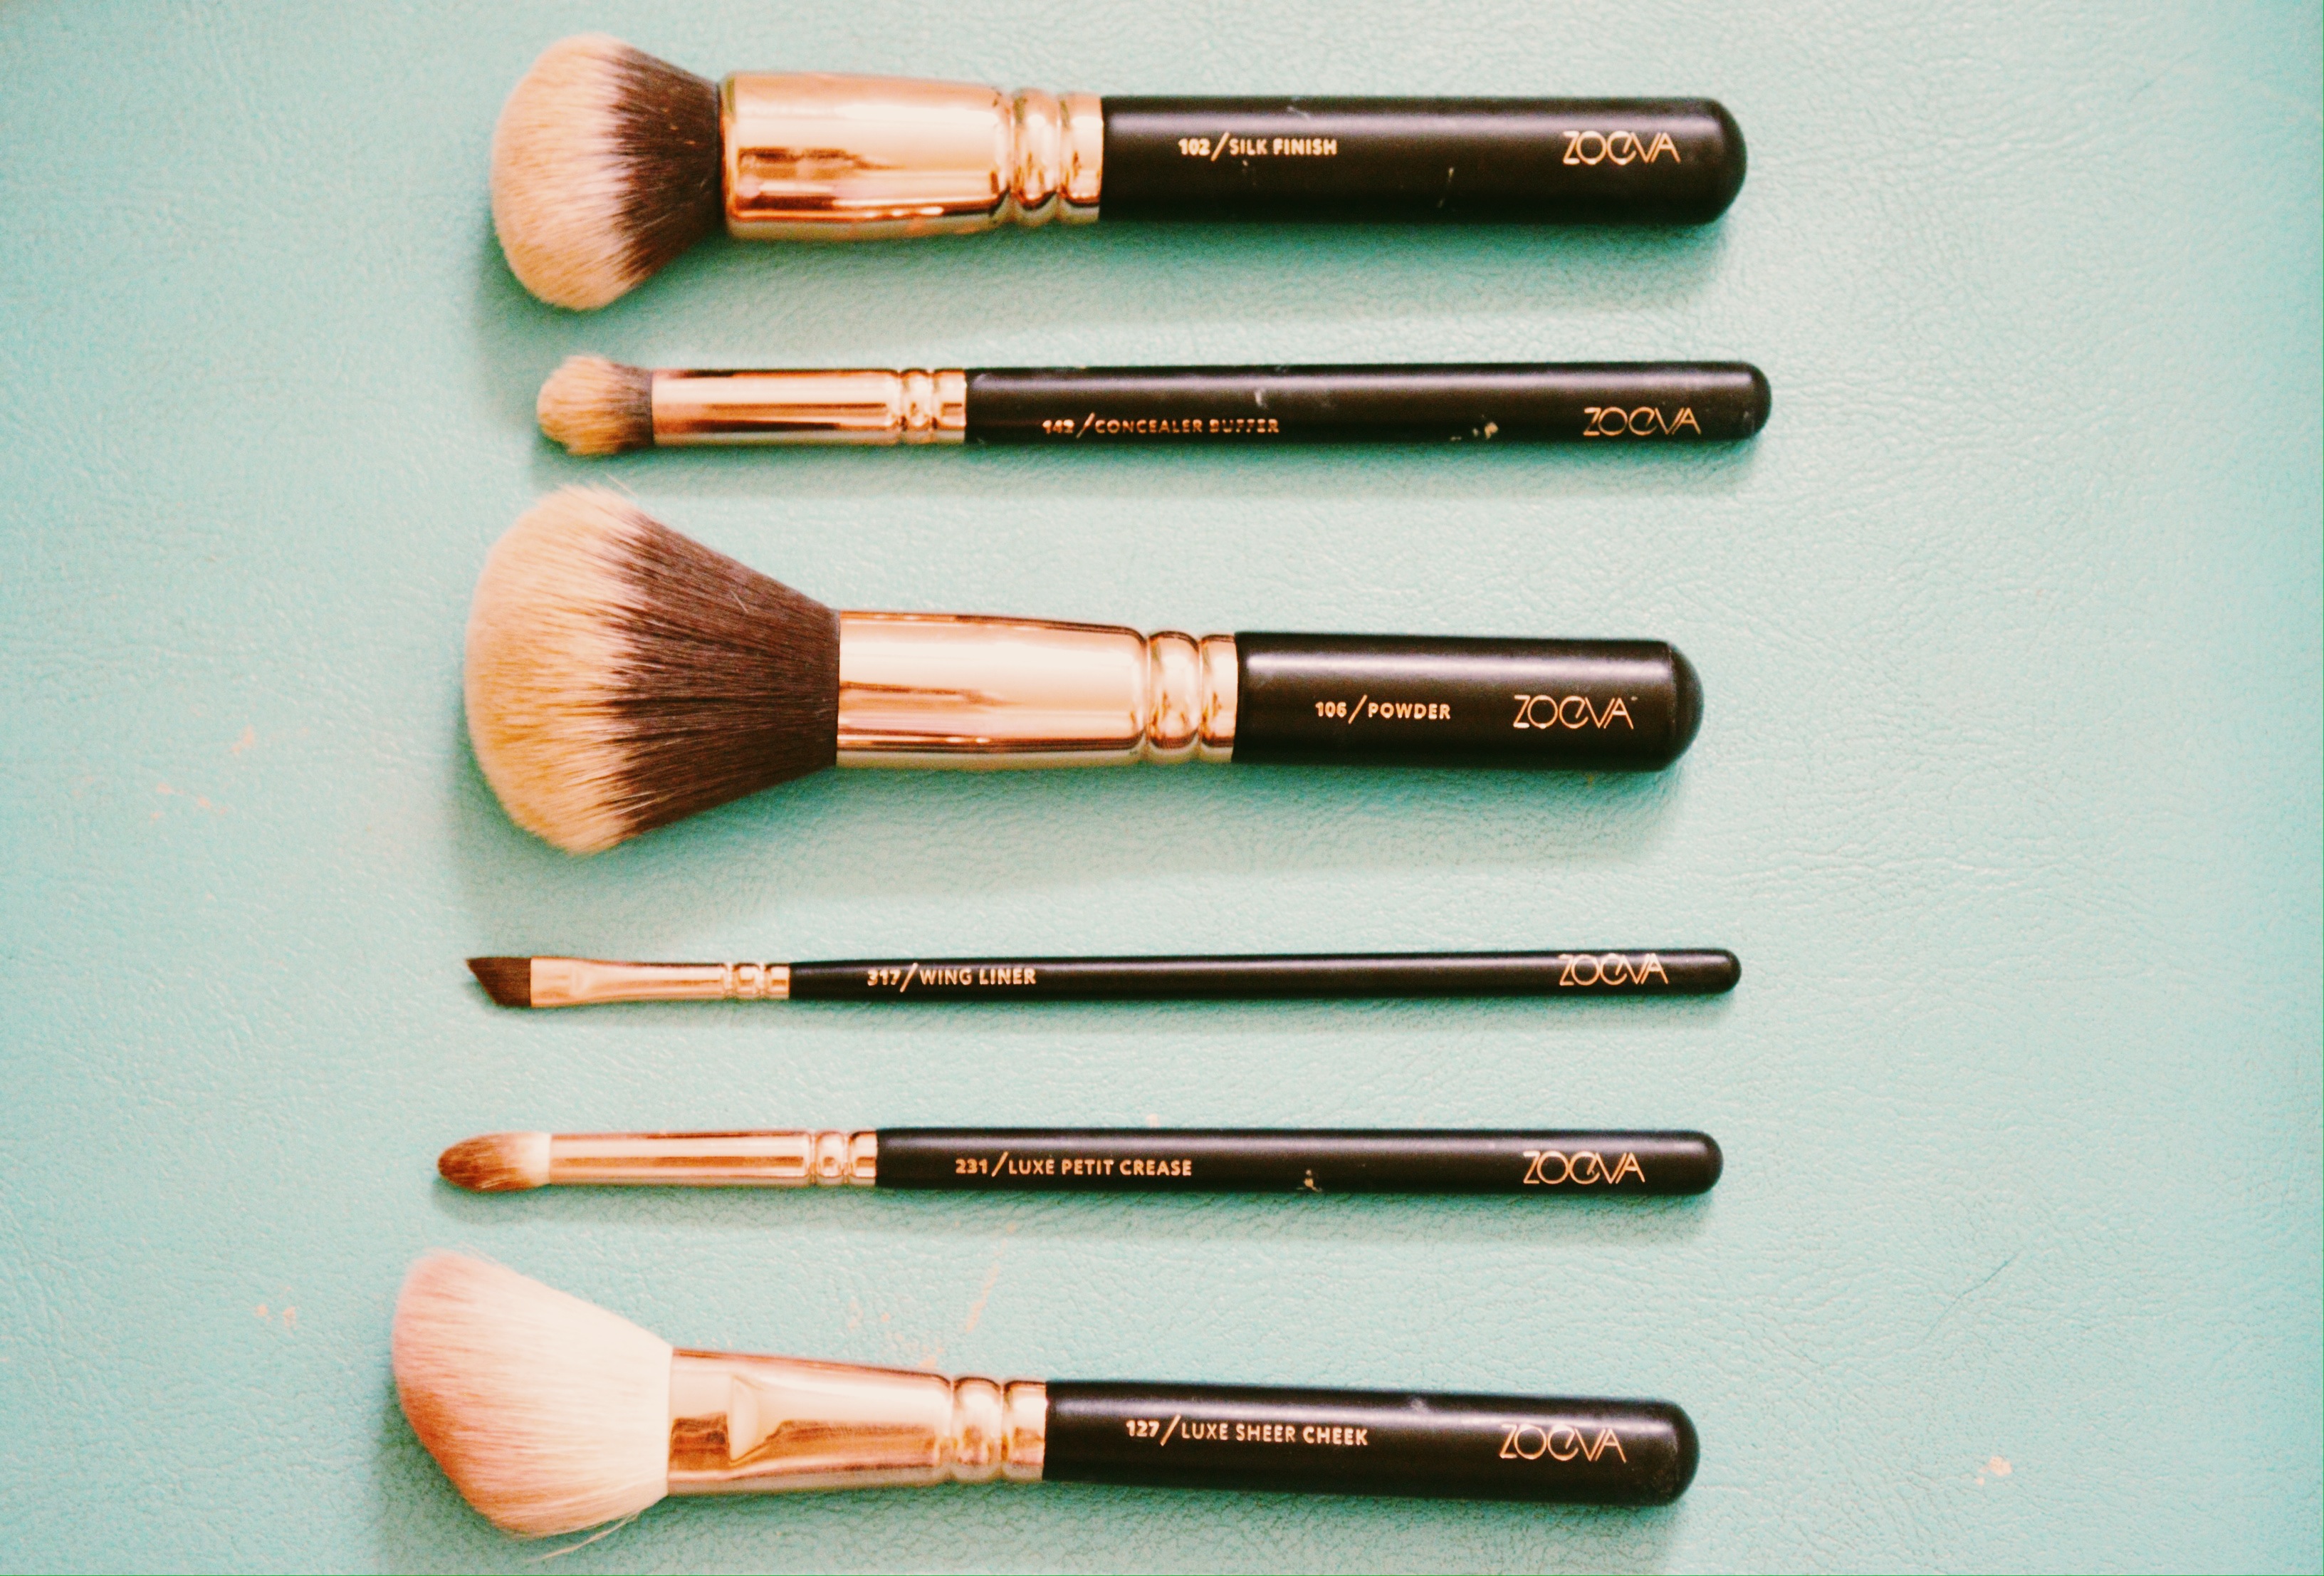
Brushes
+ Zoeva 102 silk finish
+ 142 concealer buffer
+ 106 powder
+ 317 wing liner
+ 231 luxe petit crease
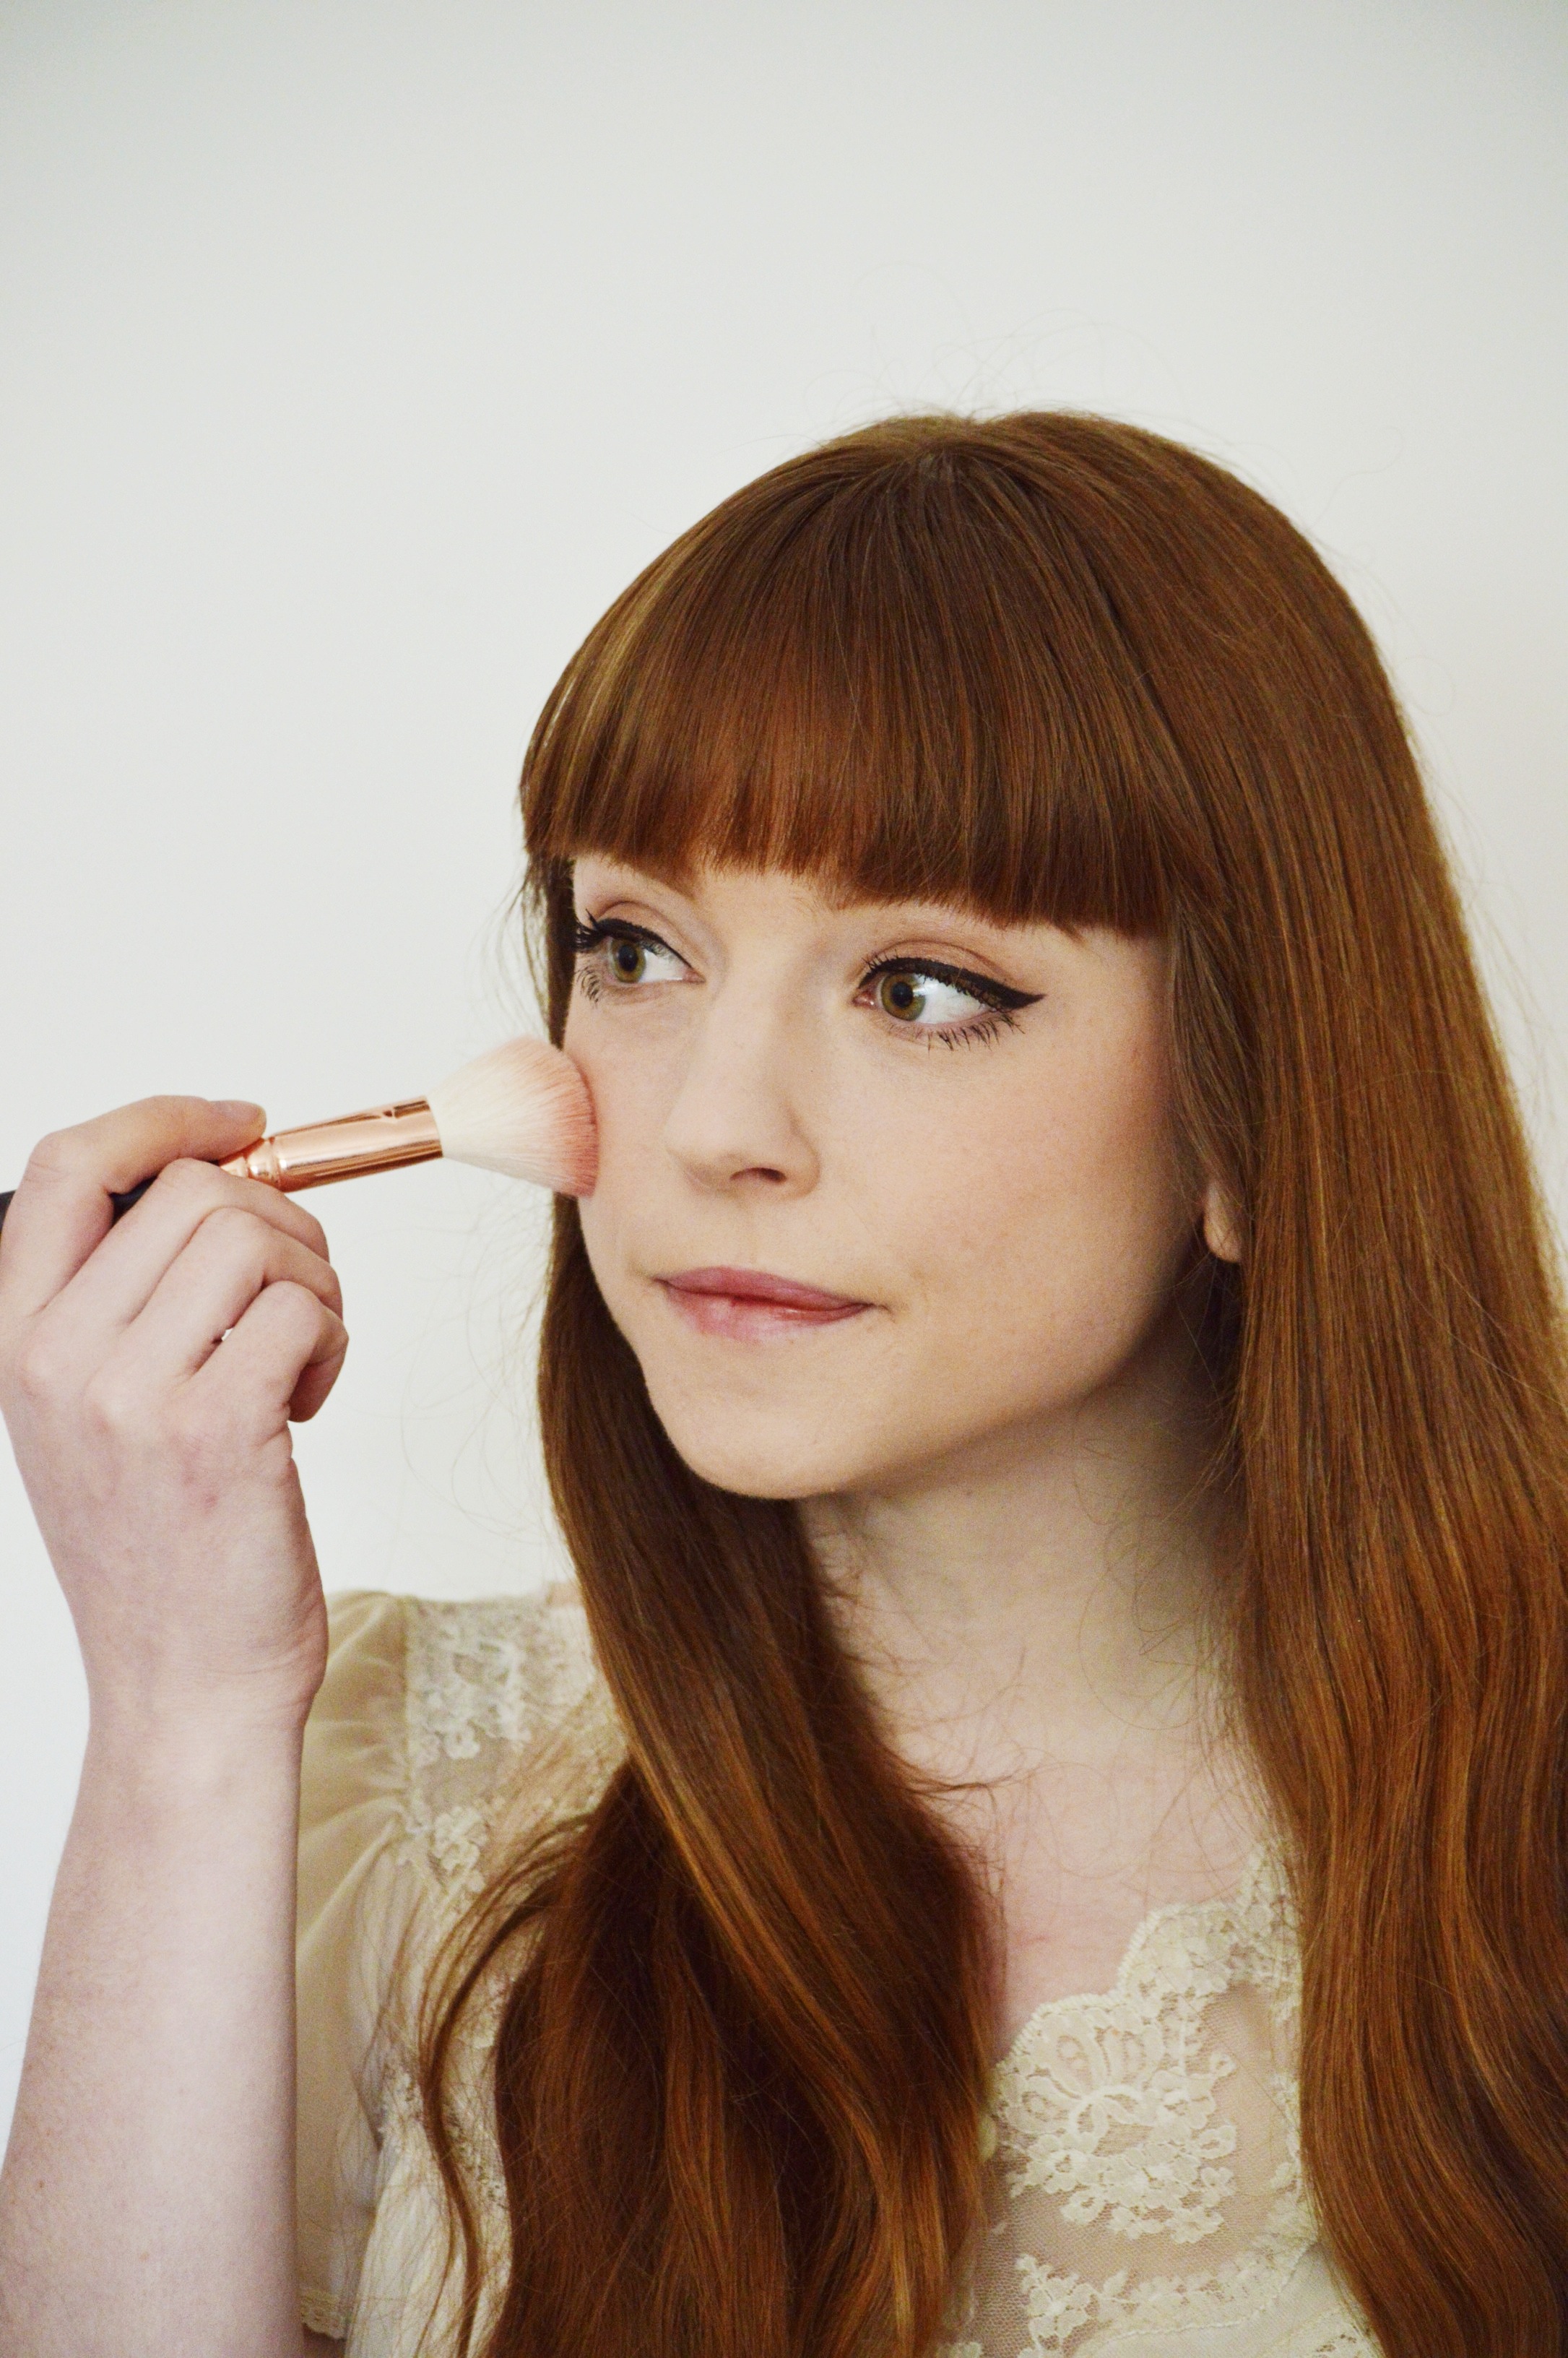
+ 127 luxe sheer cheek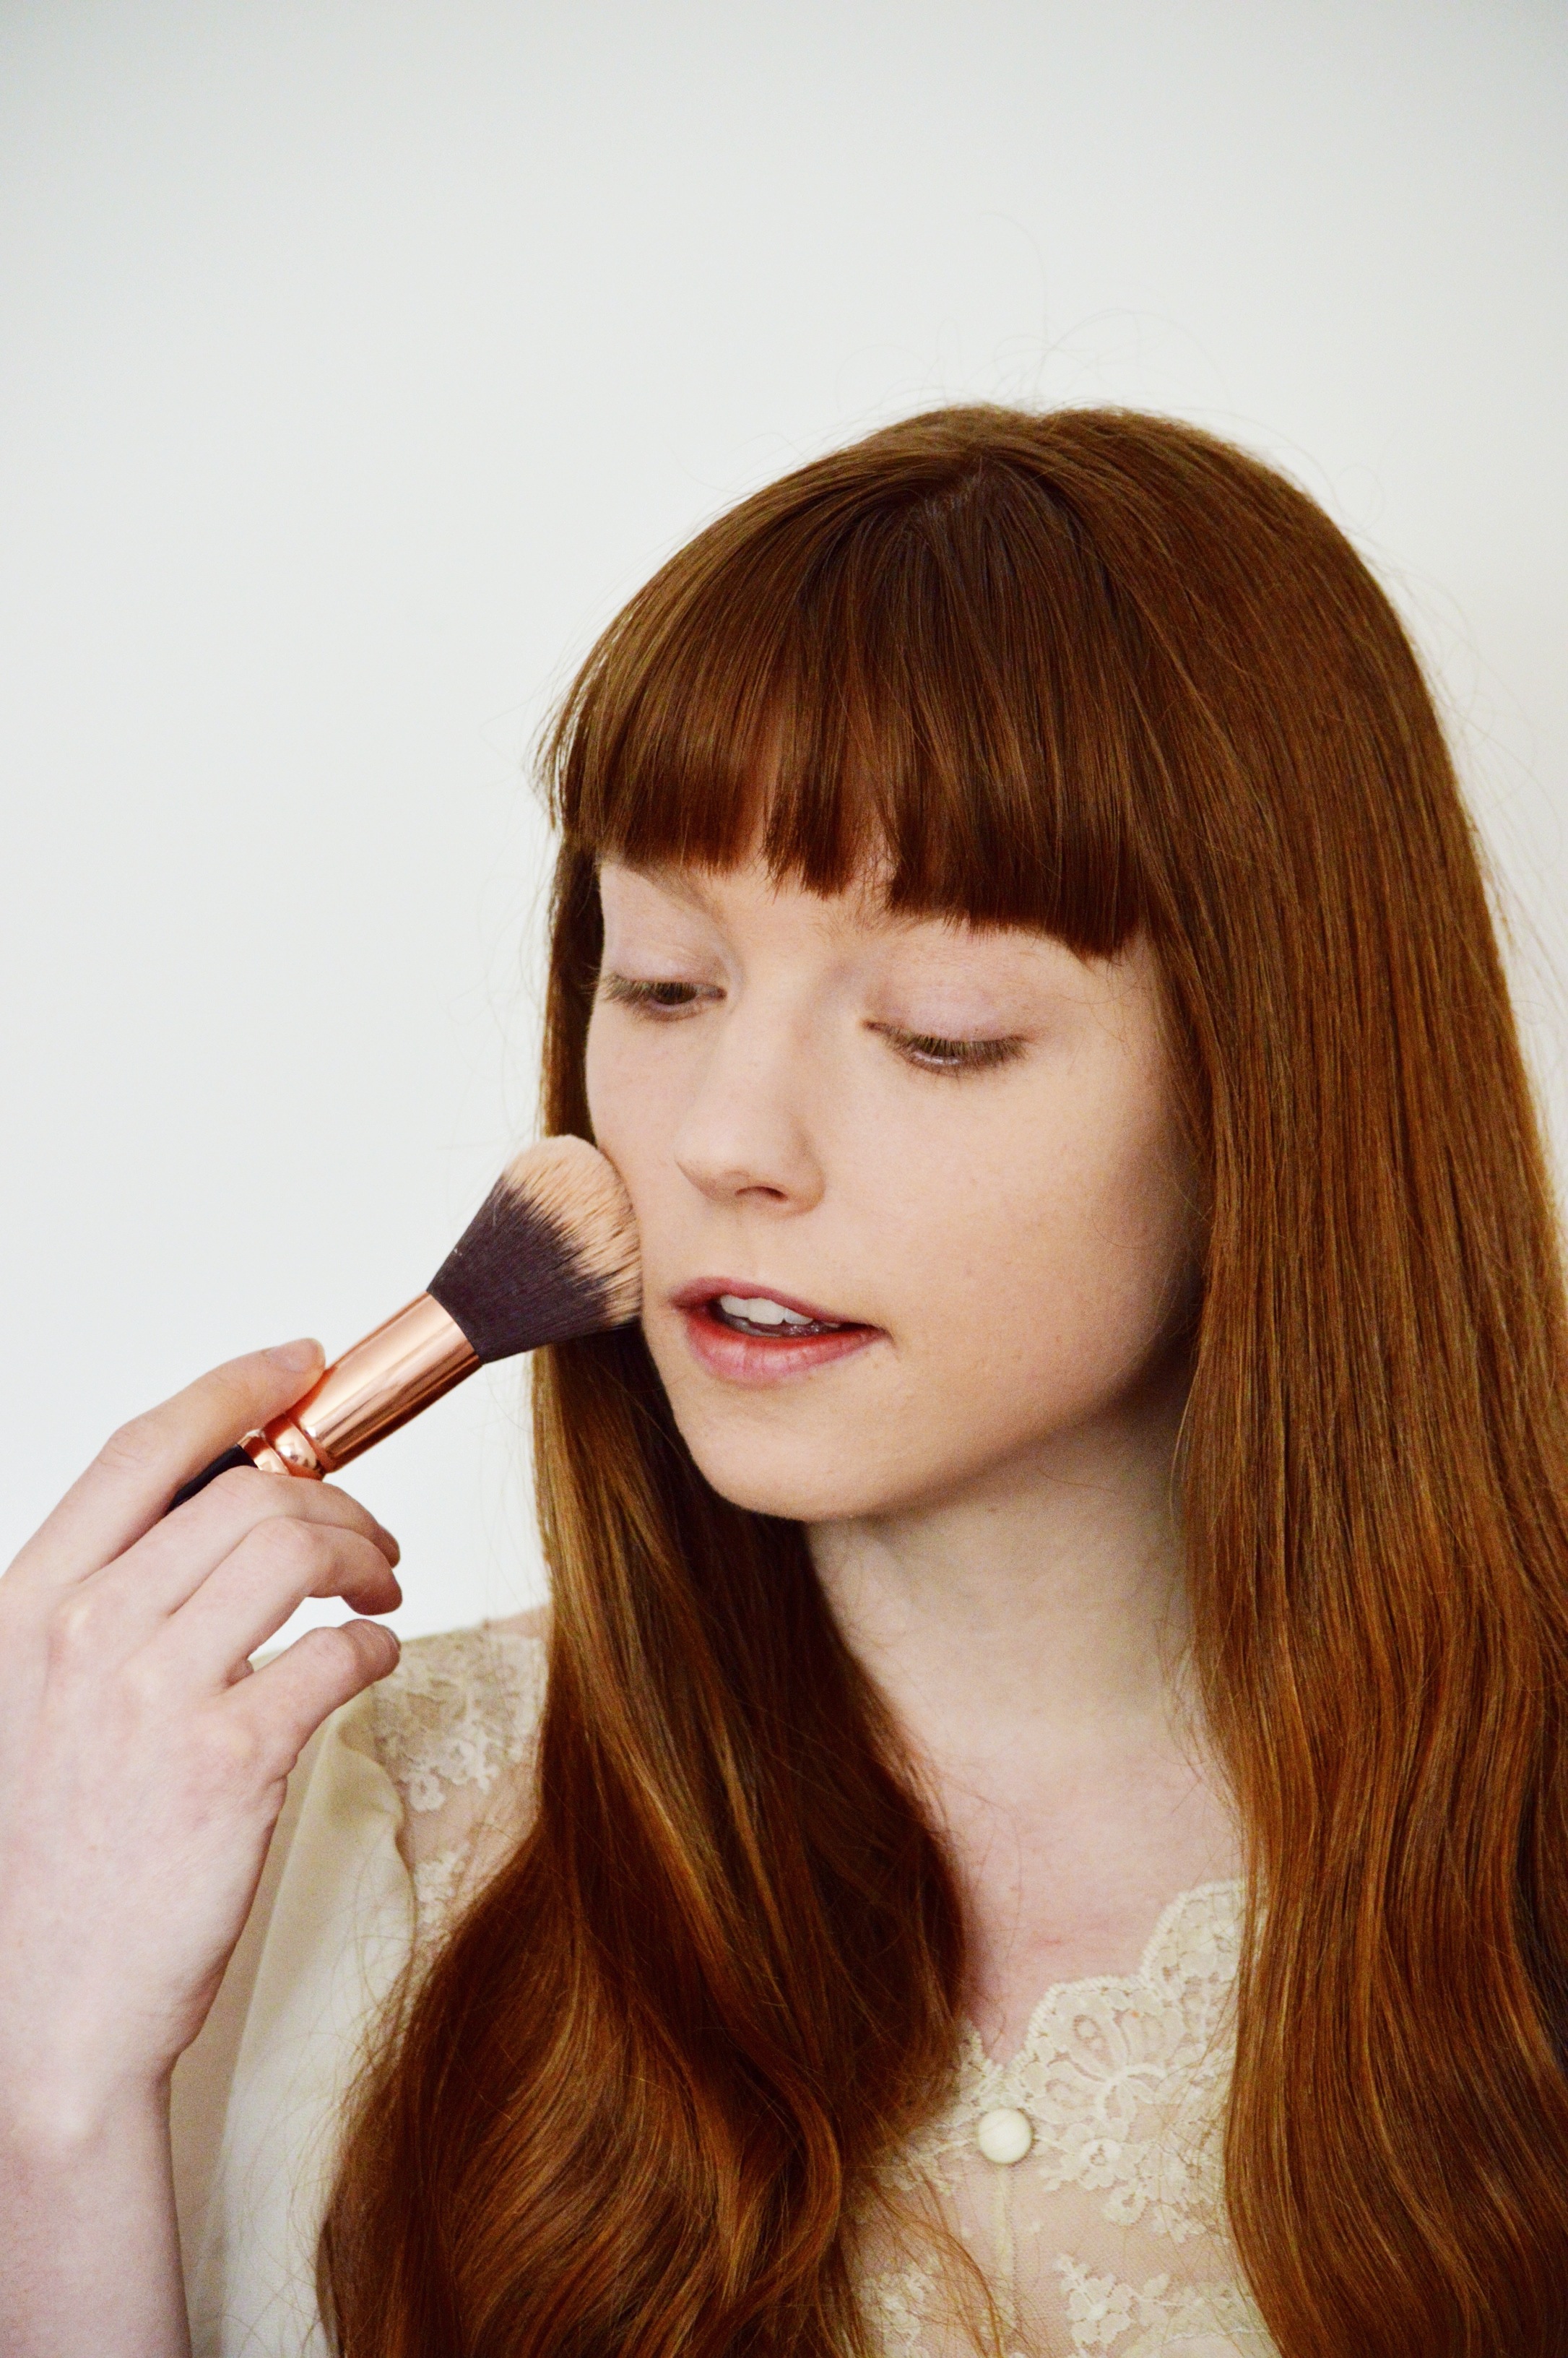 To start (and my favourite part), I squeeze about a nickle size of my Maybelline BB cream on to the top of my hand and with my zoeva 102 brush I apply in circular motions all over my face, making sure I get as much coverage as possible and so it blends thoroughly. Next, I apply my concealer under my eyes and on any blemishes I may have (which I always do), blending with the 142 brush. I usually blend under my eyes with my fingers first, and then use my brush to buffer. To finish it off I use my MAC studio fix powder with the 106 brush all over my face to create a matte finish, which diminishes the shine that the bb cream causes. I have to say, I do like the dewy look that the bb cream creates, but I find my face feels incredibly greasy to the touch, which annoys me.
 For my eyebrows, since they are pretty invisible (a ginger’s life), I first lightly outline my natural brow shape with an eyebrow pencil and then using my 317 brush and brow shadow I fill them in. To finish them off, using the brush on the opposite end of my brow pencil, I brush through my brows, evenly distributing the colour throughout, giving them a less harsh and more natural look.
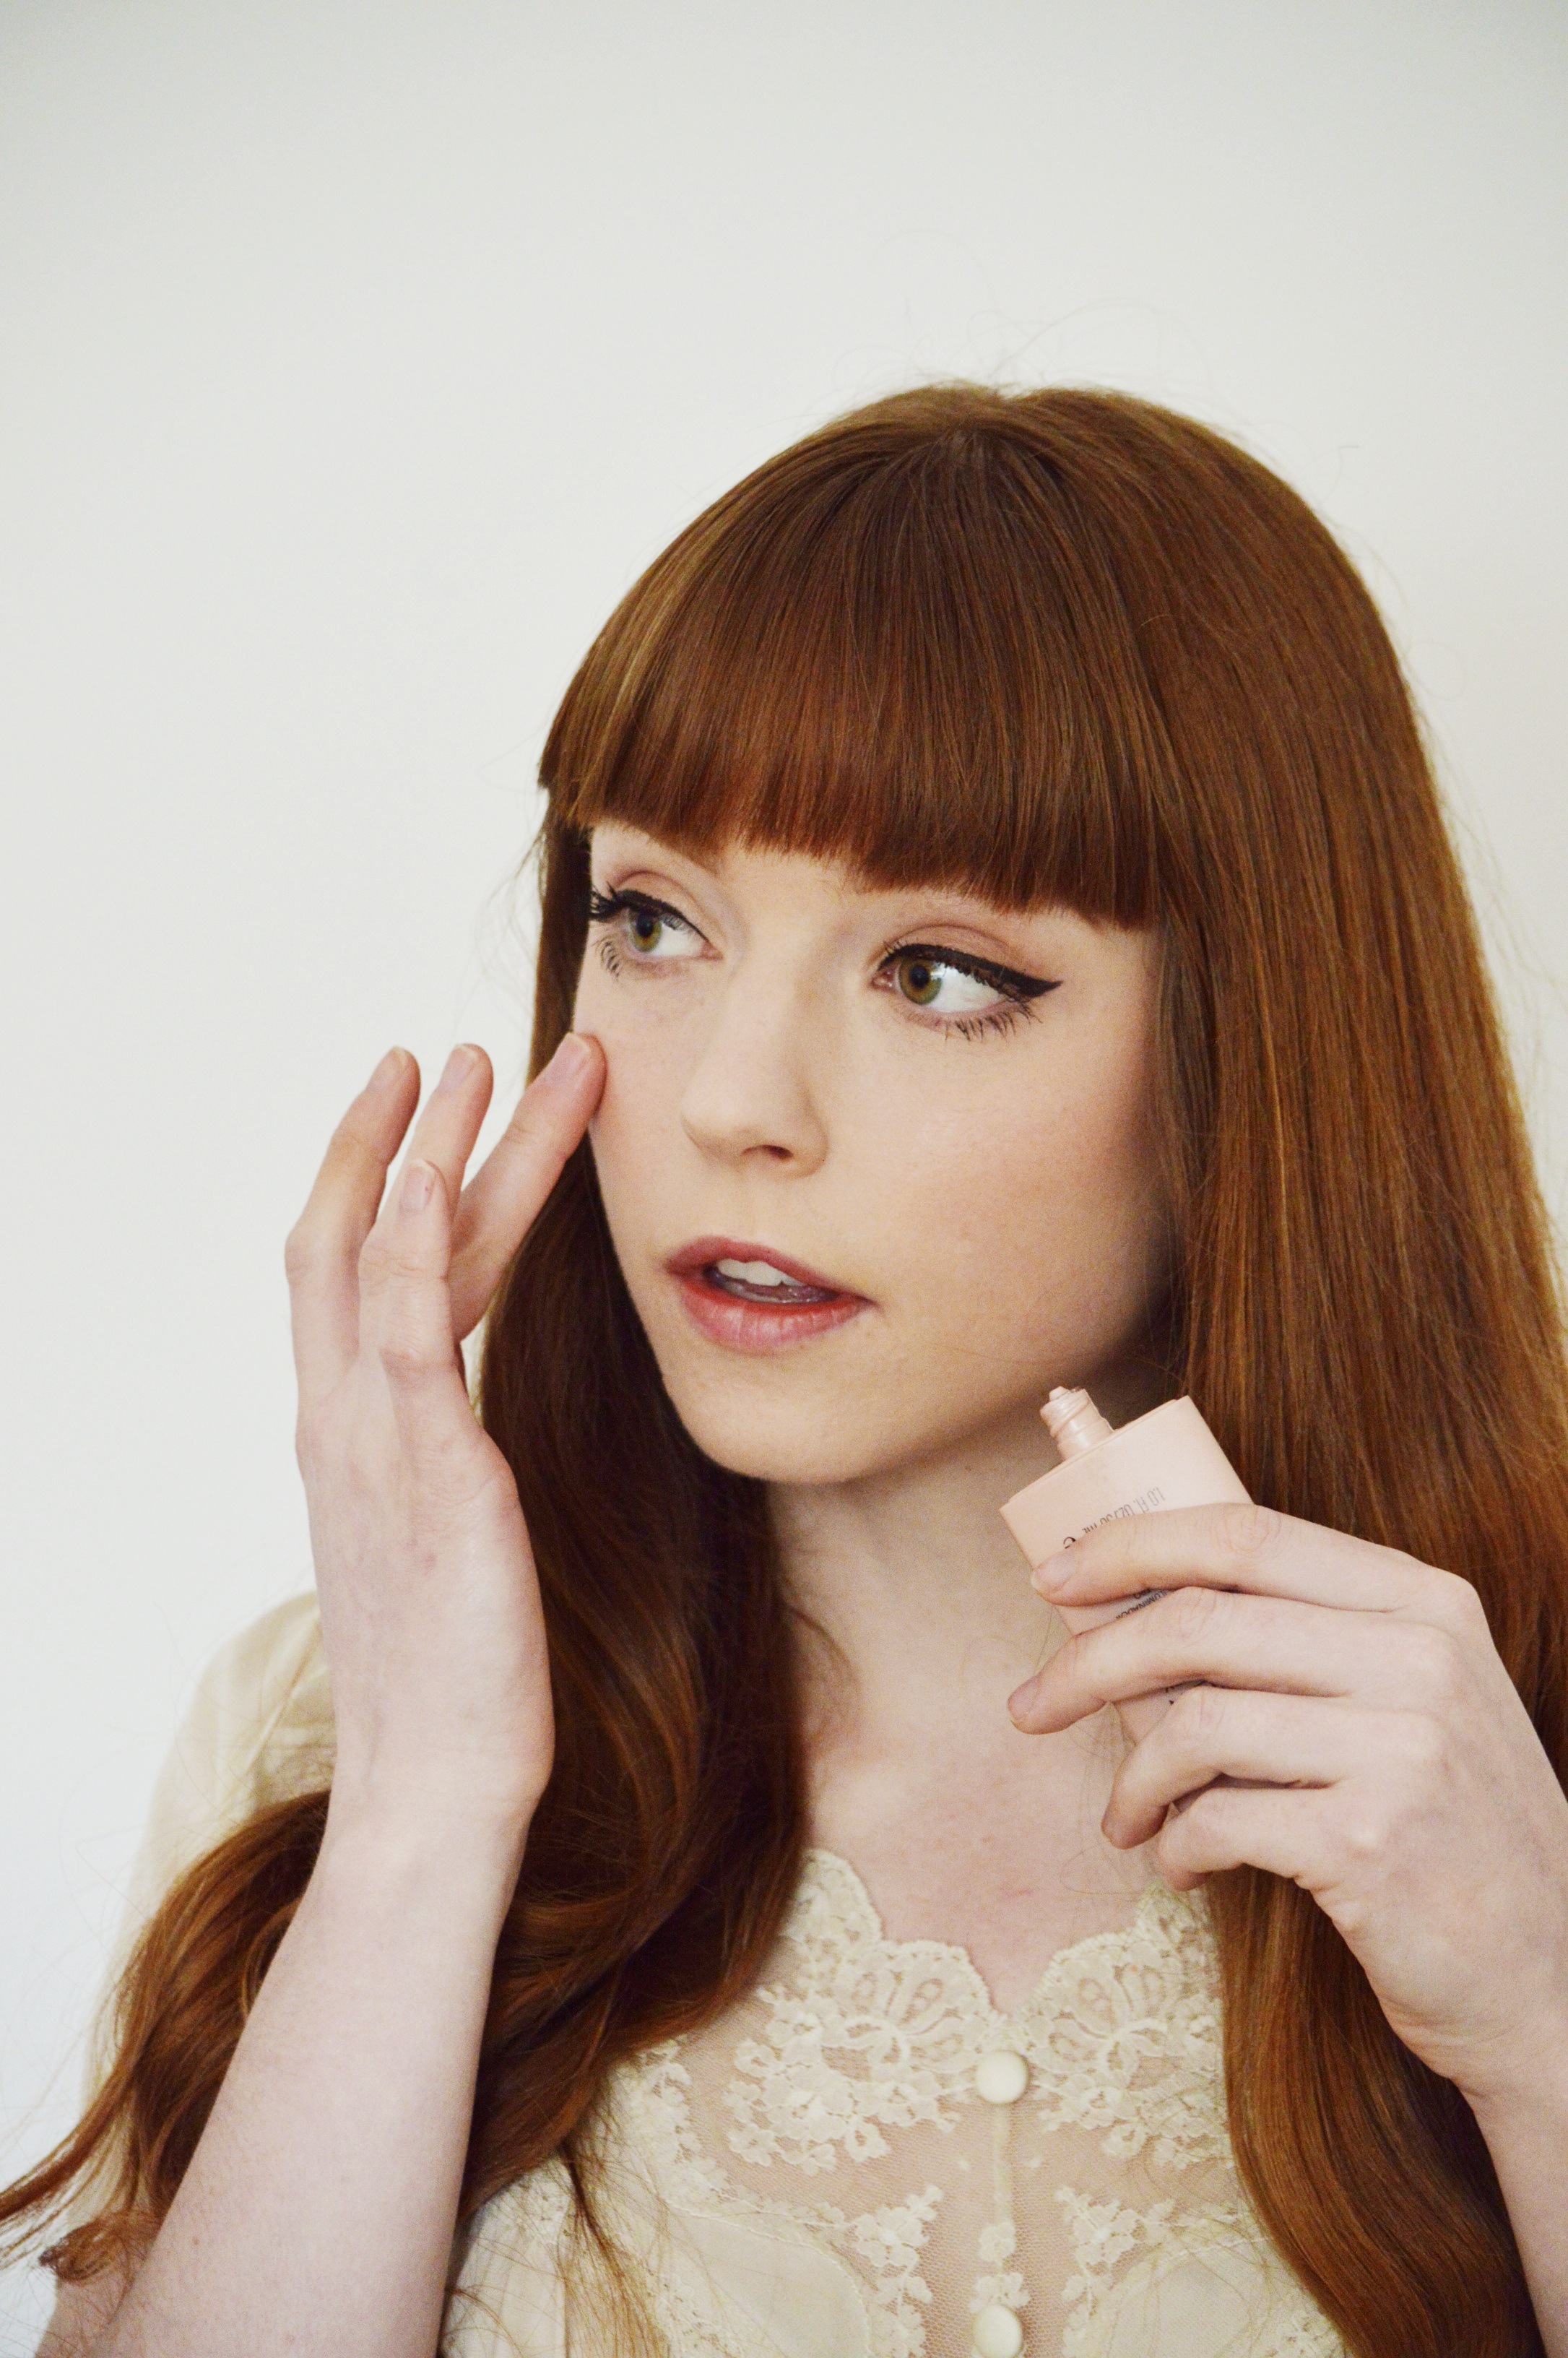
 Recently for my eyes, I’ve been using a cream shadow palette, which I like because it has all the neutral colours I enjoy wearing for a more natural look (and I also wanted to give cream shadow a go…my report, it is decent). Unfortunately, they don’t have a name for each colour in the palette (but the palette I’m using is called skinlights), so if you go off my third product photo, using my 231 brush and the second shade in, which is a light cream colour, I apply it right under my brows to give them a more lifted, awake look. On my lids I do a base of the fourth shade in, which is a flesh tone, and starting in the outer corner of my lids and blending inward and into the crease of my lid, to give an ever so slight smokey eye, I use the first colour, which is essentially brown with some golden tones.
 I’ve been doing a cat eye for years. I’m talking yeeeeears. I first learned how to do it when I was just a wee one because it was essential for stage makeup (I’ve been a dancer since I was 3, in case you didn’t know), so I feel at this point, I’m pretty well versed in the art of the winged liner…so I’ll share my secrets with you. To have my liner stay on as long as possible, I first use a pencil liner and then go over top of that with a liquid liner. This is also great because you can really straighten up those lines when going over it again with liquid. I start from the middle of my lid going outward and when I reach the outer corner where my two lids meet, I wing the liner up a bit, having it become even with my brows. After I will go to the inner corner of my eye, and turning the pencil on slight angle so I’m less heavy handed, I will make a thin line that joins to the line I have already made. From there I go over top of what I have just done with my liquid liner, in the same sort of process, only this is the time I really pay attention to steady my hands, and I’ll also play around with the thickness of the liner, ie., a thin line at the start that gradually becomes thicker near the end. And to finish my eyes off, I apply my mascara to the top lashes in an up and fanning out motion, creating that sort of doll-like effect, and I put a slight amount on my lower lashes just in the outer corners.
 Next, using my 127 brush (my favourite one because I like the way white and pink look together) I apply my blusher. Because I don’t do any true contouring, I use blush as a sort of contour. So, I apply the blush on the apple of my cheeks, as well as my cheek bones (you know when you suck in your cheeks? ya, right in that spot). And to give my face a nice, bright look, I dab my liquid illuminator right above my blusher, on the cheek bones, which makes me feel angelic and wonderful.
 And last, but certainly not least, lip colour. Now, when I do really want to give my lips a punch, I use a true red lipstick (usually So Chaud by MAC), but since this is an everyday look, and I can’t be bothered to wear lipstick on the regular, I’m using my Burt’s Bees lipgloss. To be honest, I’m not a huge fan of glosses, especially strongly pigmented ones. I have quite thin lips, so a more pigmented shade of lipgloss I tend to steer away from because it just doesn’t look right, but since I like this colour a lot, I make it work for me. I just dab the gloss on with the applicator, and from there I blend it in with my finger, so instead of it looking like I added a glossy colour to my lips, it gives a more flushed sort of look, like hey, my lips are just naturally this rosy. how cute of me.

 And that is my everyday make up. Sorry if there was a lot of writing…man is it ever hard to explain in writing how you apply make up! Also, all of this takes me about 15 minutes, so if you think this is too much work for everyday, think again. And if you have any other questions or things that need clarifying, please let me know. I may do a post that is more in depth about my favourite products I use regularly, so let me know if that is something you would be interested in.
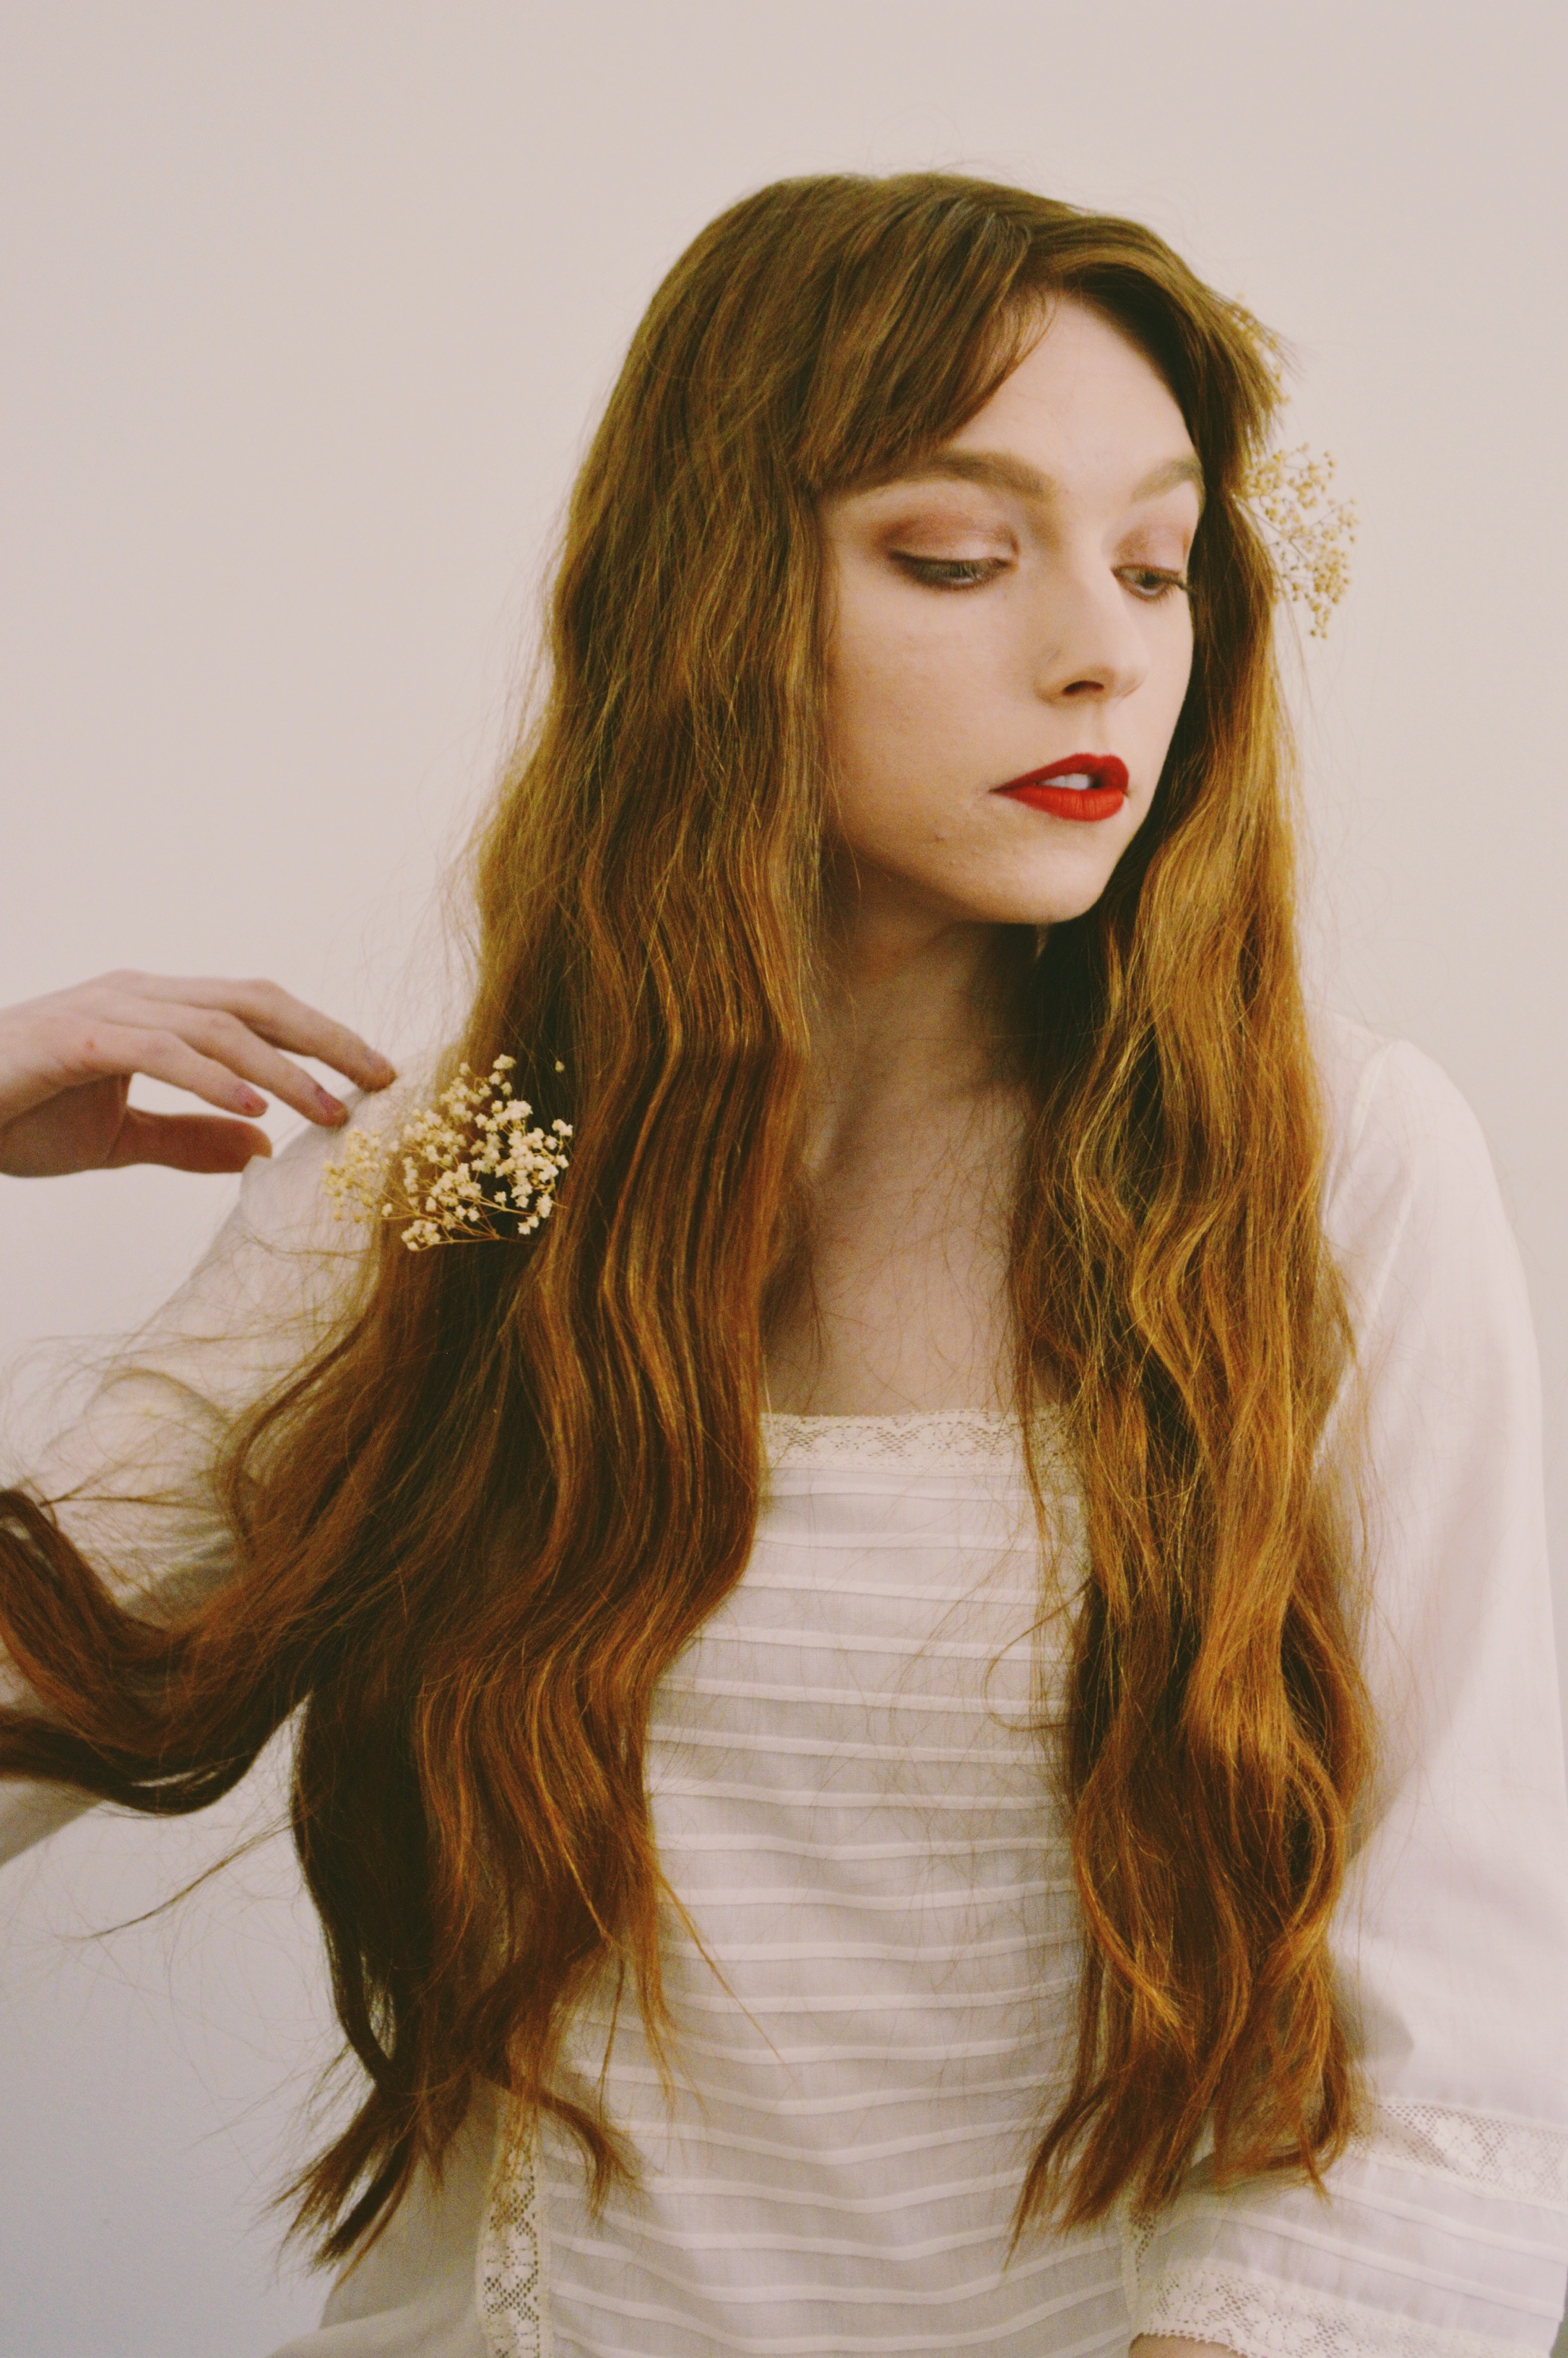
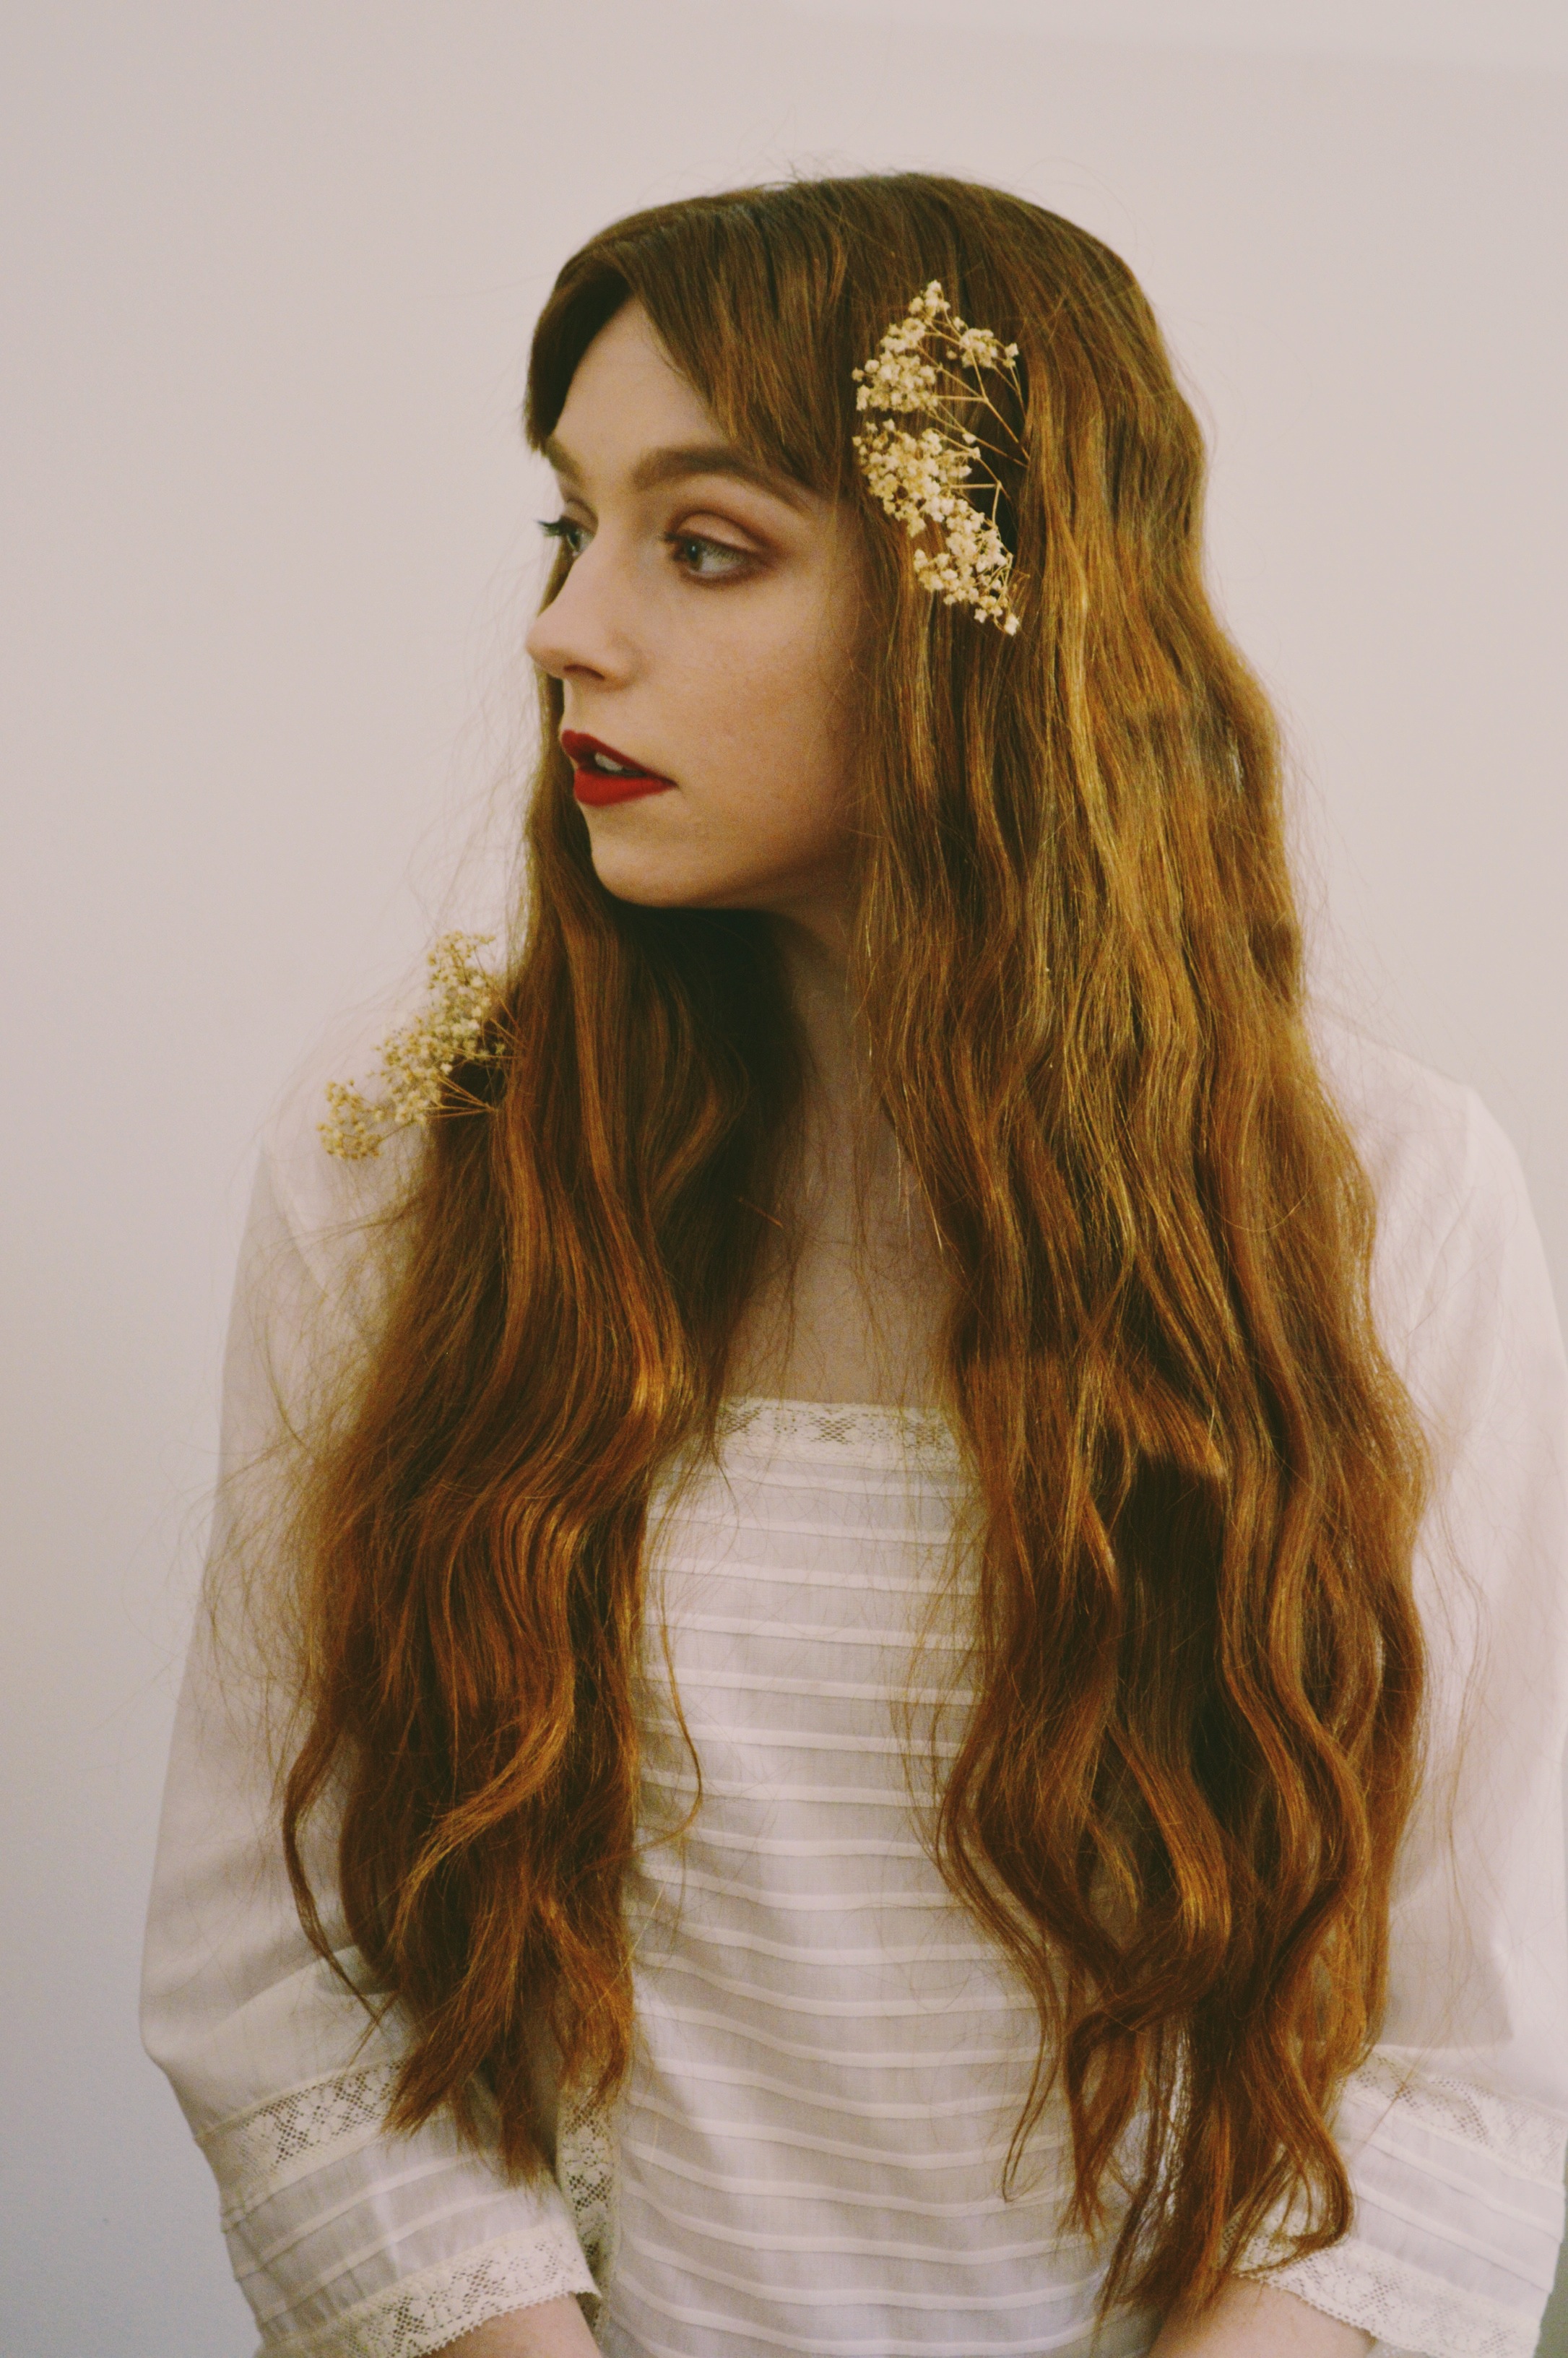
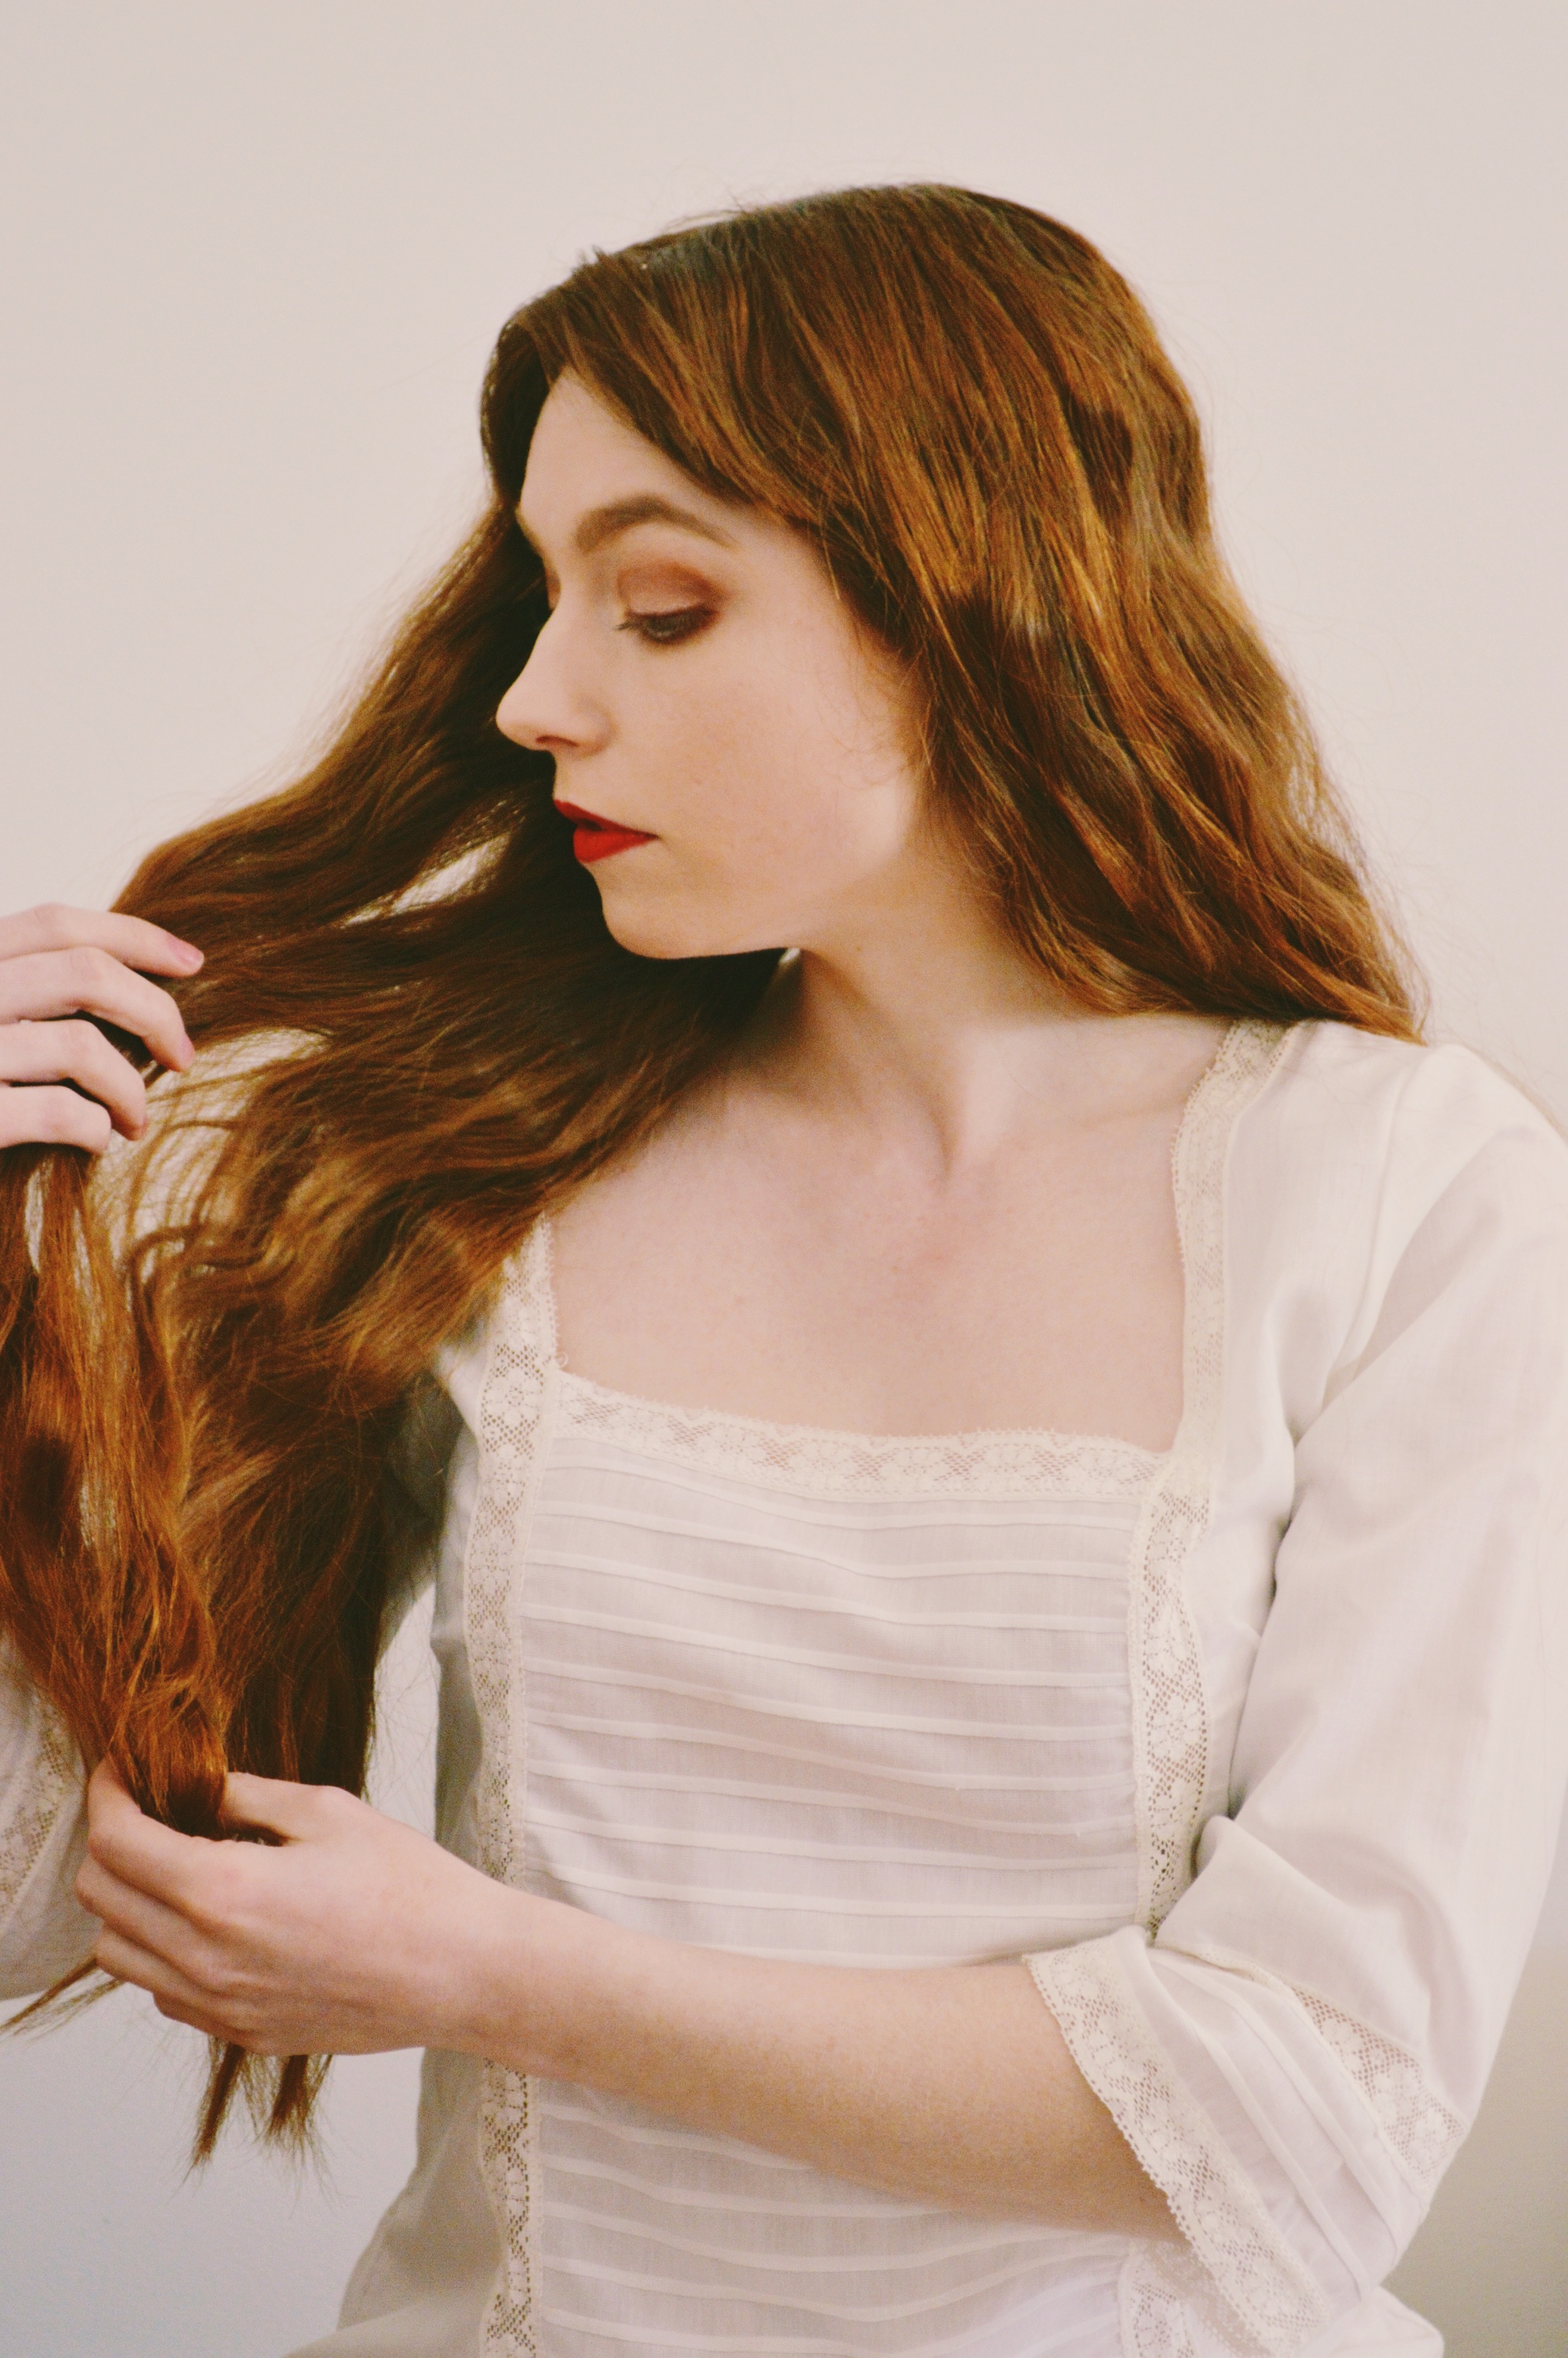
Beauty / Pre-Raphaelite Hair & Makeup
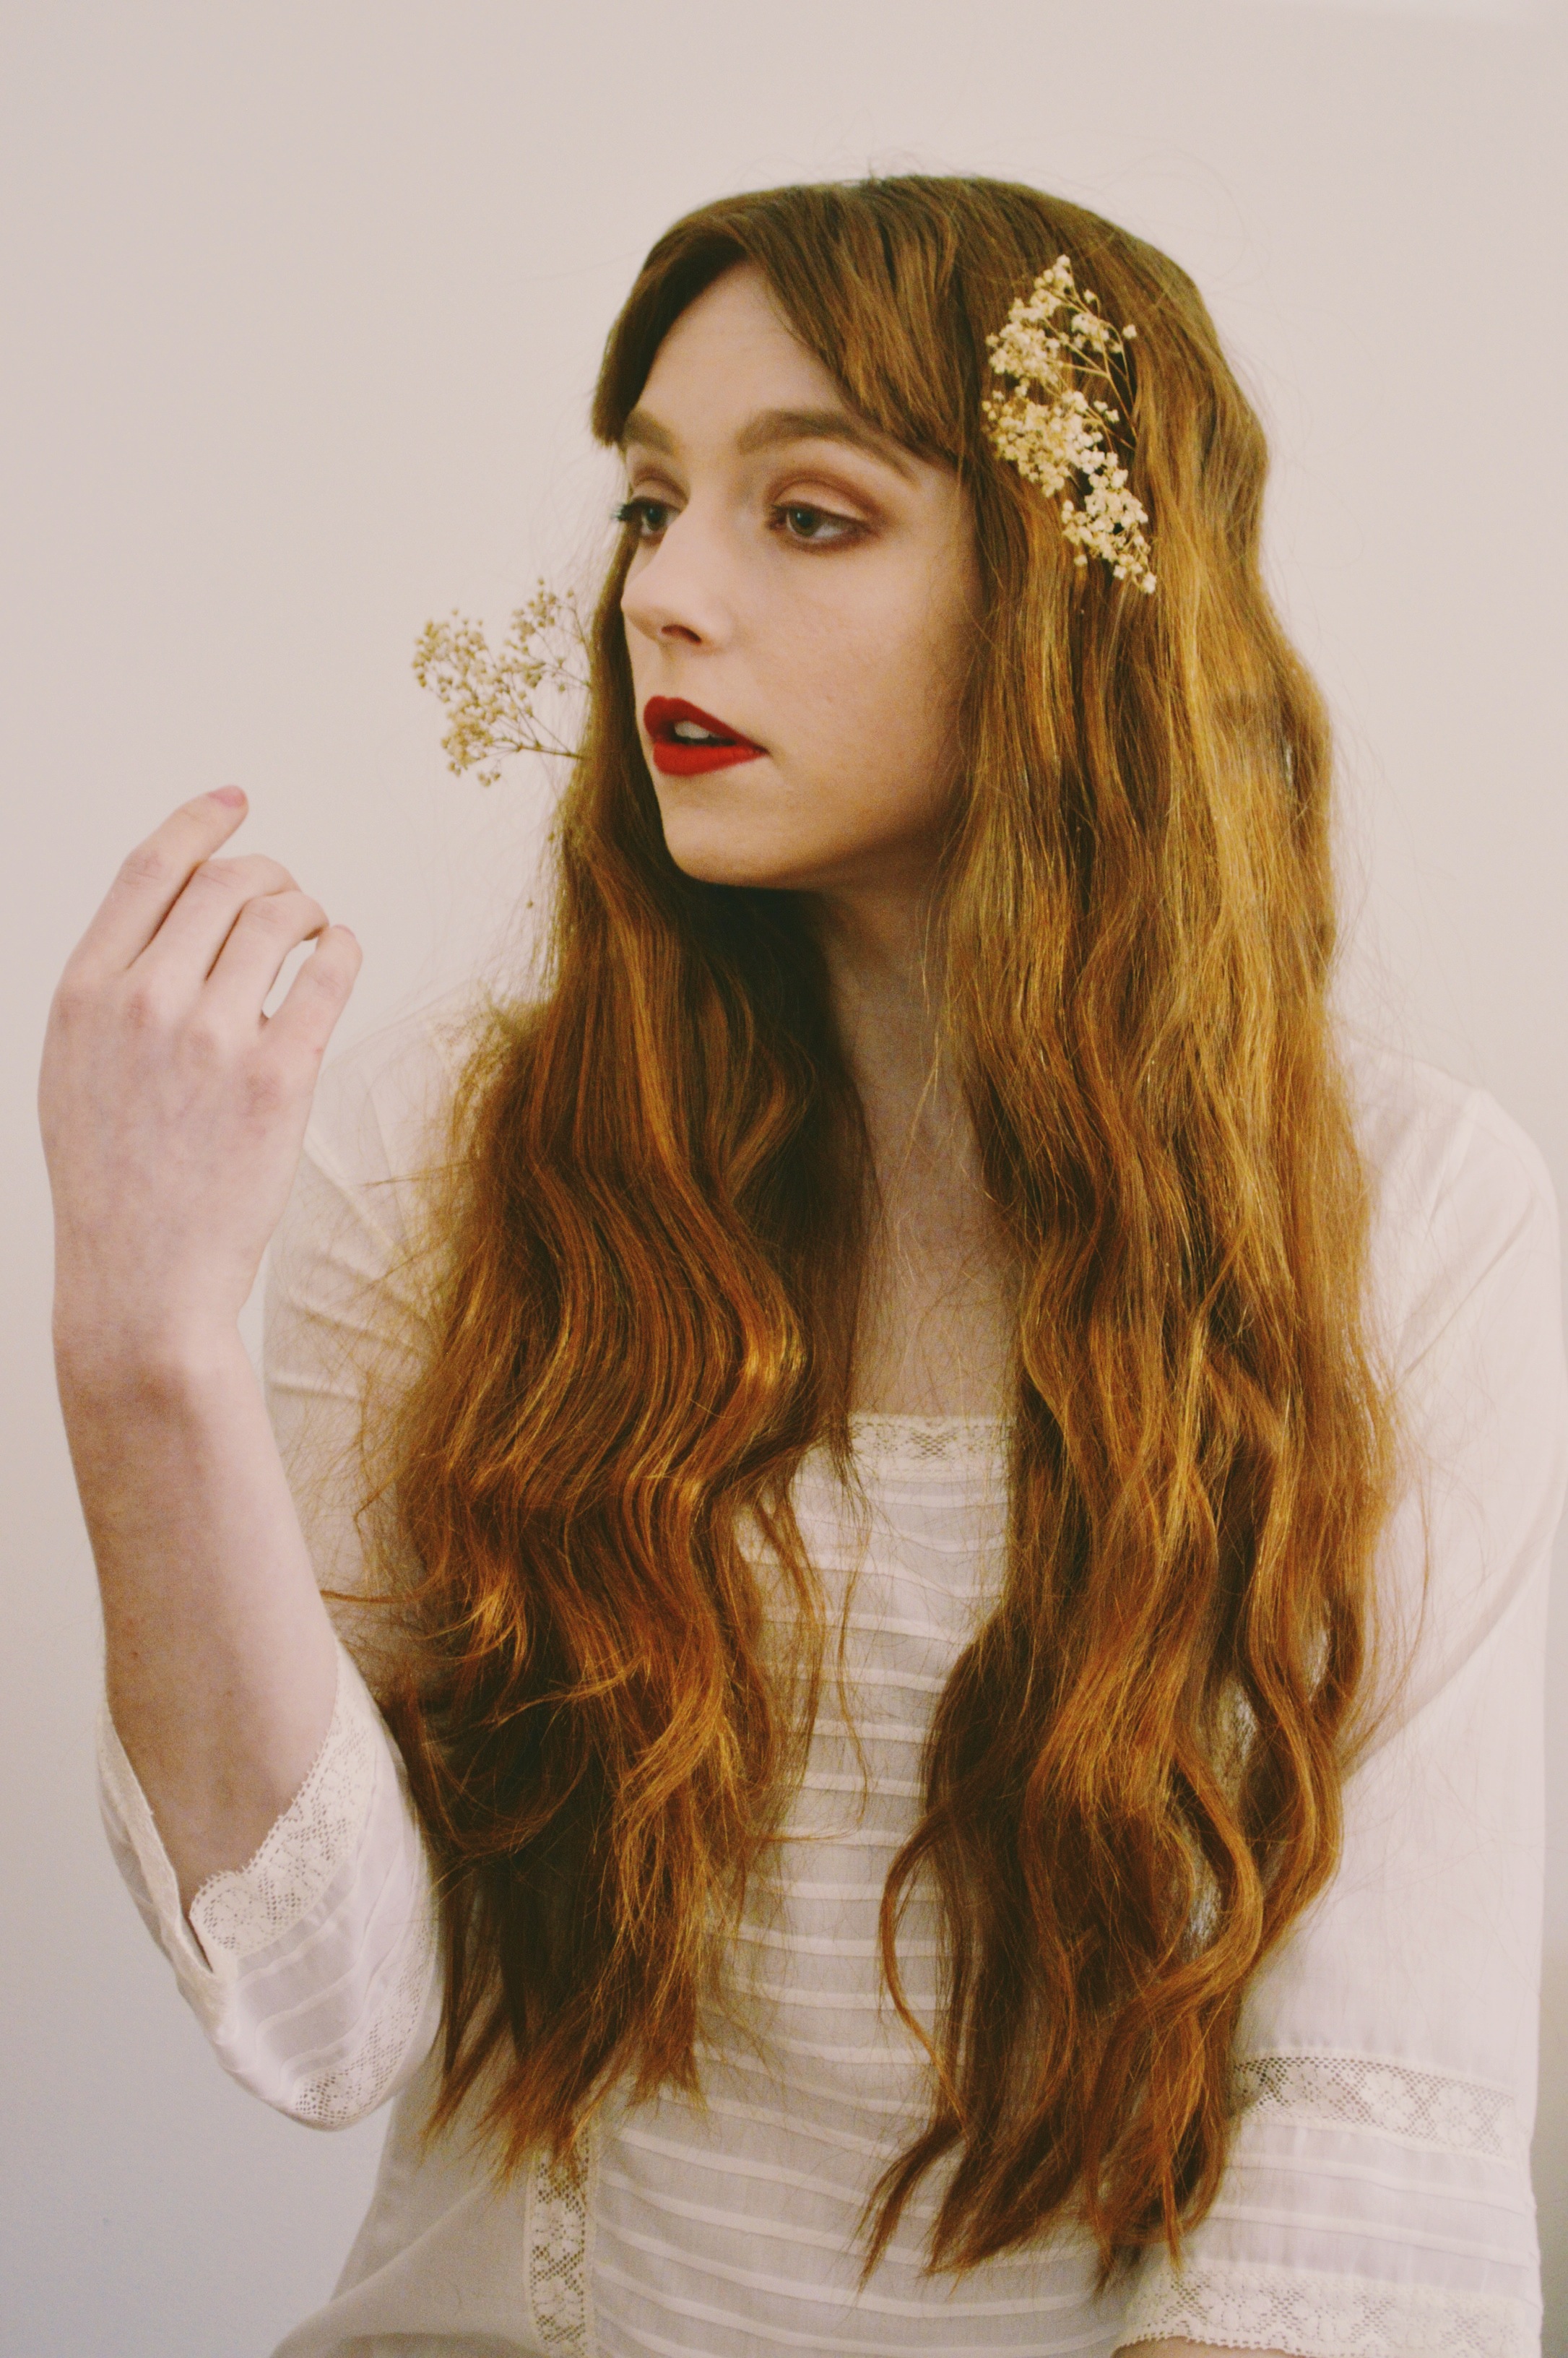 I quite often get compared to the women in Pre-Raphaelite paintings, solely based on the fact that I have long red hair and pale skin (I’ll take it though!). So it only felt like a natural and fun challenge to really and truly try to emulate the beautiful women from those paintings. This actually ended up being extremely enjoyable for me. When I was a teenager, I absolutely loved makeup ( I still do) – I’d try out different styles, colours, you name it – the crazier the better. But as I got older I fell into a routine with my makeup, and rarely change it up, so it was fun for me to look at images from Brotherhood’s art and recreate the hair and makeup.
If you are interested in recreating this look, I have written a wee tutorial at the end.


 To get this look:
Hair
The wavy, crimpy red hair is probably the most discernible feature of the Pre-Raphaelite look. To achieve the waves I used my hair straightener. I sectioned my hair with an elastic, working from the bottom of my head to the top to ensure I get all the hair as wavy as possible. Take a section from your hair and using you straightener, clamp it near your scalp and turn the straightener towards your head and hold for a few seconds, then pull the straightener down the hair ever so slightly and this time turn the straightener away from your head. Your hand should be doing a sort of rocking motion that is folding the hair under itself and over itself. Repeat this all the way down, until all of your hair is done and wavy baby. Also, to keep the look as authentic as possible I center parted and crimped my fringe since most of the girls from the paintings do not have a fringe.
Makeup
The Pre-Raphaelite look is a pale one, with glowing skin and slightly dark, sunken eyes with a rosey-red lip. I used this image as my guide. To create this look I did my normal bb cream/concealer/pressed powder routine, and instead of adding blush, I used a light shimmery cream shadow on my cheek bones with my finger in a dabbing motion. For my brows, I tried to make them a bit thinner than usual (although maybe not successful) – I use an angle brush and shadow for my brows and a pencil to sharpen them. For the eyes, I used a mix of a neutral flesh tone shadow and a white shadow on my lid to create a light, glowing base. To create the sunken look I used a mix of brown shadow and blush pink shadow and blended around my top the lid and under my bottom lid, creating a sickly, but striking look. I finished off the eyes with my angle brush and black shadow along the top lid, creating a faint eyeliner. For the lips I used my favourite red “So Chaud” by Mac, although a little less tomato red and more rosey red colour would feel more authentic, but we work with what we got.
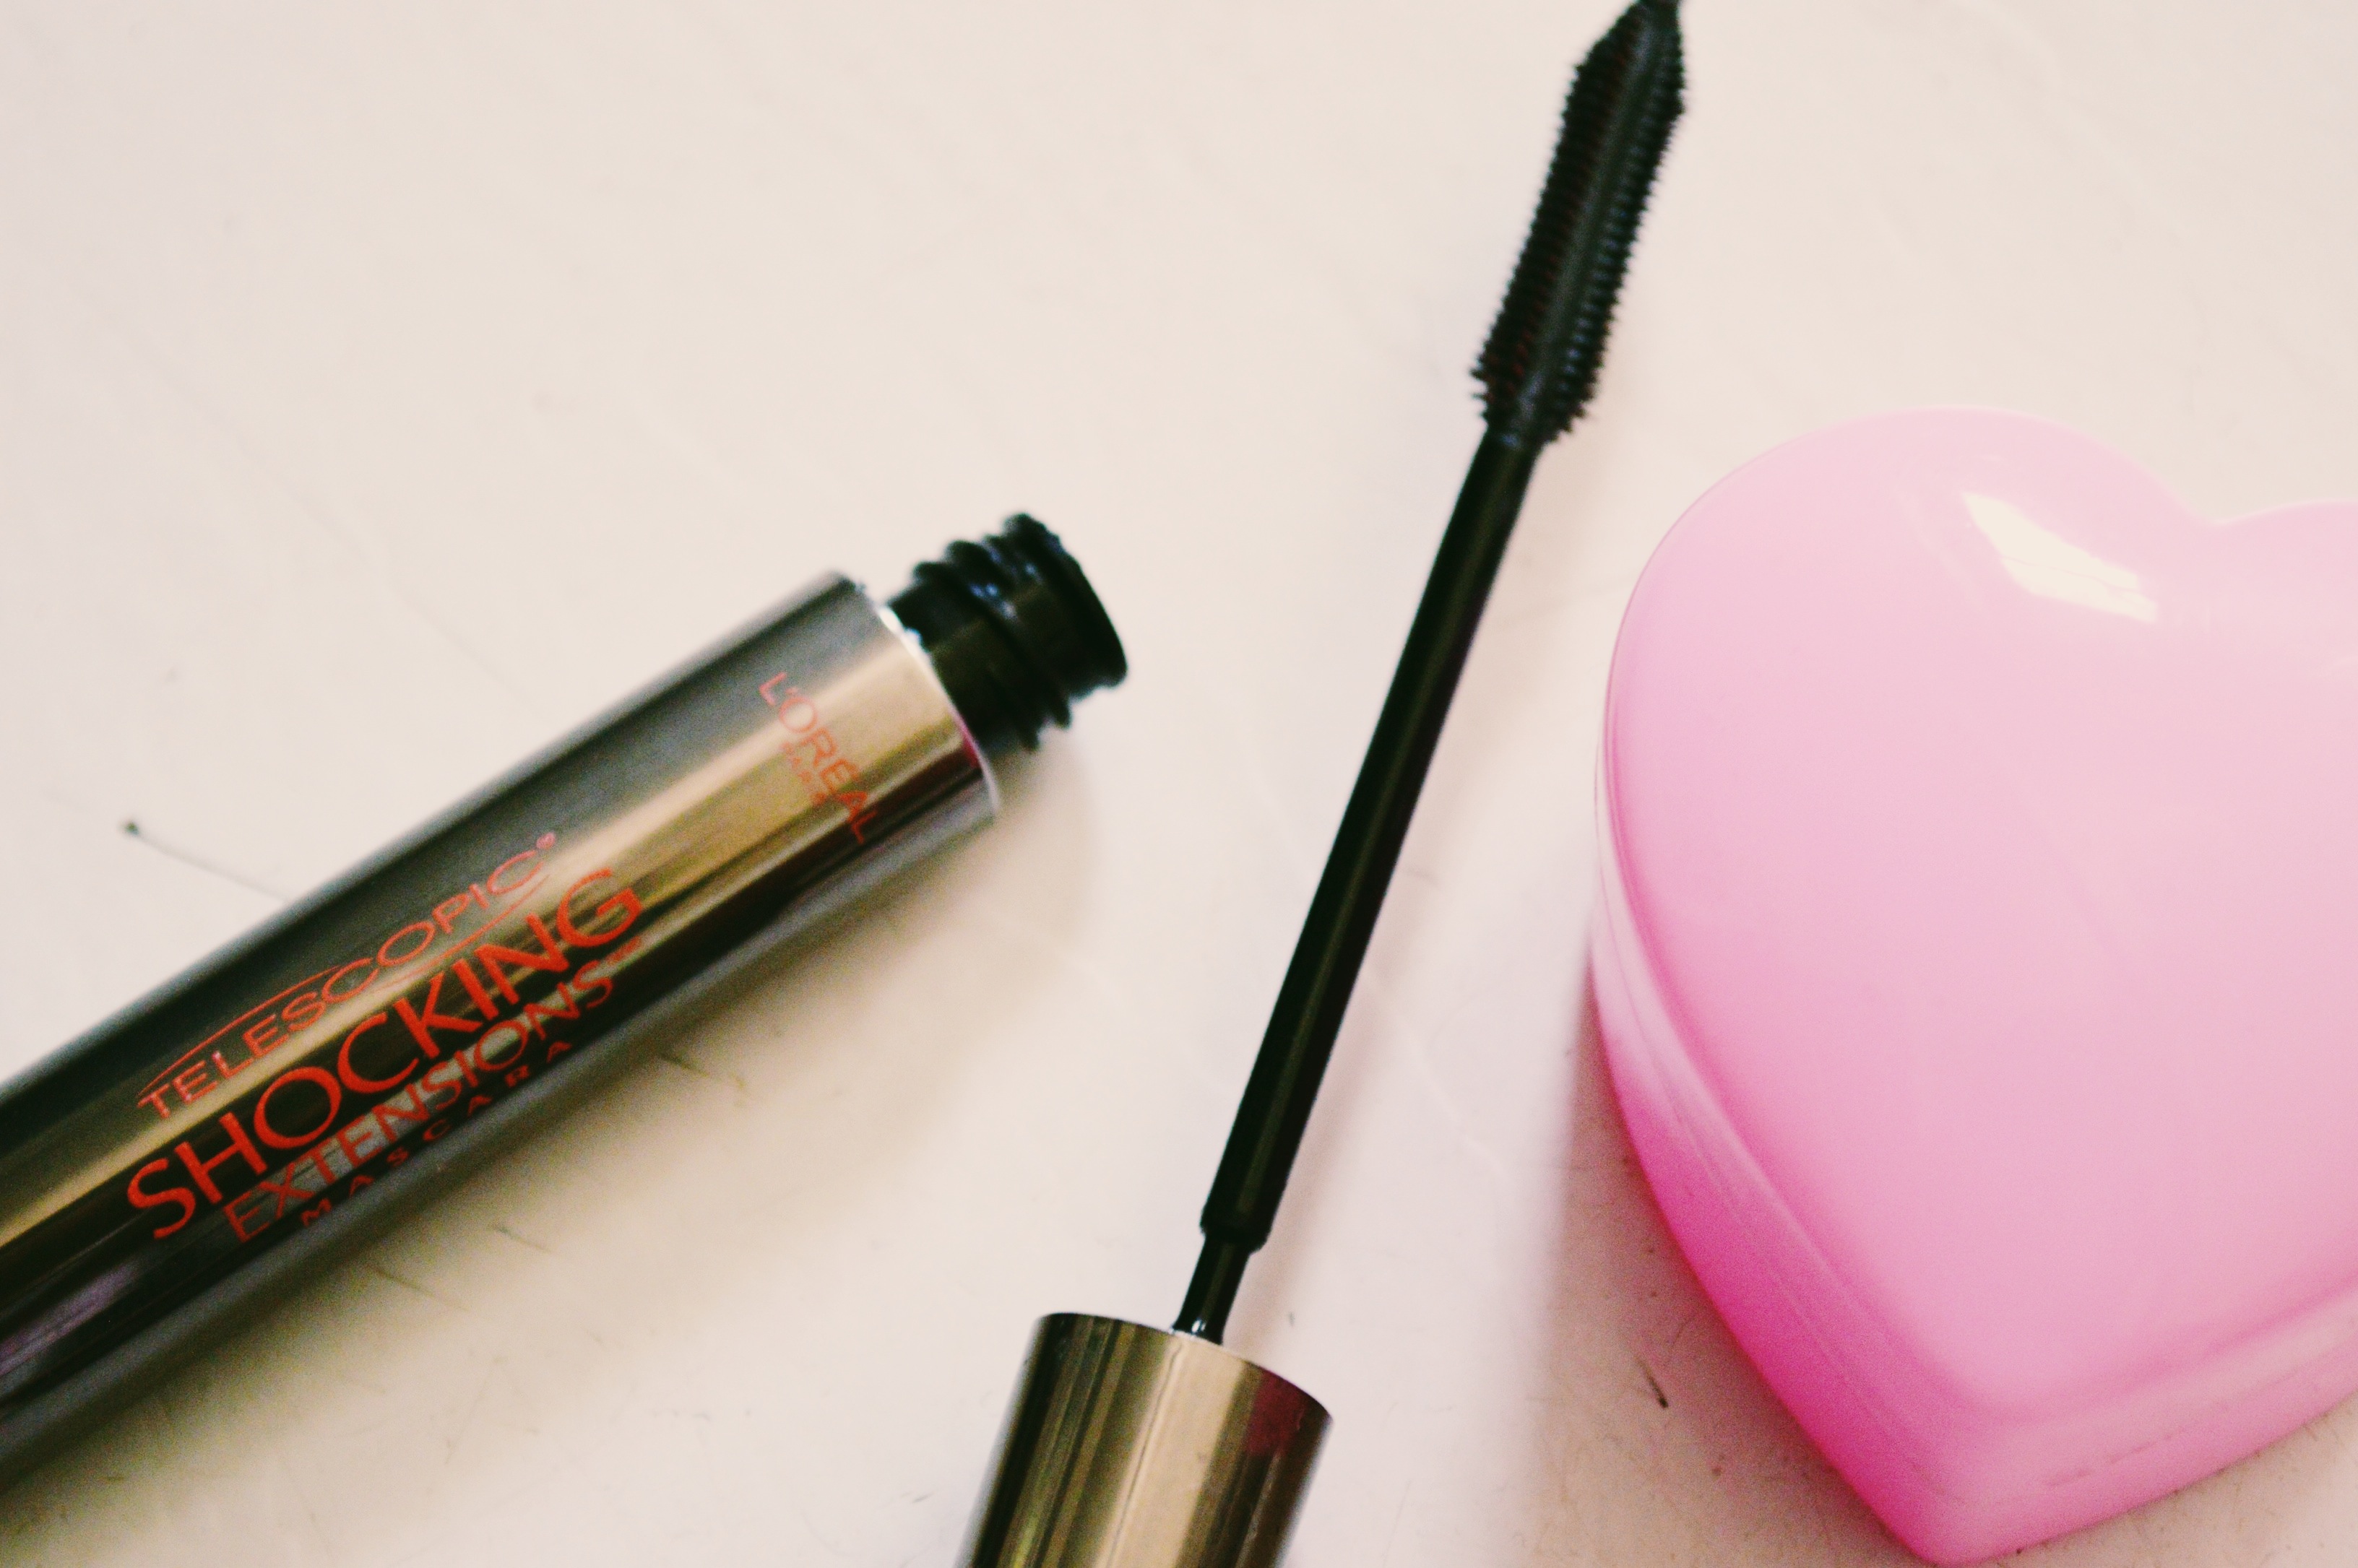
Beauty / My New Favourite Mascara

 Up until very recently I had been using the same mascara for years, for no particular reason other than I’m a creature of habit and picking up that same mascara every time made my tendency to be indecisive far less debilitating. I didn’t give much thought to whether it enhanced my lashes to their full potential or not, and to be honest, I never much concerned myself with that because I have quite long, full lashes that often get mistaken for falsies. But, for one reason or another, I decided to pick up a different mascara and see how it worked for me. And oh boy, was there ever a difference! Enter, L’Oreal Telescopic Shocking Extensions Mascara, a silly name really, but to be honest, quite accurate. If I thought my lashes looked long and full before, this mascara enhanced them in such a significant way. An added bonus is that it lasts way longer than my previous mascara, so I don’t feel the need to apply more throughout the day, and it doesn’t clump! Thank god! I have a tendency to apply quite a lot of mascara because of my ginger, almost invisible lashes, so the fact that it does not clump is a life saver for those of us who need quite a bit of mascara to actually prove we have lashes.
If you are looking for a new mascara, I can’t suggest this one more. I didn’t think I’d ever be so excited about mascara in my life (what has my life come to!?), but here we are. A whole post dedicated to it.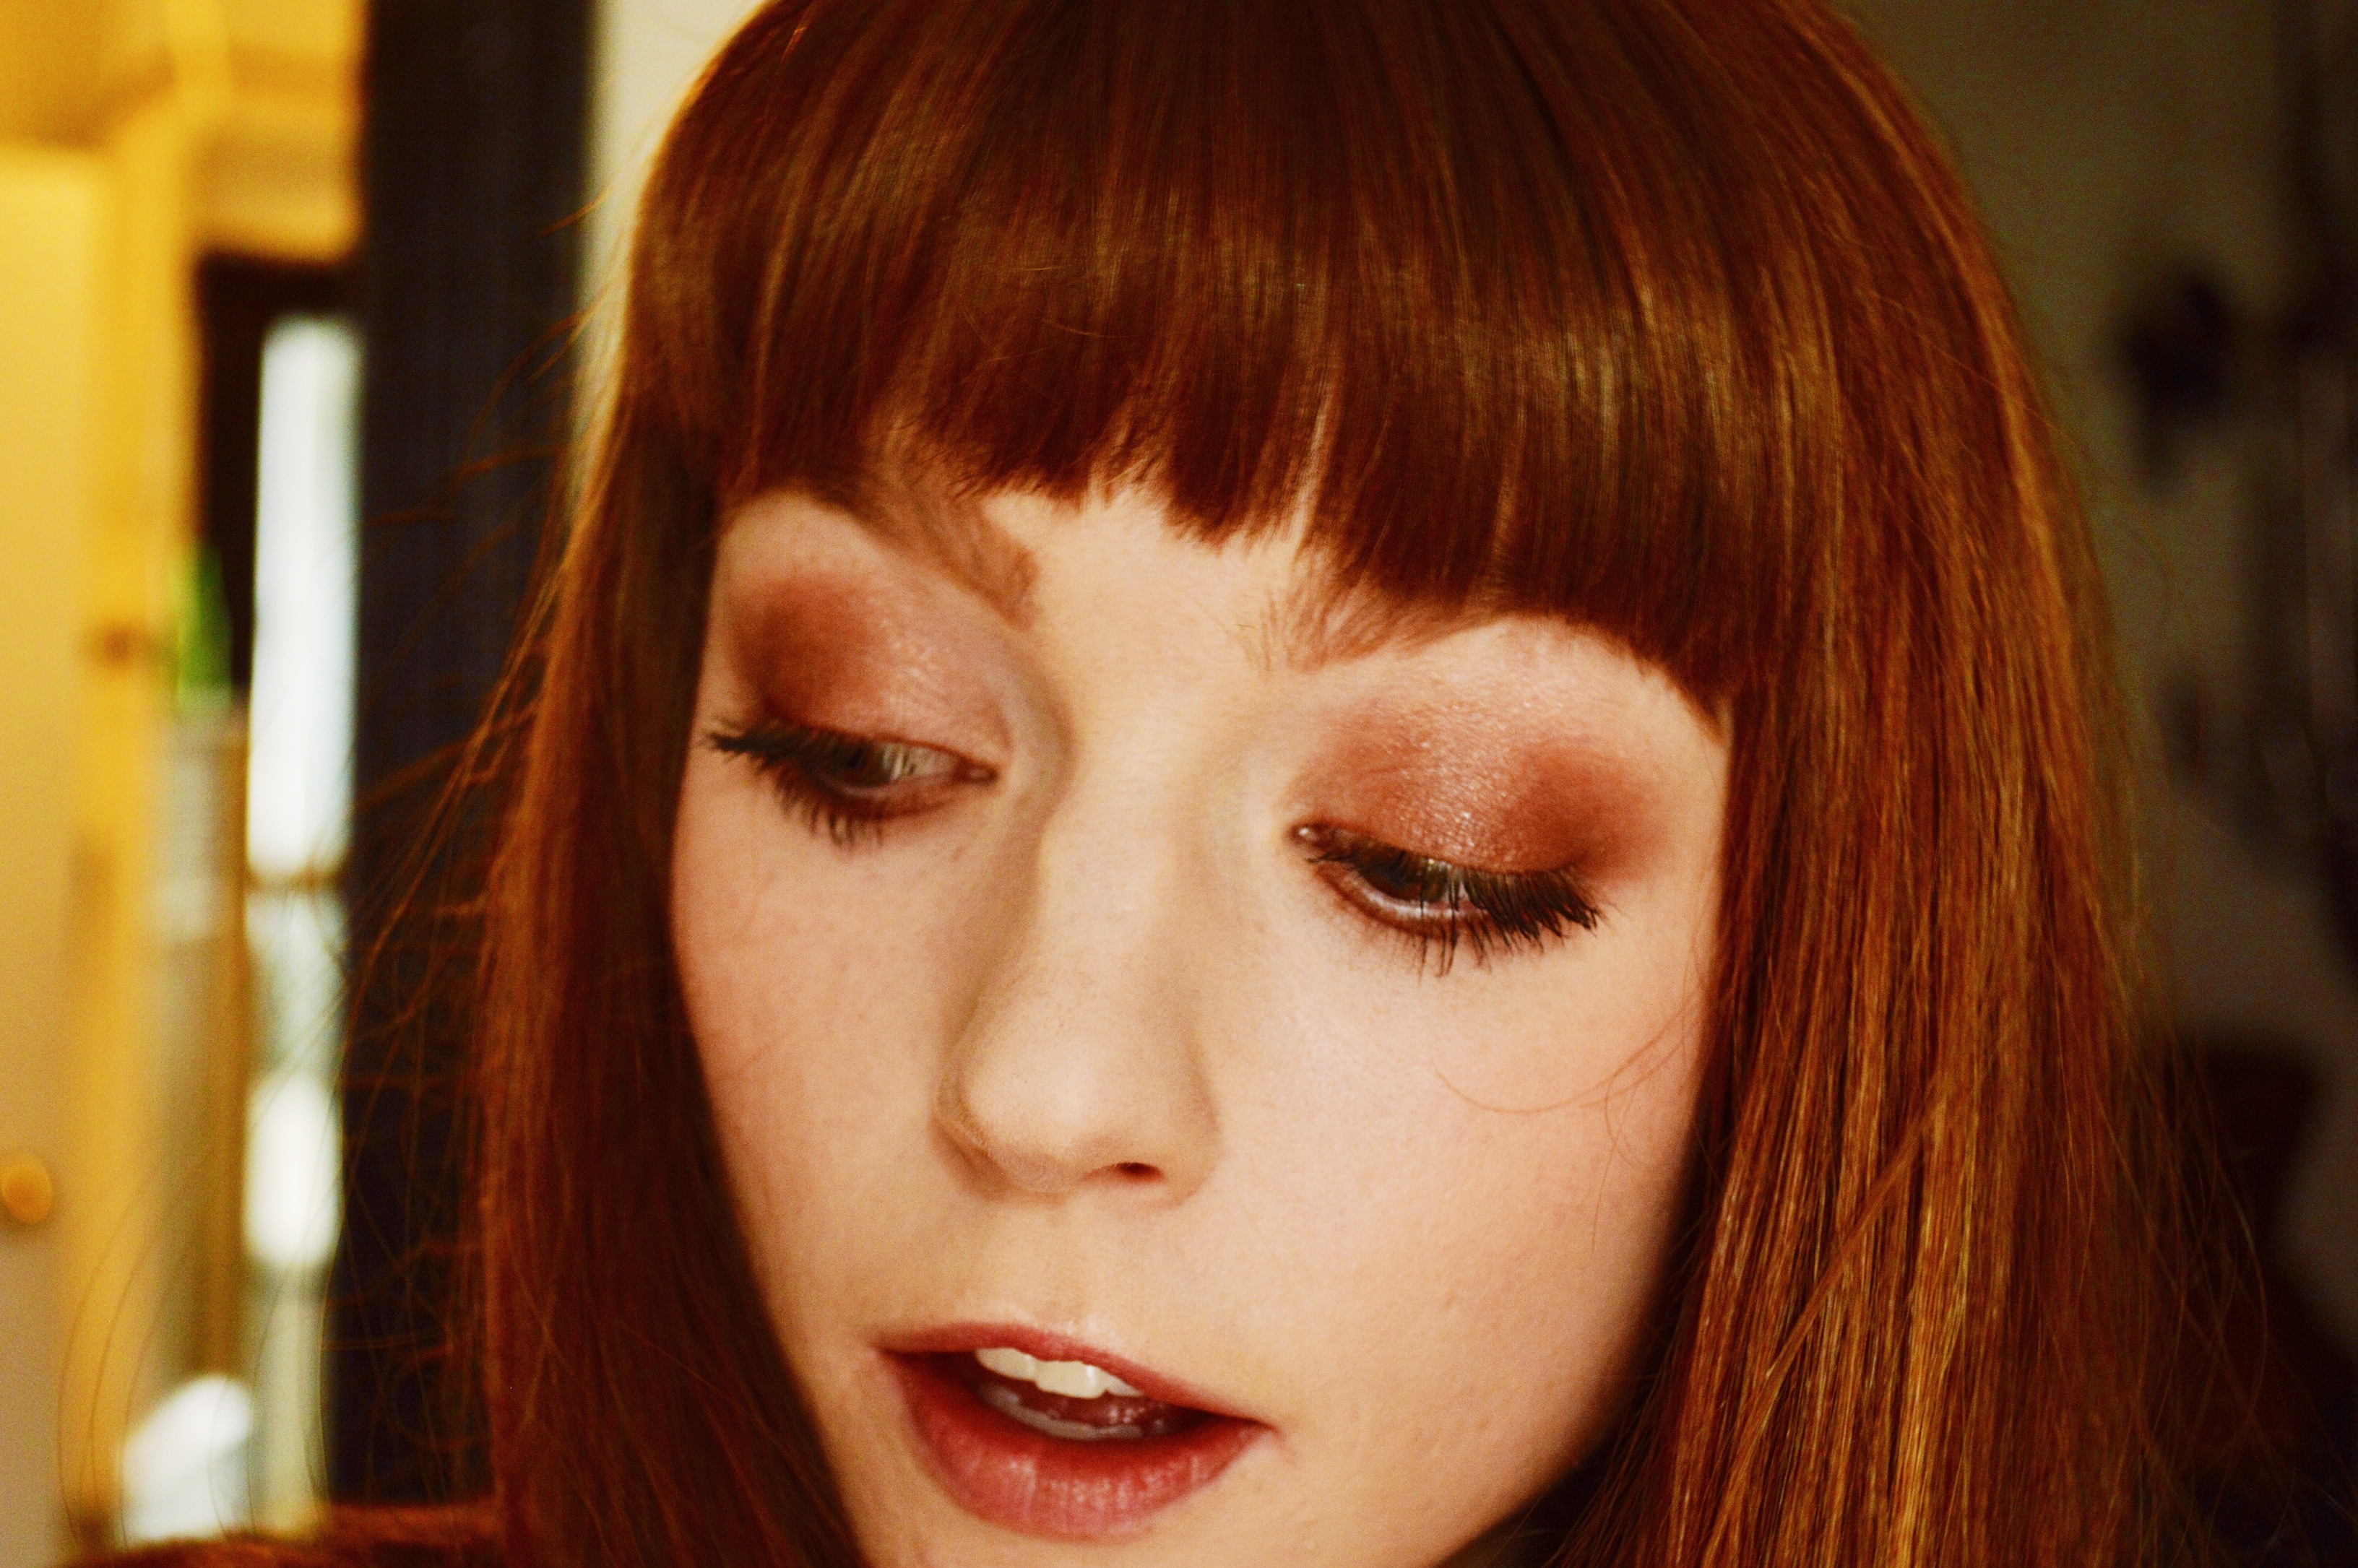

Beauty / Styling My Fringe (Bangs)
 Today I’m going to share how I style my bangs/fringe, each and every day. I’m sure the way I style my fringe is not uncommon, but I do see a lot of people using a straightener to style a straight-across fringe, which I used to do ages ago and that works pretty well, but what I do now I find is longer lasting and gives the right amount of volume, in my opinion. Also, I’m in desperate need of a bang trim, so my fringe is a bit wonky, I apologize for that.
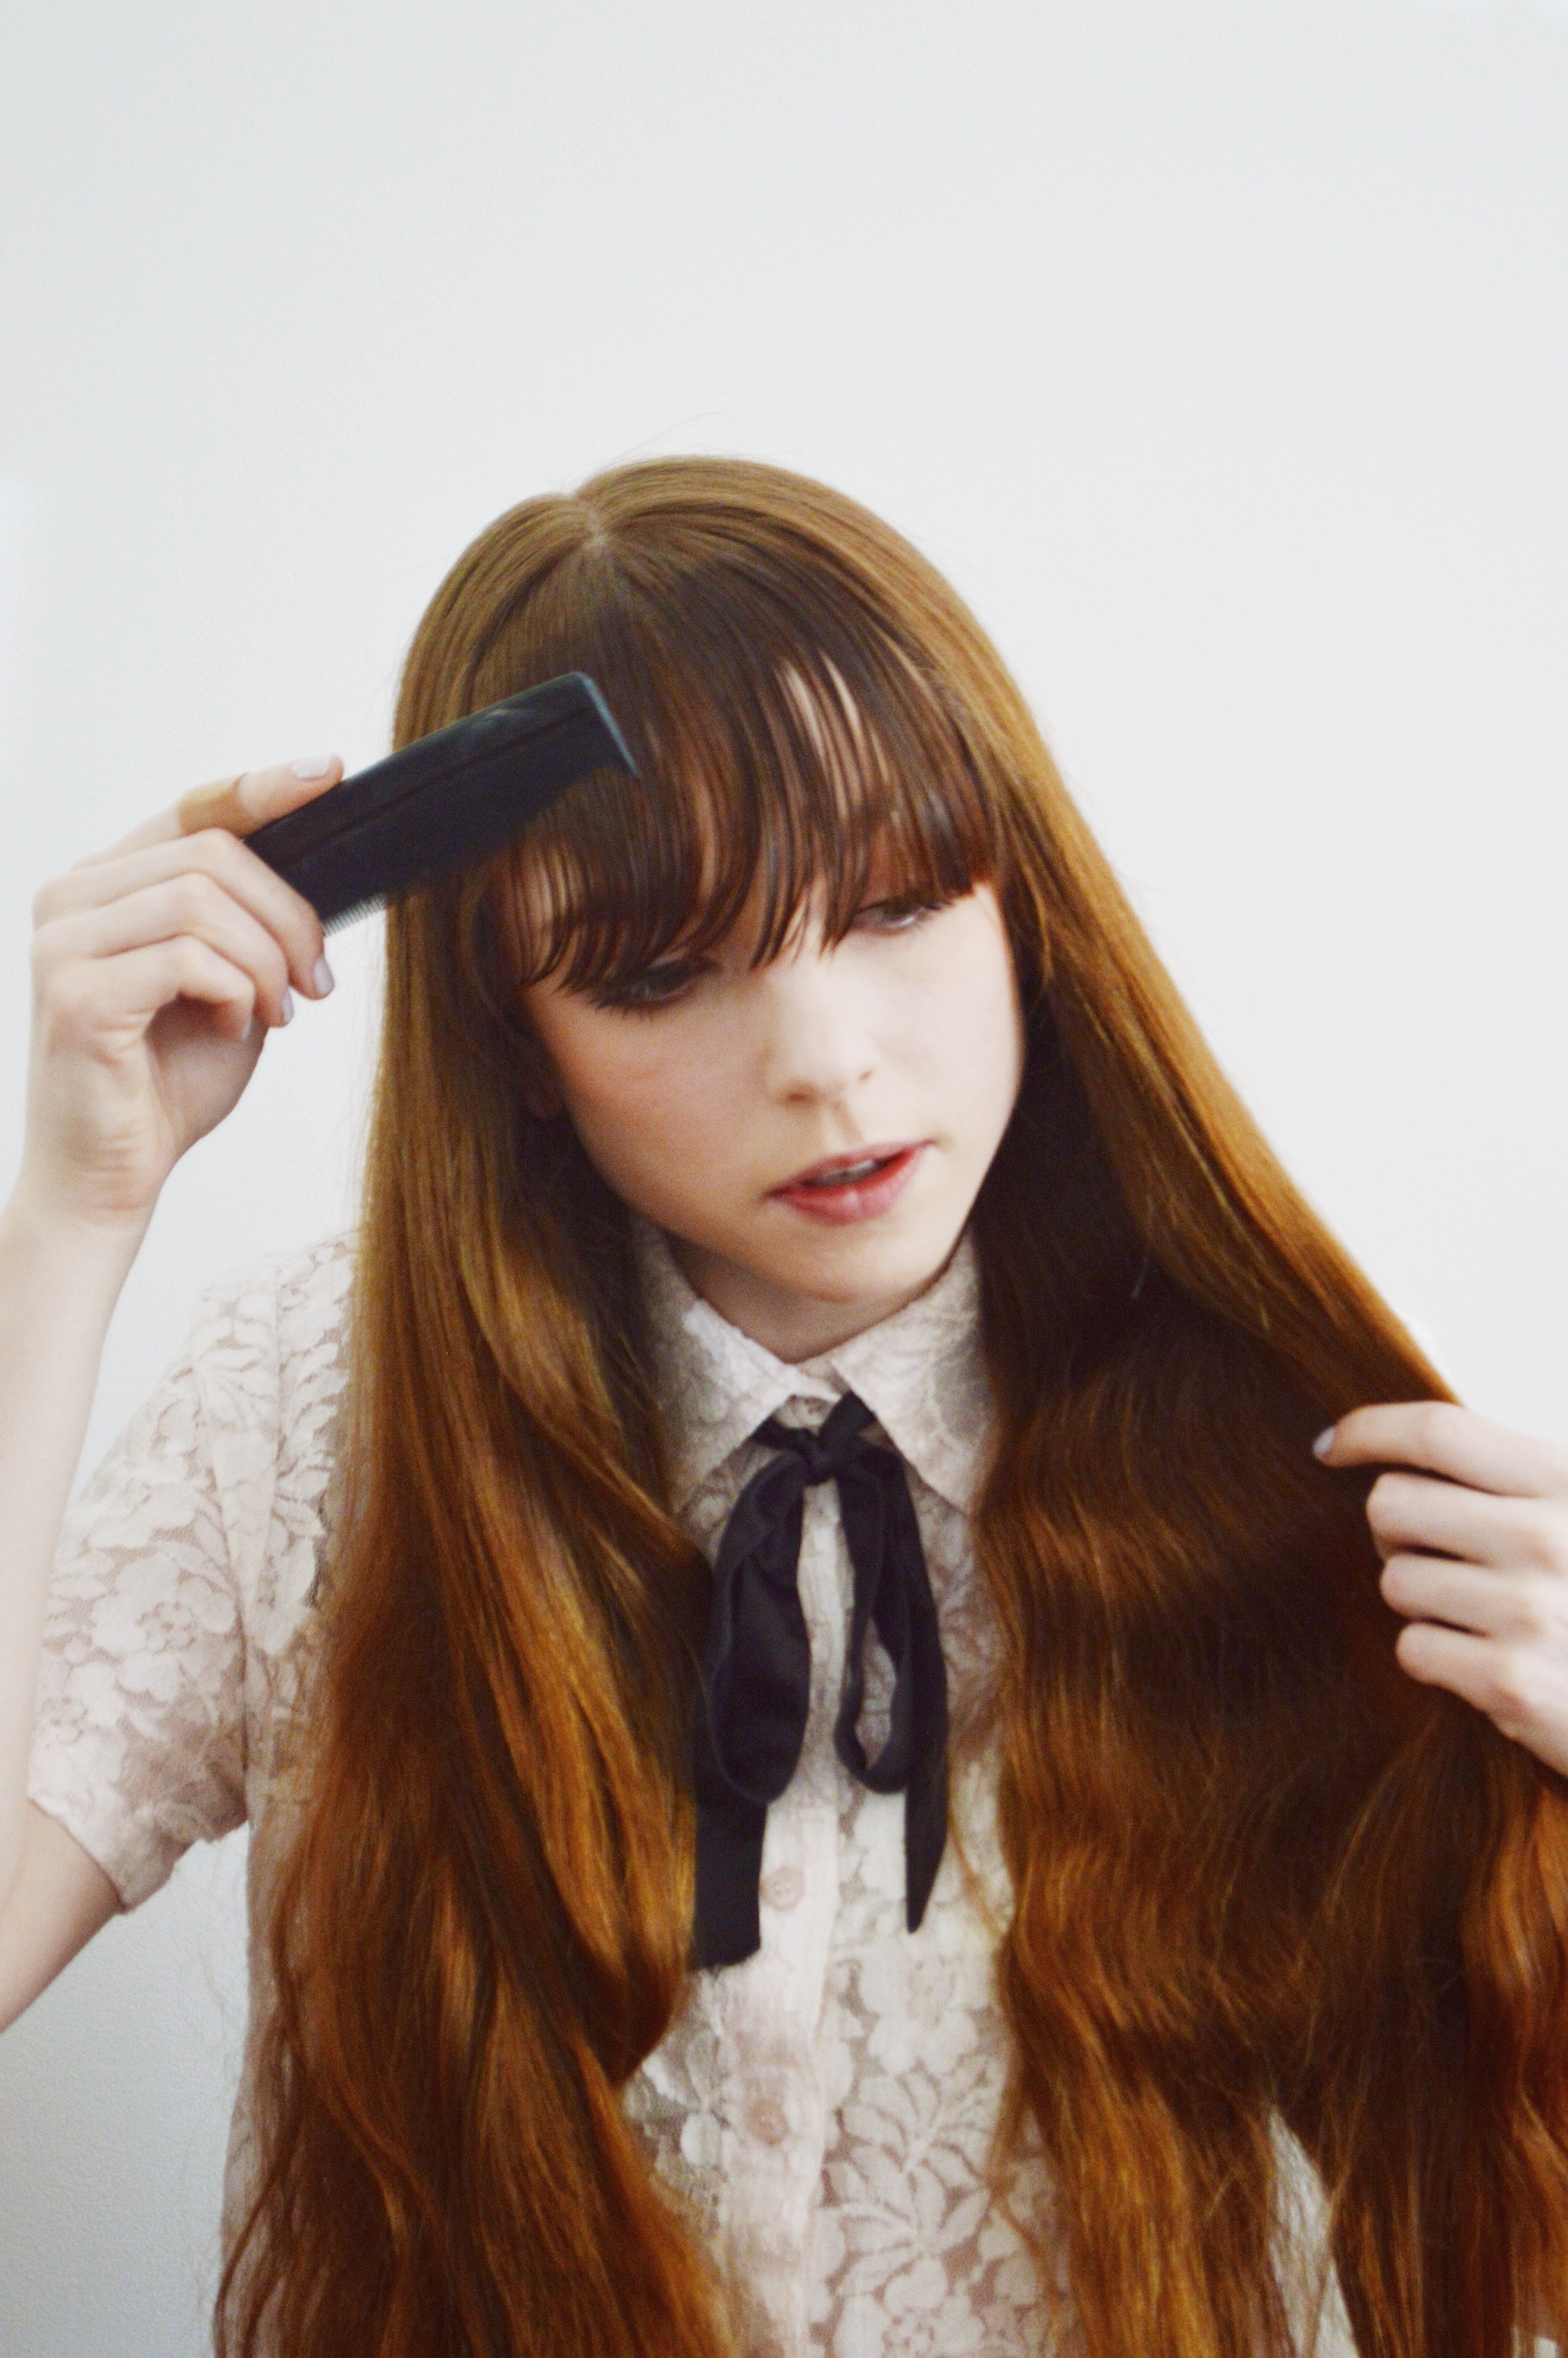
 STEP ONE: To style my fringe, it is an absolute must that my fringe is wet. But since I normally wash my hair in the evening, I wake up with totally dry hair. What to do?! Well, I just run my comb under water and then comb through my fringe, getting all parts of it wet, not to a super sopping wet degree, but just enough that it is malleable and will agree with my blow dryer.
 STEP TWO: Now the styling part! I split my fringe in 3 sections (left, centre and right) and using my round brush and blow dryer I place one section over the brush and dry that section by holding the brush near my hairline and then pulling out (that’s what she said) away from my face. The round brush will create a lovely lifted, round shape to the bangs, that is both bouncy and clean looking. Then I continue on to the rest of my sections, until all is even and dry. Since my fringe often has a mind of it’s own, I usually guide the outer sections in the correct direction so that my fringe covers all of my forehead. To give the whole look an extra lift, I’ll take little sections of hair from the top of my fringe and do the above process again. Side note: you may be thinking, why the heck are you not holding the handle part of your round brush? And the answer is, I’m not sure? It feels more comfortable for some reason.
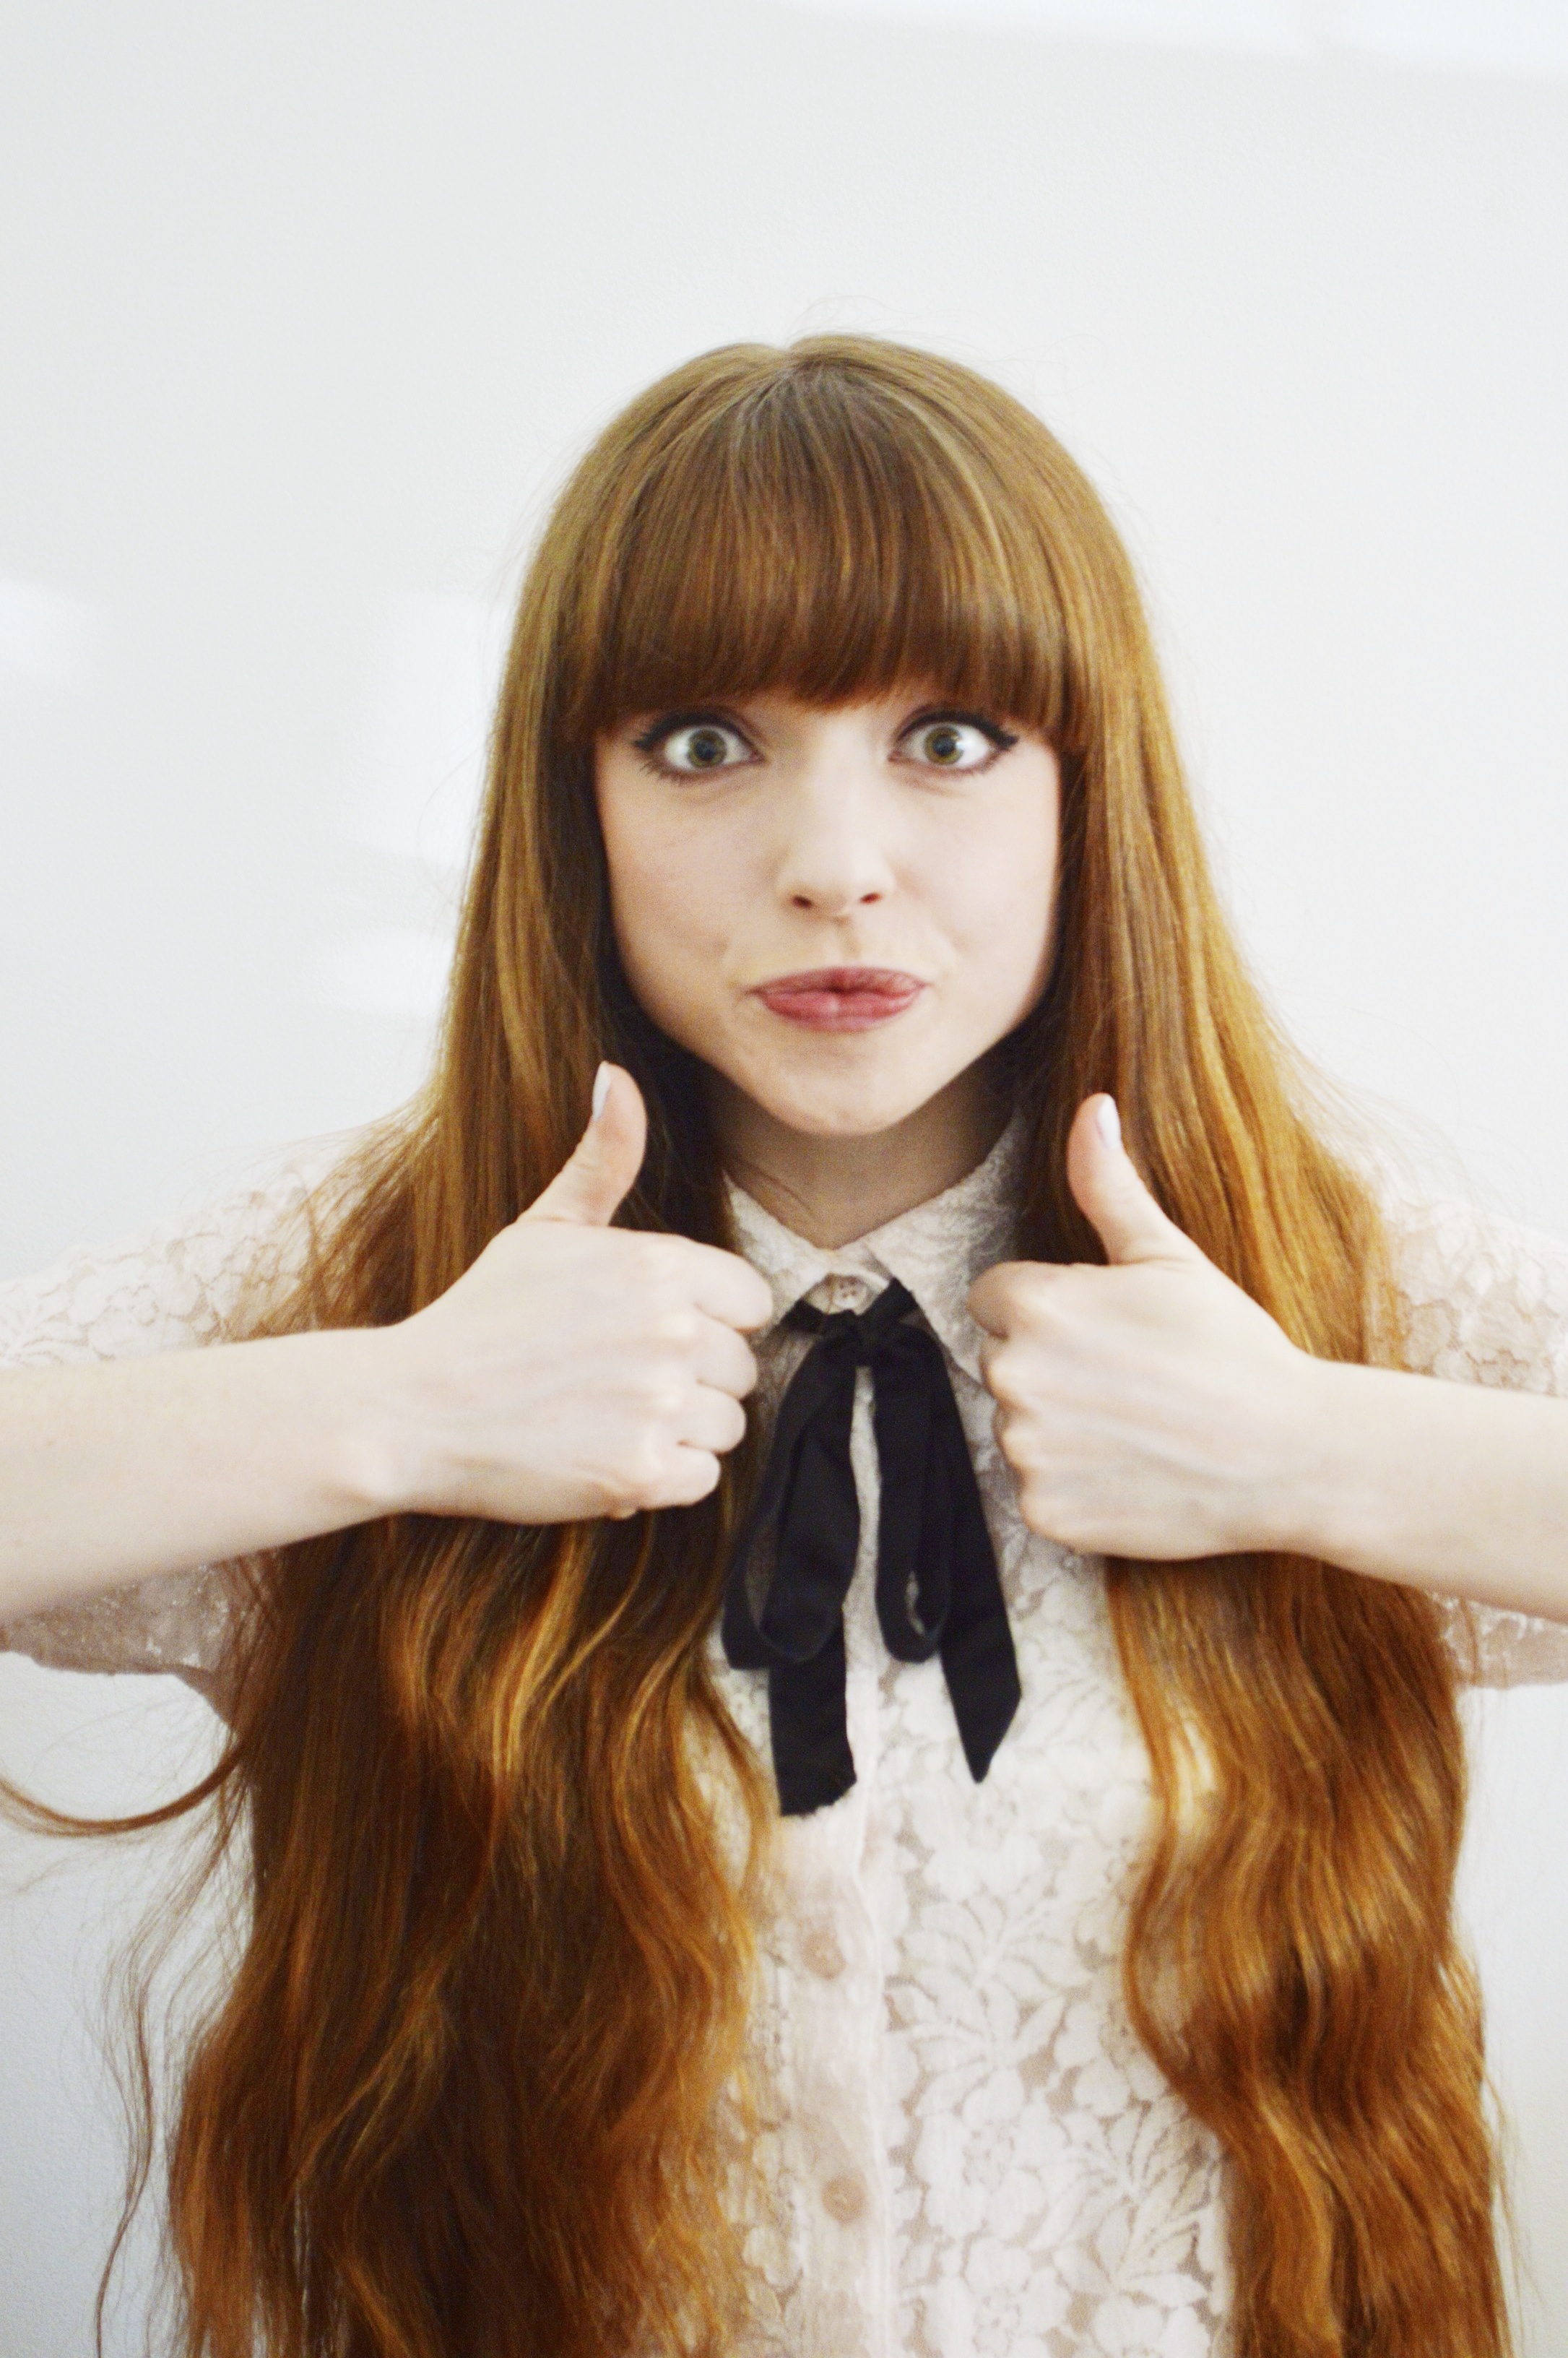 And that’s it! Every so often I give my fringe a little spritz of hairspray after I’m done, but not always. I find this way of styling a straight-across fringe is great for holding on it’s own, with little or no product.
