DIY Wednesday: Rag Rolling Hair

rag1

It has been busy busy around here lately. If doing last minute Christmas shopping/gift making, and working on top of dance rehearsals wasn’t crazy enough, both Meg and I thought it would be a great idea to do an apartment swap within our building. It has been a lot of moving boxes up and down stairs in an old pair of sneakers and jeans with my hair in a messy sweaty bun. Needless to say, there has not been much time to take true care in my appearance. I finally decided Sunday evening I would take some time to myself, drink some tea and rag roll my hair. I thought I’d share a little tutorial on how to do these rags and rolls.

What you’ll need:

  • A head of hair
  • Old t-shirt or towel etc.
  • Scissors
  • Tape measure (if you would like to be precise)

First Step: Making the rags!!! You need to cut up that old – unloved – t-shirt into strips. I did mine about 1″ in width and 7″ in length. This can vary depending on how loose (or tight) you want your curls to be and how long your hair is. I have longer hair, so I cut mine to a longer length and I like smaller ringlets, so I did thin strips. I probably cut the t-shirt into about 25 rags in total. You never really know ahead of time how many you’ll need, but that’s okay! You can always go back and cut more.

IMG_0427

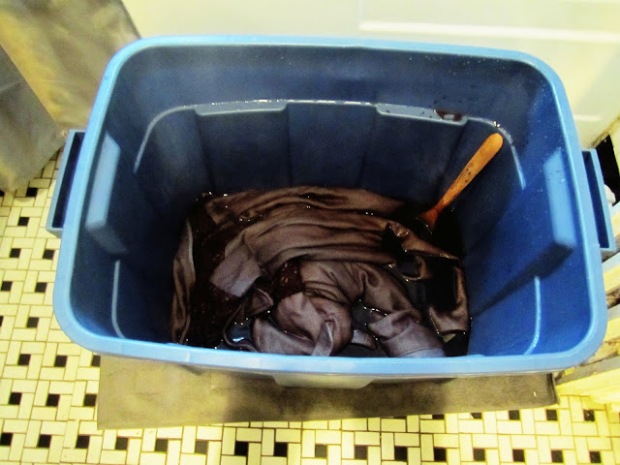
Second Step: Wash dem hairs! Personally, I like to have damp hair to roll with. To be honest, the outcome is about the same with dry or damp, but I find it far easier to actually roll my hair when it’s damp. So that is always something to consider.

IMG_0428
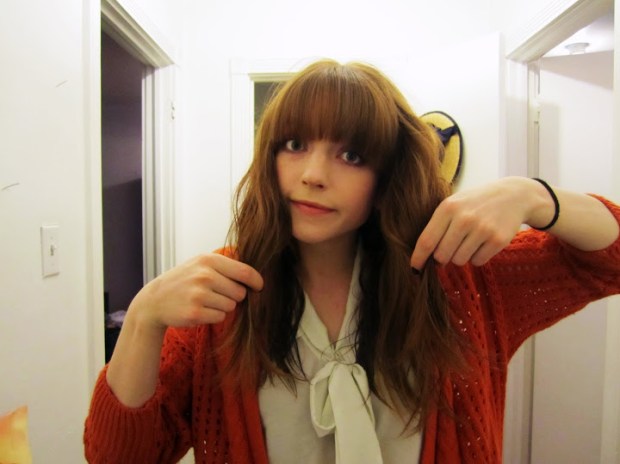
not often I take selfies…was having a moment

IMG_0434

Third Step: Let the rolling begin! Make sure you are wearing a shirt you do not have to remove at any point, or that does not require removal via head…I think the reason for this is obvious. I like to part my hair from bottom to top, starting with bottom layer to do my rolls. Take your desired amount of hair to be rolled, whether that be a clump, chunk, piece, strands or bundle does not matter, this is your life! Wrap the end of your bundle around the rag, and roll it up. Once you are at the top, tie your rag into a single knot. Voila! First roll, a success. Now continue on with your entire head.

IMG_0436

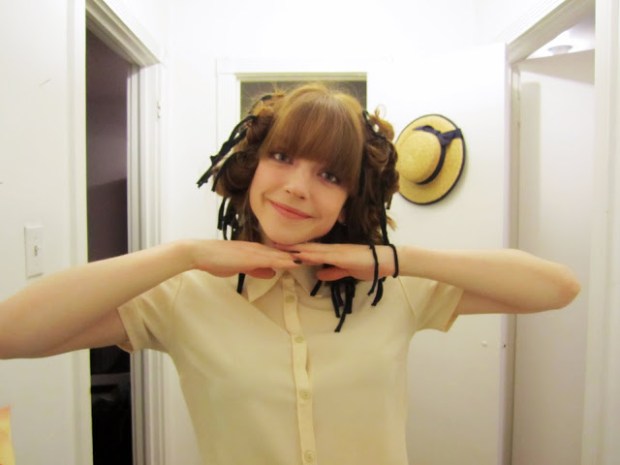
Eventually, you will look darling like this. I like to call her spider head.

IMG_0438

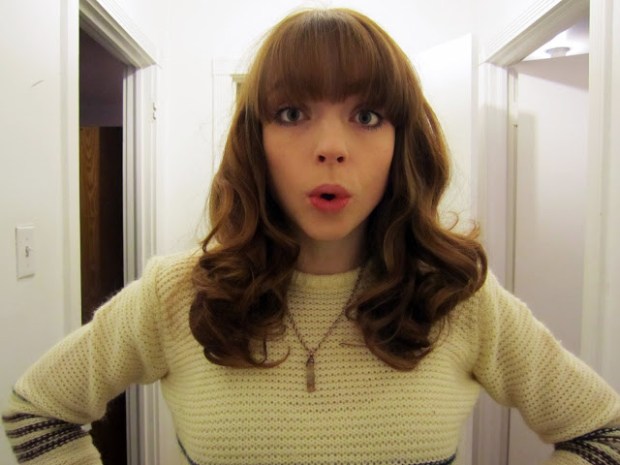
Fourth Step: After I’m all done I like to sleep with my rags in and take them out the following morning. Once I take them out, I tend to look like this, so personally, I like to brush out my curls to give a more voluptuous 1970’s look. But if  you don’t suffer from Annie syndrome, you can leave them as perfect little ringlets if you so desire.

IMG_0441 (1)

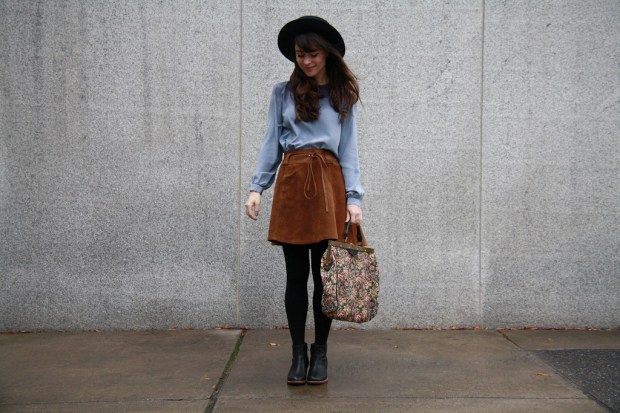
Now go forth and take on your day, anything is possible with a head of curly locks!

Cold weather outfits we love

8241374471_7d3ae65218_o

Maria from Hickory & Juniper

This week has been totally insane for Alex and I. We’ve been busy with, what might be, the most ill-timed apartment swap situation of all time. That’s done now though, and we’re a little freer to get into the holiday spirit by doing things like baking cookies, drinking mulled wine and wrapping Christmas presents.

Last night we shot Larkspur’s first lookbook, which we’ll be giving you a sneak peek of on Thursday, and we’re so excited about it. Kira worked her magic, just like we knew she would, and made everyone and everything look even better than we’d hoped! So stay tuned for that.

Today I’m at home sick with tonsillitis, so you’ll have to forgive me if most of the outfit photos I’ve rounded up involve big comfy sweaters, or warm looking coats.

My plan is to spend the rest of this day swaddled in blankets reading blogs, drinking tea and watching Christmas movies. I hope you’re all ready for my favorite time of year!

8282181067_2dafb55be1_b

Lauren from Blooming Leopold 

8260865709_0449b71f65_o

Rhiannon from Liebemarlene

©Richard Davenport, London UK, Mademoiselle Robot

Laetitia from Mademoiselle Robot

8223375854_261f77016f_b

Liz of Olive My Love

Posted by Meaghan

Missing Summer & Muskoka

Since moving away from Montreal, the thing I’ve missed most – more than anything else- is being able to spend time with my family. The nice thing, though, (I guess) about living farther away, is that it becomes such a treat when you finally can all get together. The last time my parents and sister came to Toronto to visit, we all drove out to a cottage my Mom rented in the Muskoka region, and the whole weekend was perfect.

This post is a little out of context, seasonally speaking, but with the weather being all cold and gray and dreary lately, I was already missing Summer, and then I found these old photos in my nightstand drawer, and got even more nostalgic for bare feet and breakfasts of honey dew. And so, this post was born.

The cottage my Mom picked out was rustic-in-the-best-way, and had canoes and a dock for jumping off. The whole thing was surrounded by woods and the inside of the cabin had walls of books, a wood burning stove, bunk beds with old family heirloom-y quilts and it smelled like cedar wood and campfires.

We spent the weekend doing tons of reading, and watching scratched up Liam Neeson VHS movies and swimming and eating (we made s’mores in the oven when it was raining out one night – it was my Dad’s first time eating one!). My sister, Allie and I went for a canoe ride out to a little island and jumped in the water, but we both got a little spooked by how dark the water was and we hopped right back in our canoe and paddled back home.

It was a perfect weekend and ended all too quickly. I was really sad watching them all drive away, but now Christmas is coming up and I can’t wait to spend a few more days making crafts and singing old camp songs with my sister, and baking cookies with my Mom, and gossiping about neighbors with my Dad.

– Posted by Meaghan

DIY Wednesday on a Thursday: Hand Dyeing a Winter Coat

edited coat finished2

I bought this coat two years ago, when I saw it on a mannequin in one of my favourite stores. I tried it on, loved it, and had to have it. As soon as I got home, I tried it on again and became very unsure about it – due to my fear of ruining something white/looking like a marshmallow  – and then never wore it again. I finally decided I needed to make use of this coat, and if I couldn’t accept it being white, then I would make it another colour. I wanted to make it brown, as I don’t have a brown coat in my wardrobe. So here is a tutorial on dyeing a coat , or any article of clothing.

WHAT YOU’LL NEED:

  • Article of clothing – make sure to read the label!!! Natural/organic materials like wool or cotton take dye beautifully. Synthetic materials like polyester or viscose…not so much. If you do wish to dye something polyester make sure to look for the correct dye, its out there, just not easy to find.
  • Dye of your choice – I used 3 boxes of Tintex brown that I got at Home Hardware (make sure to read the box to know how many packs you will need based on the weight of your garment)
  • Bucket – again, the size of bucket depends on the garment you chose
  • Spoon – or anything to stir with
  • Water – I hope you know where to find water

edited materialspeek-a-boo! there’s gus!

FIRST STEP:

Boil water! Your garment will need to be submerged in the boiling water, so make sure to boil enough so that can happen. I had to boil like 4 pots of water and 2 kettles full to get the right amount, and even then it did not feel like enough. After your water is boiled, pour it into your bucket. I assume like most people, you only have 4 elements on your stove, so this may be a few steps of pouring and re-boiling.

IMG_0341

SECOND STEP:

After all your boiled water is in your bucket, pour your dye into it and stir it all up! You can then submerge your garment in the water. My box read that I needed to continuously stir the garment for 20-30 mins. I assume most packs will be the same, but make sure to read yours just in case.

IMG_0351steamy!!!

THIRD STEP:

Once your 20-30 mins of stirring are up, pour your hot water and garment into the bathtub. Now its time to rinse the garment with cold water. This may take awhile depending on the material. Mine was partly wool, so it took quite a bit of rinsing before all the dye was gone. Just rinse and rinse until the water goes clear. Make sure not to ring out the garment after its been rinsed. Just lightly squeeze out the excess water. And then hang it to dry! This will be many hours of that drip sound into your bathtub.

Now, I was so silly and thought my coat was 100% wool on the outer layer and viscose on the inner layer. I presumed the exterior layer would take the brown wonderfully and the interior would not really, but that did not bother me. Unfortunately it was actually made of wool and viscose. So the crochet part of my coat took the brown, but the rest became a lavender colour. It actually turned out nice, but I really did want a brown coat you guys! So I may go buy some dye for synthetic material, or just dye it black and it will become grey-ish (i think). Regardless, it is a fun little experiment that can make you feel like you just got something brand new.

IMG_0410

Posted by Alex

Blooming Leopold

Coriander Girl 1

We were lucky enough to be asked by Lauren – the beautiful little mastermind behind Blooming Leopold – to put together a guest post about our favourite Toronto based holiday traditions recently. Lauren is a long-time favourite blogger of ours here at Larkspur, and is also someone I very quickly established a personal friendship with over an iced coffee date a few Summers back when I was travelling through the US. If you haven’t already (which I’m sure you have) check out her Etsy shop, where she sells a mix of perfectly picked vintage and amazing one of a kind hand made designs. And, if you’d like to see more pictures and read a little bit about Alex and I’s favourite Toronto spots, you can click here to see the guest post!

House of Vintage 6

The Mascot 3

Coriander Girl 6

Coriander Girl 2

House of Vintage 5

Posted by Meaghan