The Scadding Cabin

019_19

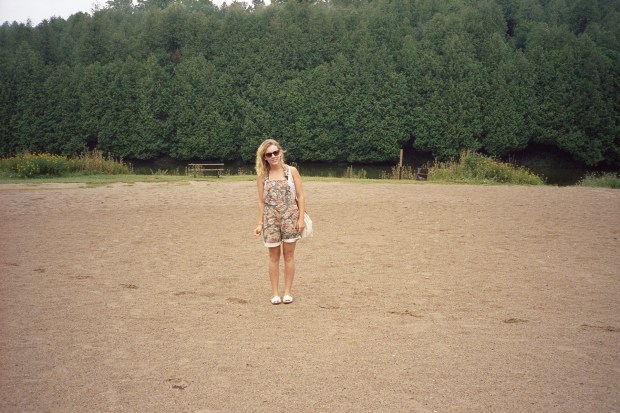
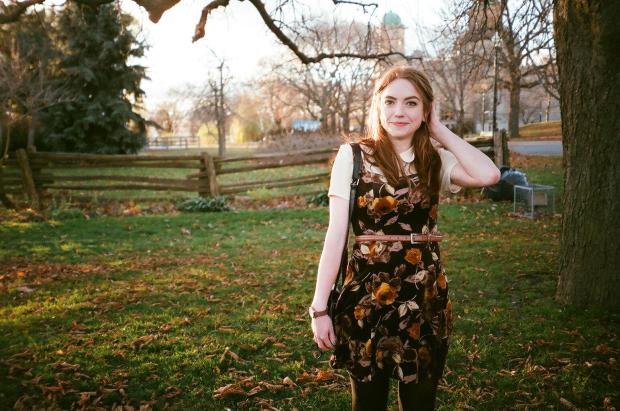
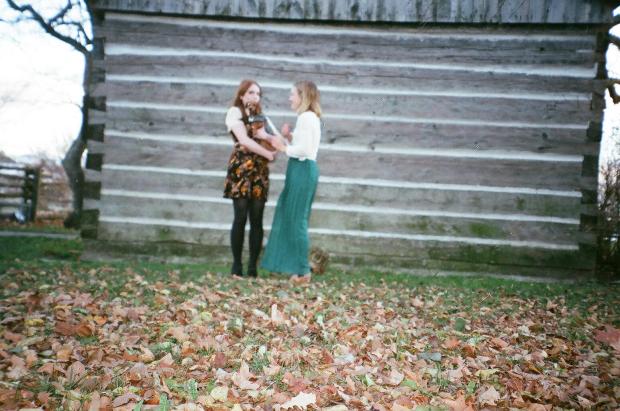
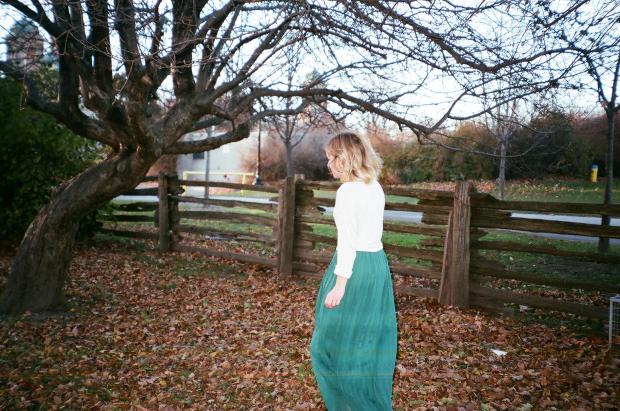
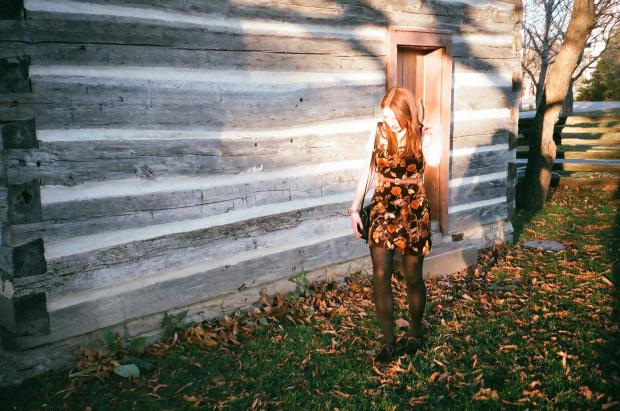
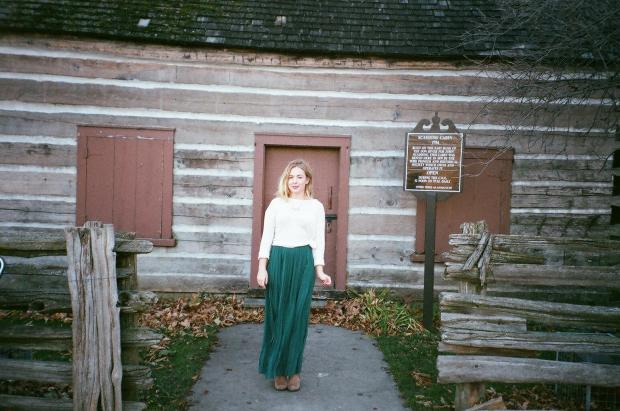
Last Saturday, Alex and I went for a walk, determined to take some blog photos despite the cold. We walked over to The Scadding Cabin which is just down by Lake Ontario, at the bottom of our street, and the light was so perfect, we decided it would be fun to take film photos instead of digital ones.  Neither of us know a thing about photography, so we just kind of let the scenery and the sunset do all the work, and we are pretty happy with how they turned out…. It made us both want to learn a thing or two about film cameras, though, so that we can take even nicer ones in the future. These are our favorites from the roll of film we finished.

009_9

021_21

007_7

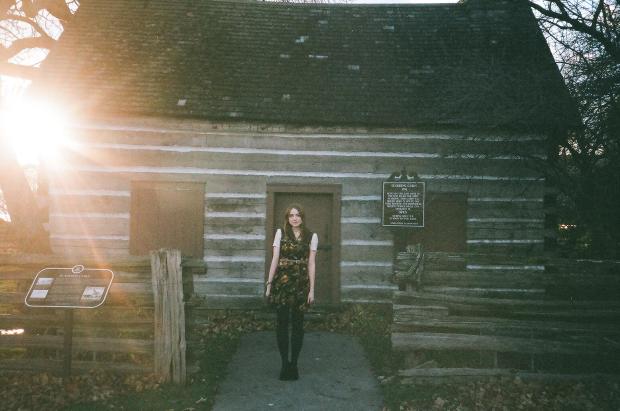
The Scadding Cabin, as far as I can tell, doesn’t have a very exciting, or scandalous history (except, maybe for the fact that John Scadding was killed by a falling tree), but it is the oldest building in Toronto!

The cabin was build in 1794, by John Scadding, who managed Colonel John Graves Simcoe’s estate back in England.  John Scadding followed his employer to Canada in 1792 and built himself a tiny little one bedroom log cabin which burnt down, so he built himself another one, which is this one here. The cabin was moved from the east bank of the Don River, where it was originally built, to the Exhibition grounds, by the York Pioneers and Historical Society as a historical exhibit for the first Industrial Exhibition.

Apparently they open the cabin up for visits every year at the Canadian National Exhibition, which Alex and I actually went to this Summer, but we must have been too distracted by tilt-a-whirls and broken down fun houses to notice. Maybe next year we’ll take a peek inside.

025_25

017_17

012_12

010_10

024_24

020_20

013_13

016_16

Outfit Details:

Alex:

Velvet floral jumper, blouse, belt and bag: Thrifted

Watch: Nixon

Black desert boots: Aldo
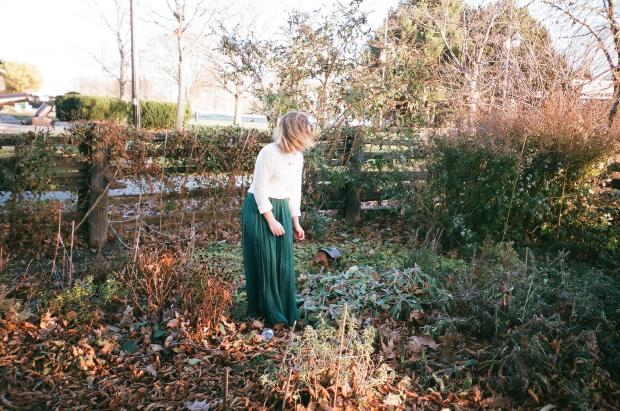
Meaghan:

Sweater: Brandy Melville

Skirt: Urban Outfitters

Tan chelsea boots: Asos.com

Posted by Meaghan

Etsy How-To: Lookbooks & Kira

Well, we hope this doesn’t start to sound like we’re writing these posts just to brag about all of the talented friends we have, but truthfully, we do consider ourselves really lucky to be surrounded by some of the most wonderful, (generous), creative people!!!

In this case, we’re talking about our very good friend Kira, who just so happened to appear in our pumpkin picking post earlier this week (she’ll likely pop up in a lot of things we post!) …

Kira is currently working over at eLuxe,  constantly turning out awesome editorials for them, and photographing everything for the online shop. But, besides having a really cool day job, Kira also happens to take beautiful pictures that we both absolutely love! There was never a question that we were going to ask her to shoot our first lookbook, and we’re really excited about working with her on it. We’ll leave you with a few pictures from her website and blog- including one or two from the day trip we took to Elora Gorge this Summer – since we aren’t quite ready to show you what we’re working on together just yet…

We won’t go on about the importance of having a lookbook, because we don’t think they’re a necessary part of selling on Etsy. That being said,  they’re a really great way of promoting your shop and giving people a sneak peak at what you will be listing in the shop. It might keep people coming back if they see something in your Winter collection that they are coveting! Not to mention, that with things like Tumblr and Pinterest out there, it never hurts to throw a pretty picture up, because people are likely to share, and that’s a quick way to get more attention for your shop.

We happened to know right from the start that we wanted to put out “collections” and corresponding lookbooks to promote them. Selling vintage may not be such a “collection” oriented branch of online retail, especially since we plan to be perpetually updating the shop with new items, but, we thought it would make the whole experience feel more like a project – plus it will just be fun!

Check out her website here & be sure to follow her Tumblr (it does not dissapoint).

*All photos belonging to Kira

-Posted by Alex and Meaghan

DIY Wednesdays: Chalkboard

It was (also) Meaghan’s birthday very recently, and keeping in check with being a lover of homemade gifts, I decided to make her something. Meaghan had expressed to me before that she wanted to paint a small wall in her apartment with chalkboard paint. Having such a busy schedule she has still not had a chance to do that. So I thought – for the mean time – I could make her one.

My original thought (and still something I would like to do) was to find an old cupboard door, mark off a rectangle in the centre with painters tape and paint the inside of that rectangle. Unfortunately, I had no success finding this cupboard door (curse you!), so I scrapped that idea and decided to use an old picture frame and just paint the glass. So here is a little tutorial on making a old picture frame into a new chalkboard!

WHAT YOU’LL NEED:

      • Old (or new) picture frame with glass – can be found at thrift stores such as Value Village or Salvation Army
      • Chalkboard paint – easily found at a hardware store. I would like to note that chalkboard paint is not my (or your) friend. It is near impossible to get off your hands or pretty much anything, so take caution and wear gloves!!
      • Small paint brush – hardware store, or maybe even the dollar store
      • Painter’s tape – same as above!
      • Twine – I found this at the dollar store
      • Hammer and nails – dollah’ store
      • Chalk – dollah’

FIRST STEP: Remove the glass from the frame you have chosen. Make sure to wash off any dirt or smudges on the glass. If it is not possible to remove the glass, that’s where the painter’s tape comes in handy. In my case, I needed to do both. I ended up making two because I did not love the original one I made. If you have removable glass, simply put the glass on top of cardboard, newspaper etc, and begin to paint. If you cannot remove your glass, no worries! Mark off the edge of the frame with the painter’s tape. Make sure it is right against the frame, if not, you may end up peeling off some paint when it’s dry. Try to have your brush strokes going in the same direction for the first coat.

SECOND STEP: After you have finished the first coat, let it dry for about 2 hours. Once it’s dry you can apply the second coat. Do your brush strokes in the opposite direction of your first. This way the whole thing gets covered. Again, let it dry for 2 hours. Once it is dry you can either put the glass back in the frame, or start peeling off the Painter’s tape. Be careful if you are using the tape. Slow and steady wins the race, you don’t want any paint chipping off.

THIRD STEP: After I was done peeling off tape and inserting glass into the frame, I hammered 1 nail into the top right corner of the frame (it is helpful to know if this gift is for a left or right handed person). Once the nail was in place I wrapped some twine around it and tied it into a knot. I played around with the twine a little to make sure it would reach across the board with no issue, so she would be able to write anywhere she liked. After I did that, I cut the twine and with the loose end tied another knot around the chalk.

And that’s it! It’s very easy to make (if you heeded my warning and wore gloves) and if you can find a really neat frame, it can be a great addition to your home décor!

Posted by: Alex

Red Valentino A/W ’12

Okay, so I’m pretty much obsessed with everything about this collection. Red Valentino‘s A/W ’12 collection is a compilation of everything I love when it comes to styling, colors/fabrics, femininity and vintage-looking clothing. The light/deep rose, cream and off-white fabrics call to me. I know I had previously said I’m not usually a fan of big labels, but I can make an exception for something so perfect. It’s filled with cute collars, pretty ruffles, lace trim, drop-waist minis paired with knee high socks and the military style cape! The collection features 2 pairs of trousers, which, if I wore pants more often, those would be it. It almost speaks to my fashion aesthetic…skirts/dresses everyday and pants once in a blue moon. The calf-length dresses with long sleeves and high neck lines have an amish-feel to them, which I don’t have a problem with at all.  I don’t, however, much like the shoes. That is okay though, the good out-weighs the bad.

Posted by: Alex

Pingle’s Family Farm

I’ll take any excuse I can to get out of the city once in a while, even if it’s just for an afternoon. So, when Kira suggested that a few of us go to a pumpkin patch to pick pumpkins, I didn’t think twice.

Pingle’s Farm is about an hour outside of Toronto, to the East of the city. I have a bad habit of romanticizing outings like this before they happen, and I have to admit I was definitely hoping for a tiny little farm with an old, pretty farm house and a family (with a dog) that greets you as you arrive. Like most things, though, Pingles was busy and full of lots of families with kids and everything was more modern than I expected. The land itself was sprawling and scenic and all kinds of Autumn picturesque, and once we took the tractor-pulled-wagon ride out to the actual pumpkin patch it was quiet and nice and we spent a little while just walking around deciding which pumpkins were the funniest looking, sipping coffees and enjoying the nice weather. At one point, we ventured into the corn maze, which I actually haven’t done since I was a kid. I forgot how quickly you end up lost. We made our way out, though, and tried to sneak into the apple orchard, but an old man saw us and we got nervous and turned right around. 

The farm is only about ten minutes away from one of the greatest flea markets in the Toronto area, but we weren’t able to make it before it closed, so we’ll just have to go back again soon! I’m sure it will merit a blog post all it’s own – as will the lifetime supply of soup and cookies and muffins I’m going to make with all this pumpkin!

-Meaghan