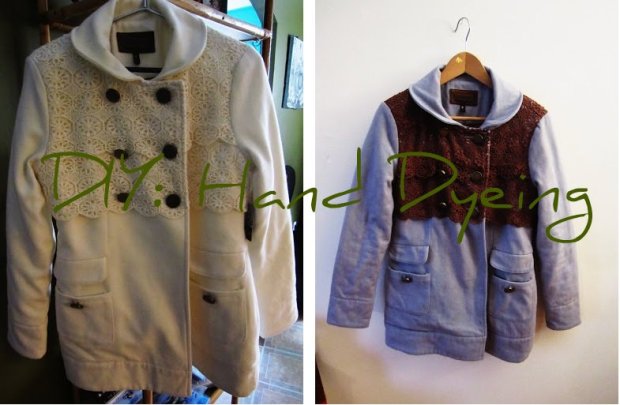
I bought this coat two years ago, when I saw it on a mannequin in one of my favourite stores. I tried it on, loved it, and had to have it. As soon as I got home, I tried it on again and became very unsure about it – due to my fear of ruining something white/looking like a marshmallow – and then never wore it again. I finally decided I needed to make use of this coat, and if I couldn’t accept it being white, then I would make it another colour. I wanted to make it brown, as I don’t have a brown coat in my wardrobe. So here is a tutorial on dyeing a coat , or any article of clothing.
WHAT YOU’LL NEED:
- Article of clothing – make sure to read the label!!! Natural/organic materials like wool or cotton take dye beautifully. Synthetic materials like polyester or viscose…not so much. If you do wish to dye something polyester make sure to look for the correct dye, its out there, just not easy to find.
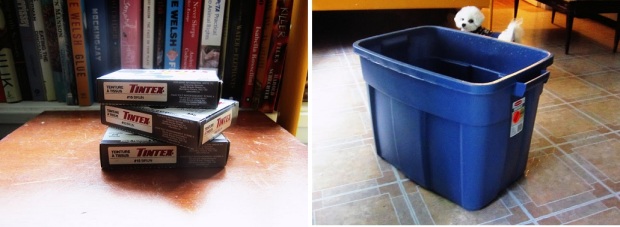
- Dye of your choice – I used 3 boxes of Tintex brown that I got at Home Hardware (make sure to read the box to know how many packs you will need based on the weight of your garment)
- Bucket – again, the size of bucket depends on the garment you chose
- Spoon – or anything to stir with
- Water – I hope you know where to find water
 peek-a-boo! there’s gus!
FIRST STEP:
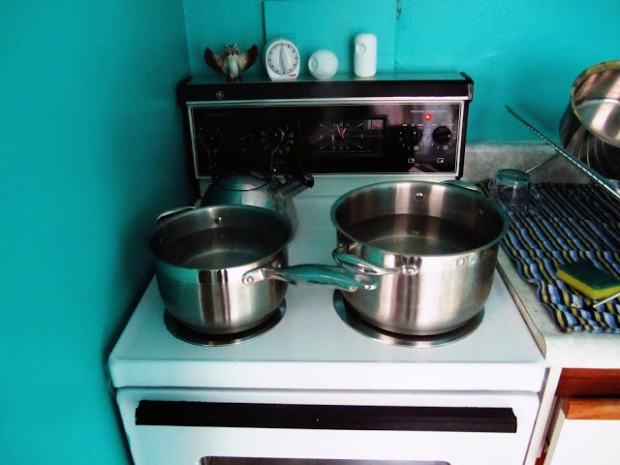
Boil water! Your garment will need to be submerged in the boiling water, so make sure to boil enough so that can happen. I had to boil like 4 pots of water and 2 kettles full to get the right amount, and even then it did not feel like enough. After your water is boiled, pour it into your bucket. I assume like most people, you only have 4 elements on your stove, so this may be a few steps of pouring and re-boiling.
SECOND STEP:
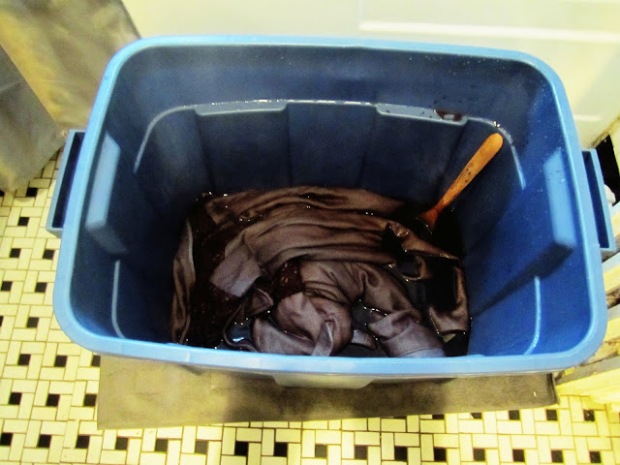
After all your boiled water is in your bucket, pour your dye into it and stir it all up! You can then submerge your garment in the water. My box read that I needed to continuously stir the garment for 20-30 mins. I assume most packs will be the same, but make sure to read yours just in case.
 steamy!!!
THIRD STEP:
Once your 20-30 mins of stirring are up, pour your hot water and garment into the bathtub. Now its time to rinse the garment with cold water. This may take awhile depending on the material. Mine was partly wool, so it took quite a bit of rinsing before all the dye was gone. Just rinse and rinse until the water goes clear. Make sure not to ring out the garment after its been rinsed. Just lightly squeeze out the excess water. And then hang it to dry! This will be many hours of that drip sound into your bathtub.
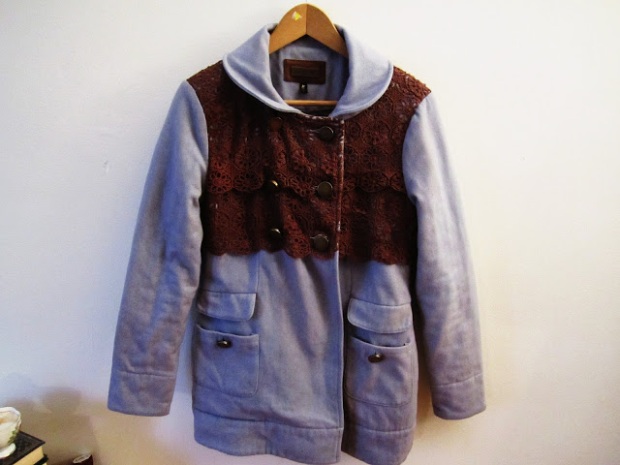
Now, I was so silly and thought my coat was 100% wool on the outer layer and viscose on the inner layer. I presumed the exterior layer would take the brown wonderfully and the interior would not really, but that did not bother me. Unfortunately it was actually made of wool and viscose. So the crochet part of my coat took the brown, but the rest became a lavender colour. It actually turned out nice, but I really did want a brown coat you guys! So I may go buy some dye for synthetic material, or just dye it black and it will become grey-ish (i think). Regardless, it is a fun little experiment that can make you feel like you just got something brand new.
Posted by Alex

 1. 1960’s Tartan Wool Skort (S/M)
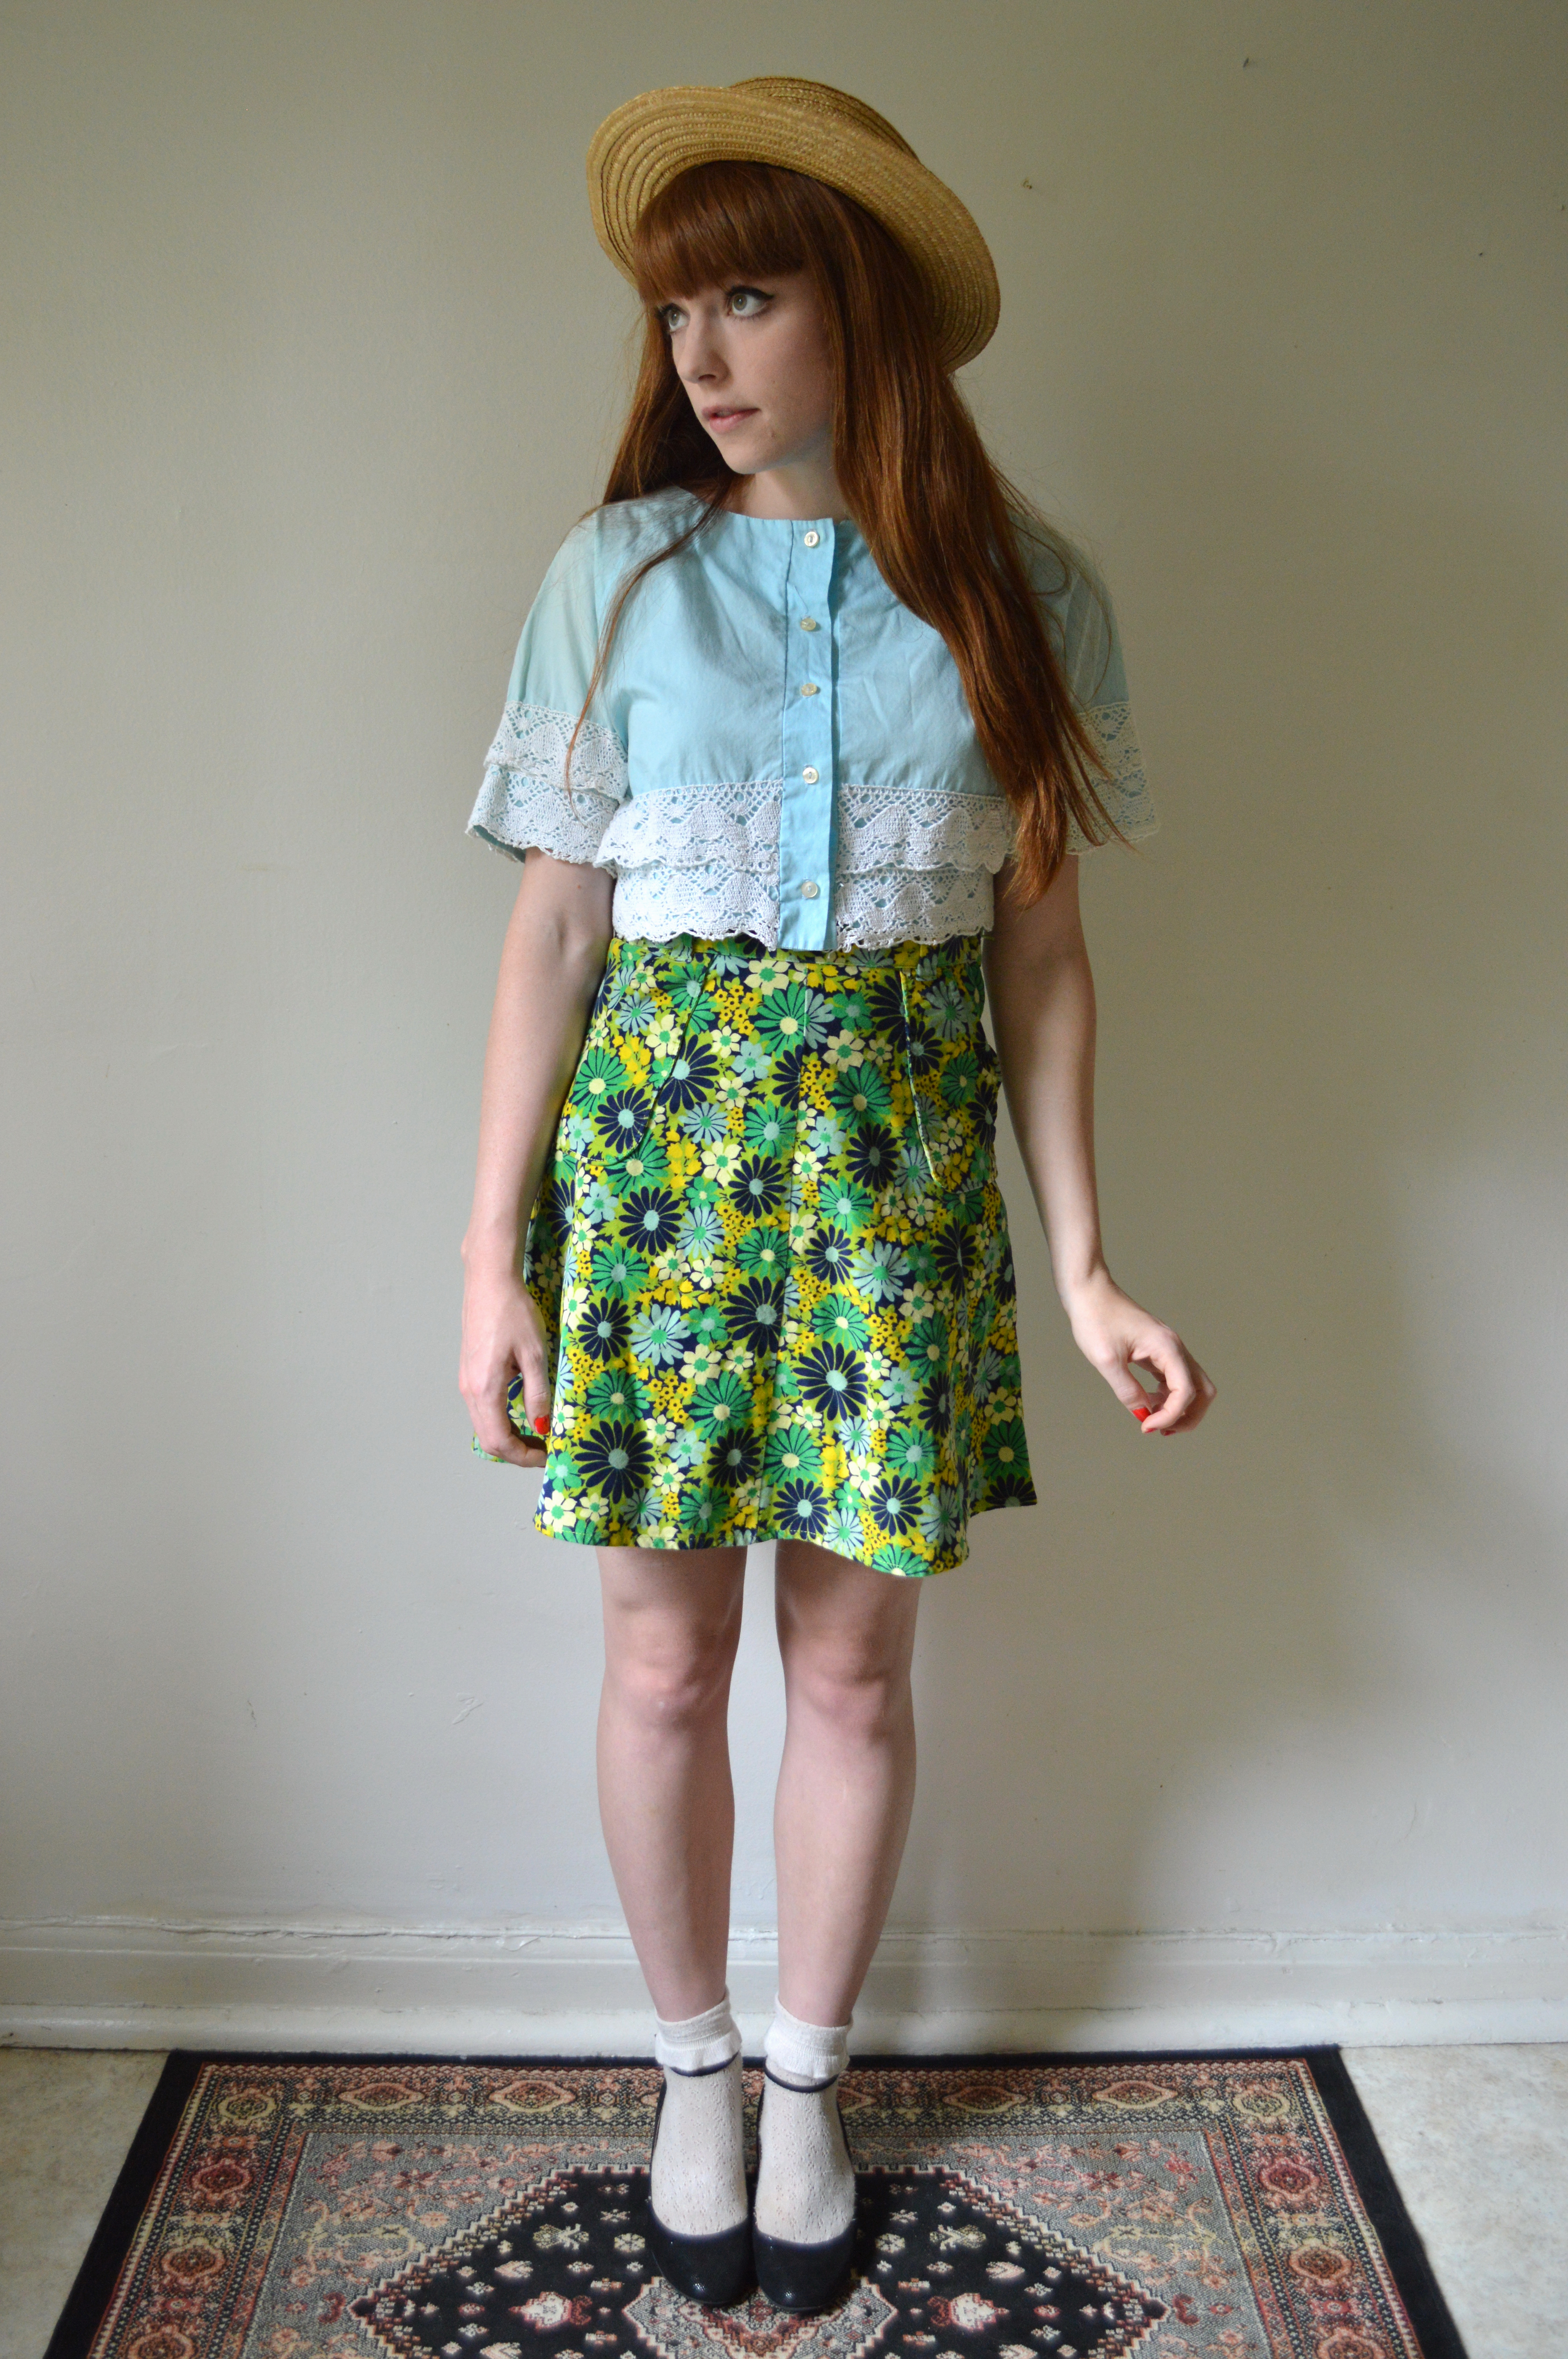 2. 1950’s Robin Egg Blue Cropped Shirt (S)
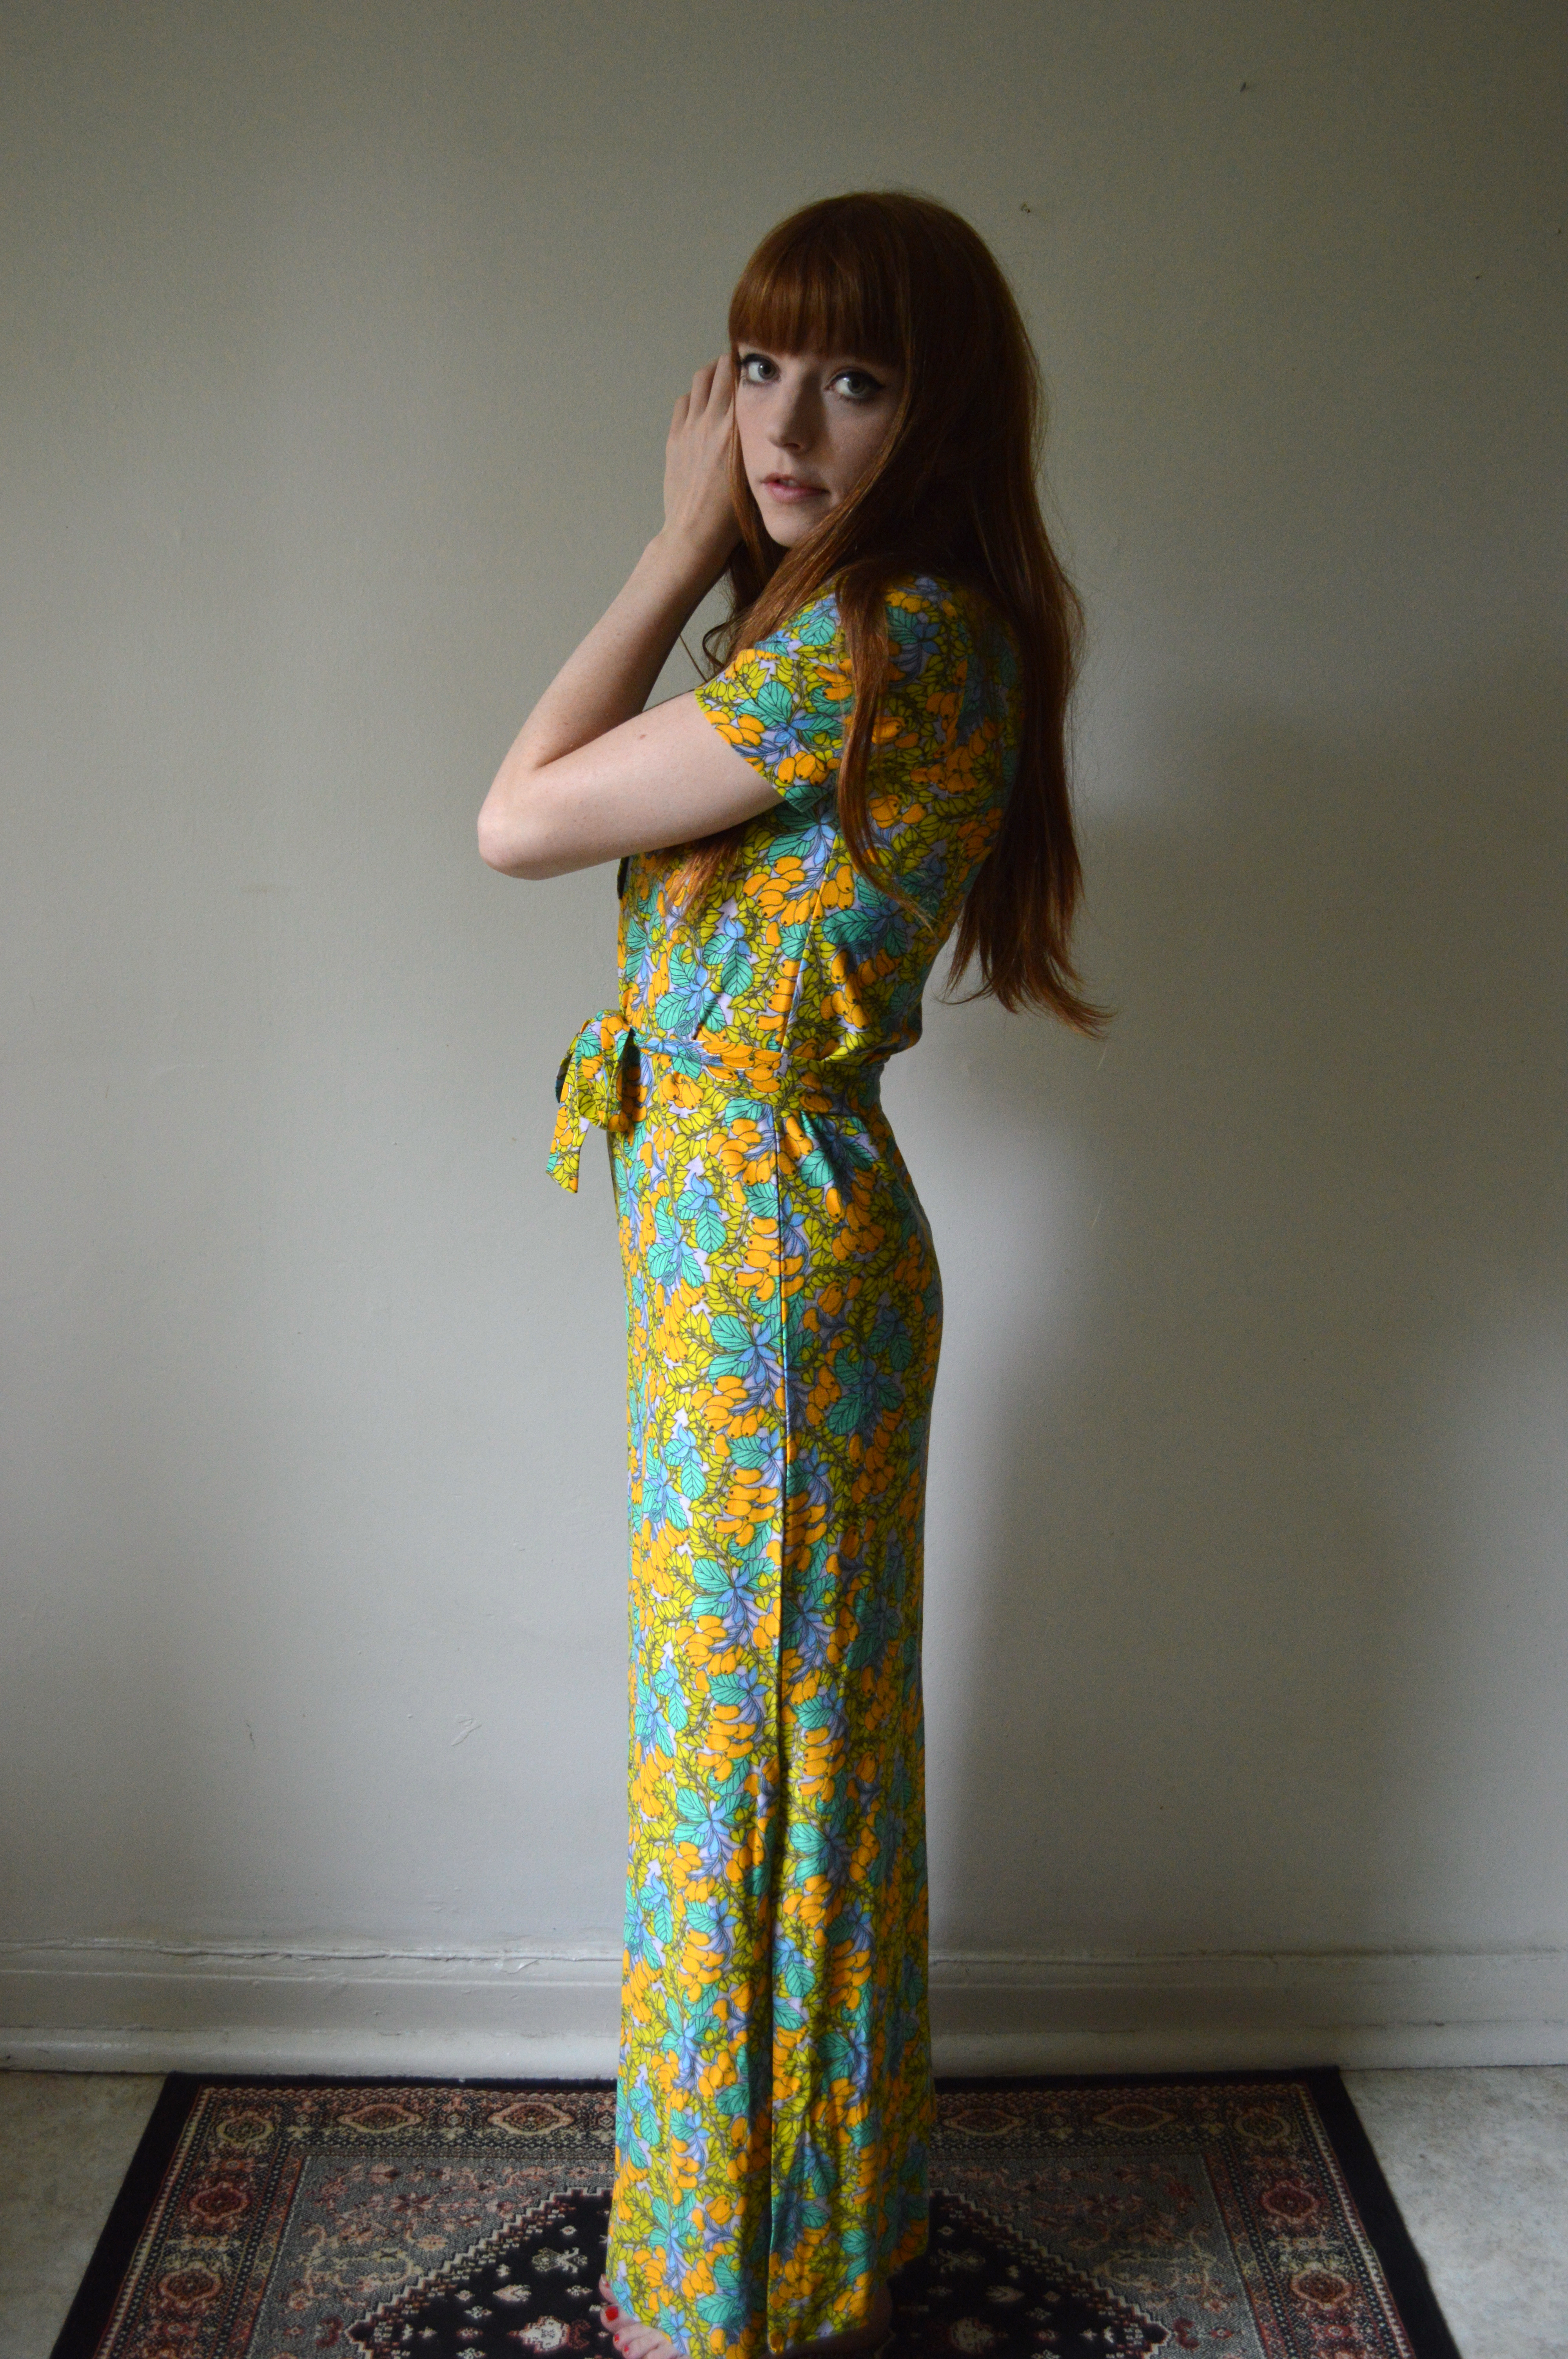 3. 1970’s Novelty Print Collared Maxi Dress (S)
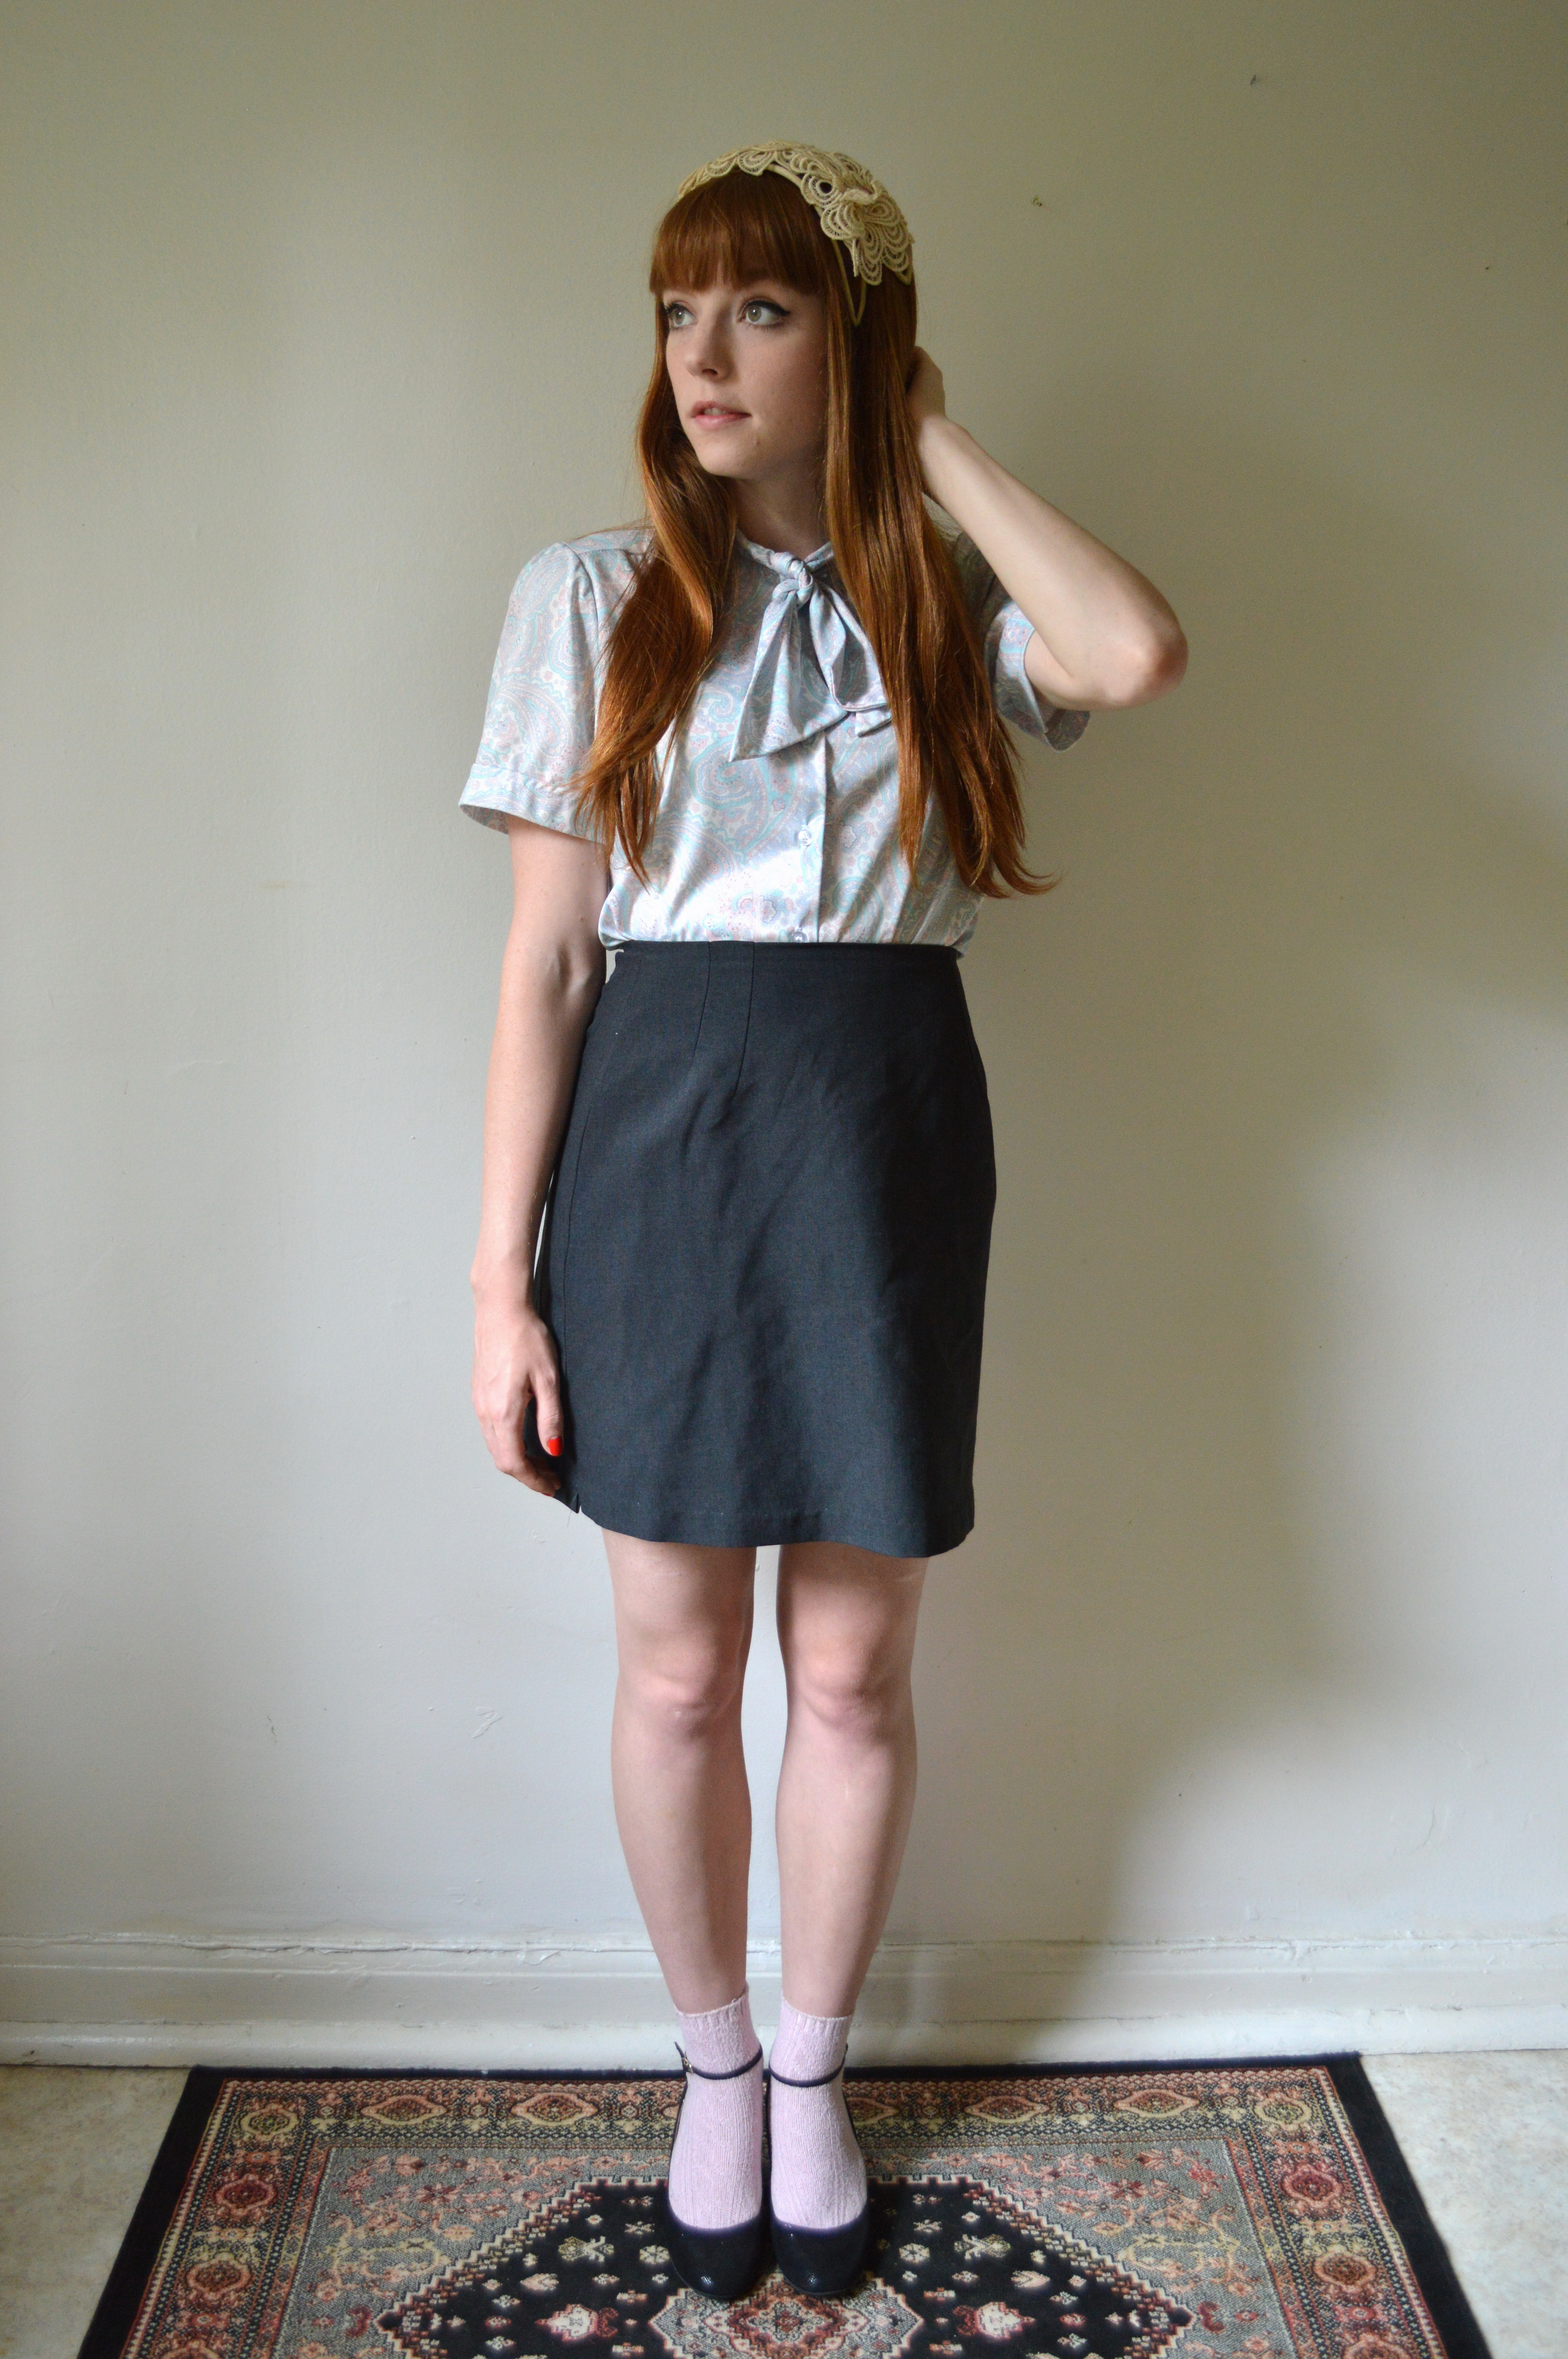 4. 1970’s Paisley Pastel Ascot Blouse (M)
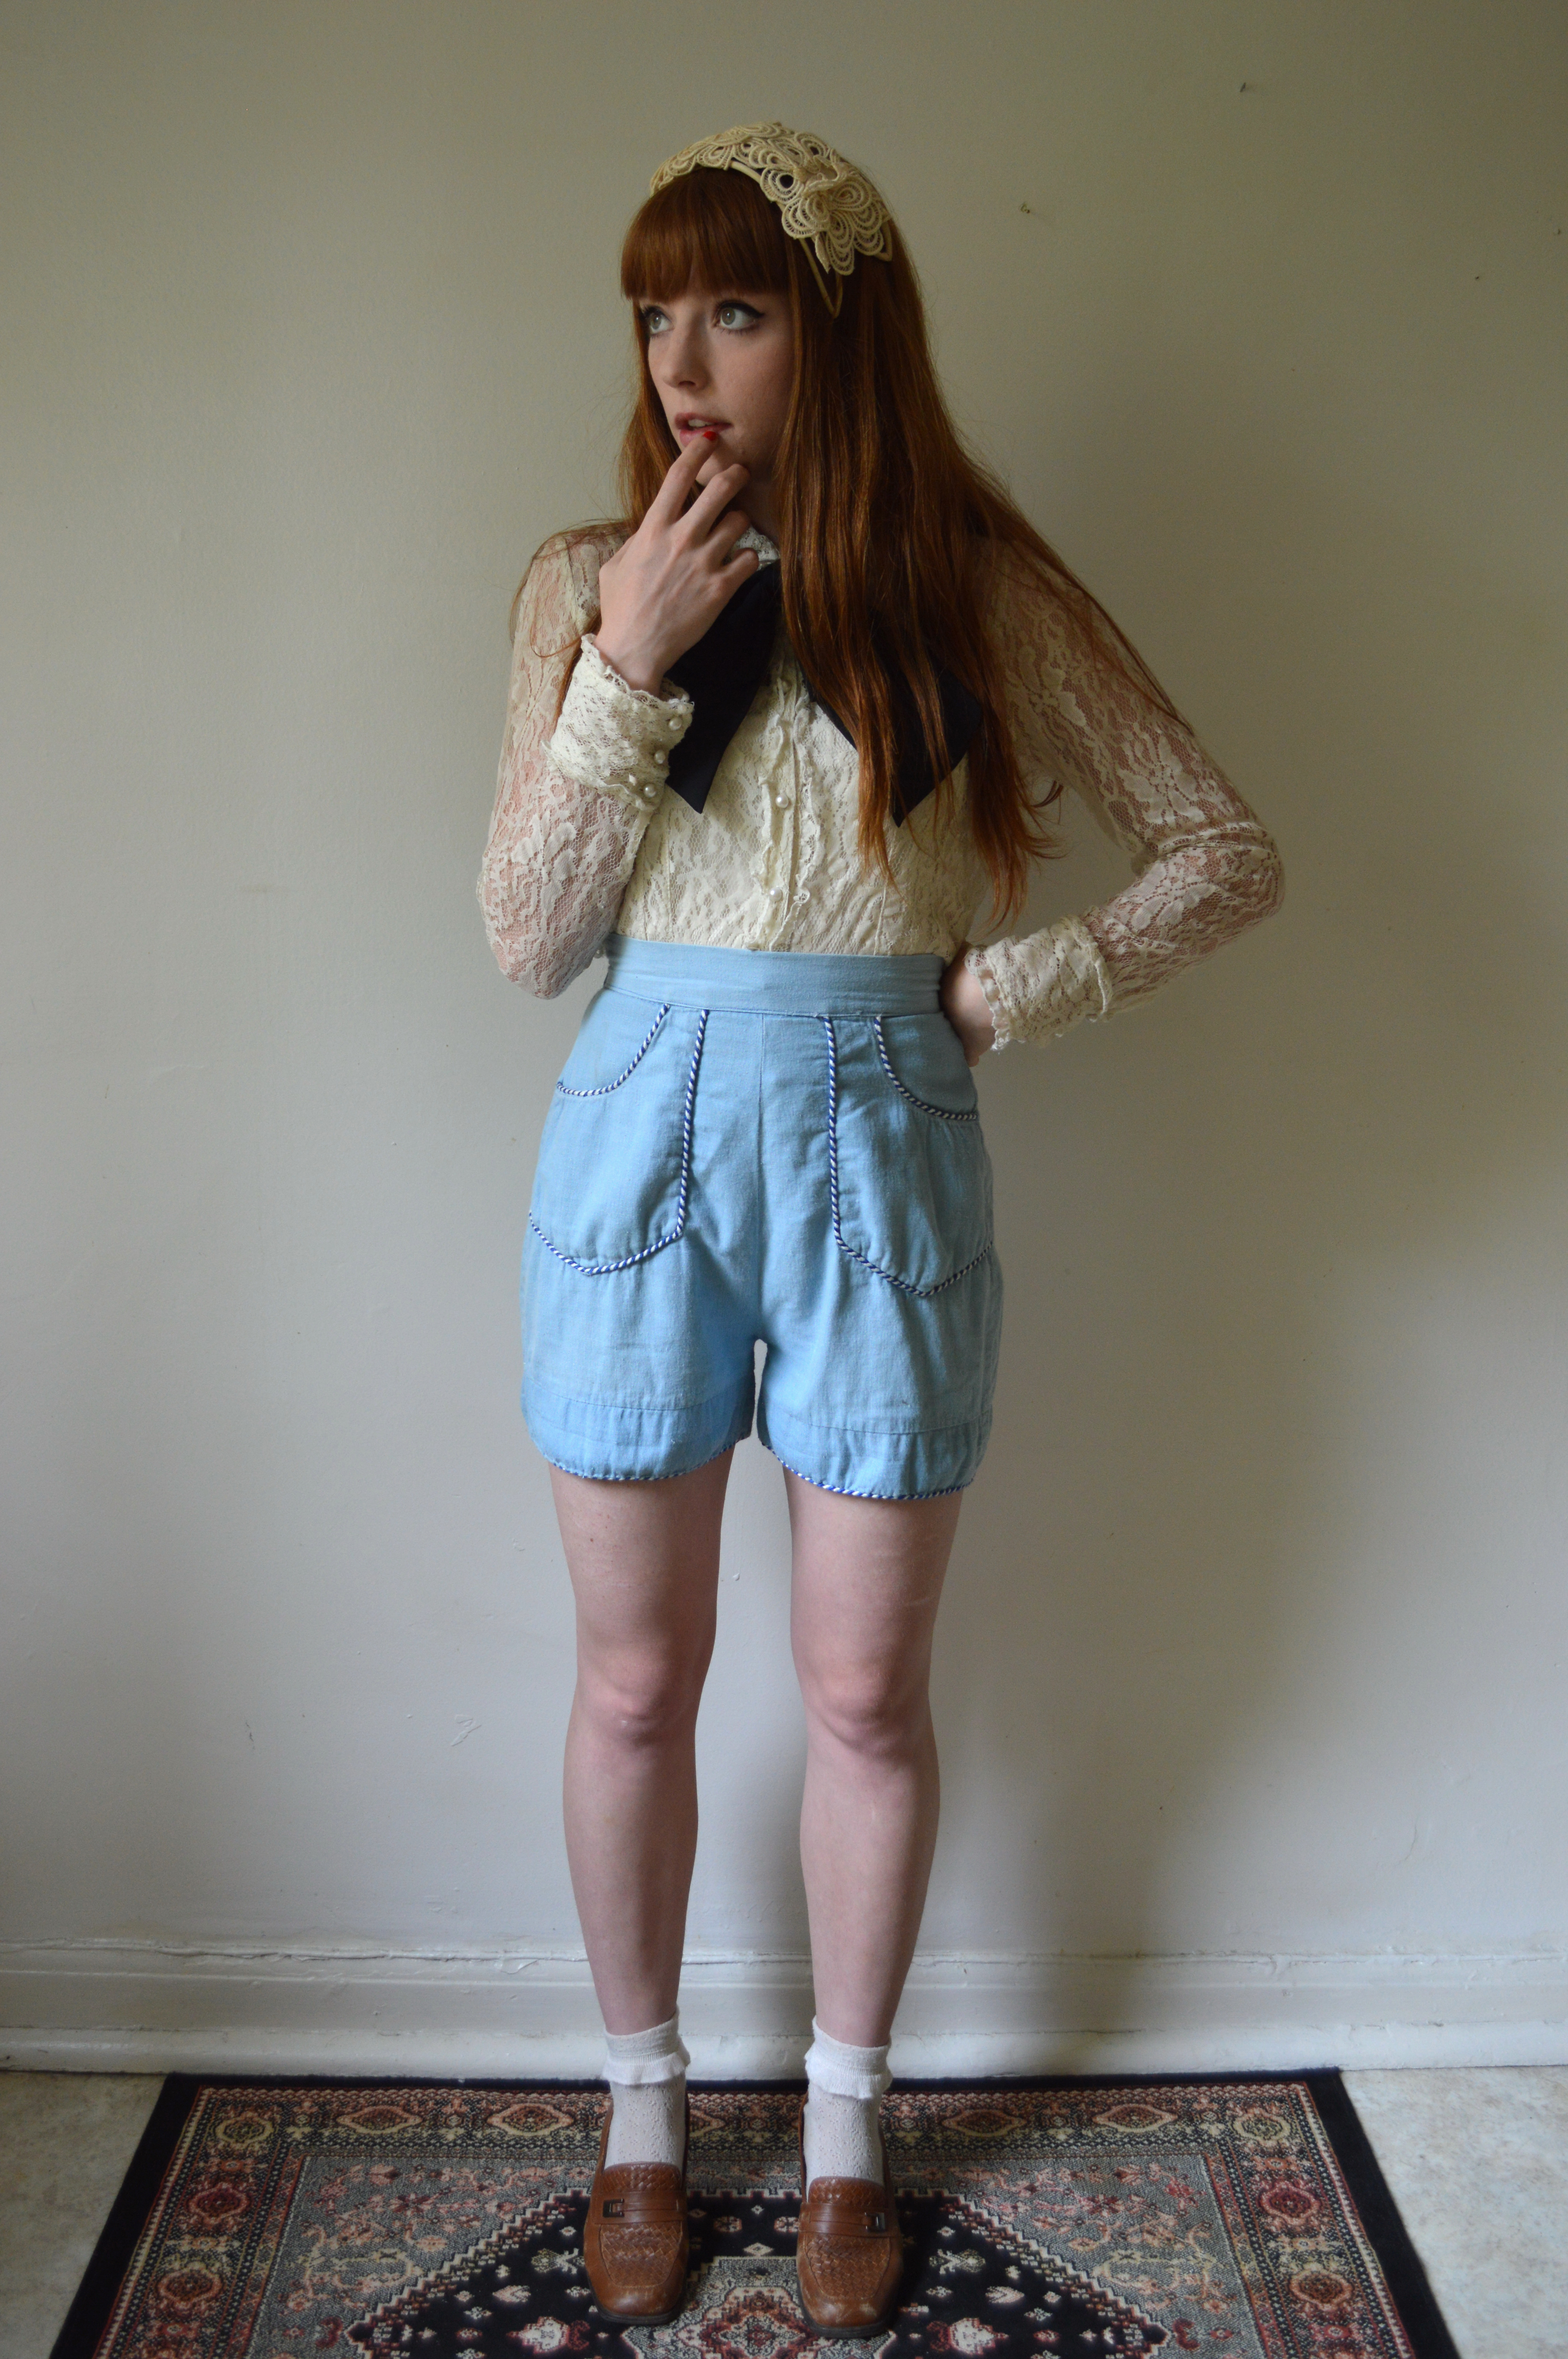 5. 1950’s Robin Egg Blue High Waisted Bloomers/Shorts (S)
 6. 1970’s High Waisted Tartan Maxi Skirt (S/M)